“Everyday Courage Has Few Witnesses. But Yours Is No Less Noble Because No Drum Beats for You And No Crowds Shout Your Name.”
-Robert Louis Stevenson
In June, I’m heading to Spain to attend a week-long painting workshop with artist Elly Smallwood. In the early months of 2023, I have been working to develop my painting techniques, while making breakthroughs along the way.
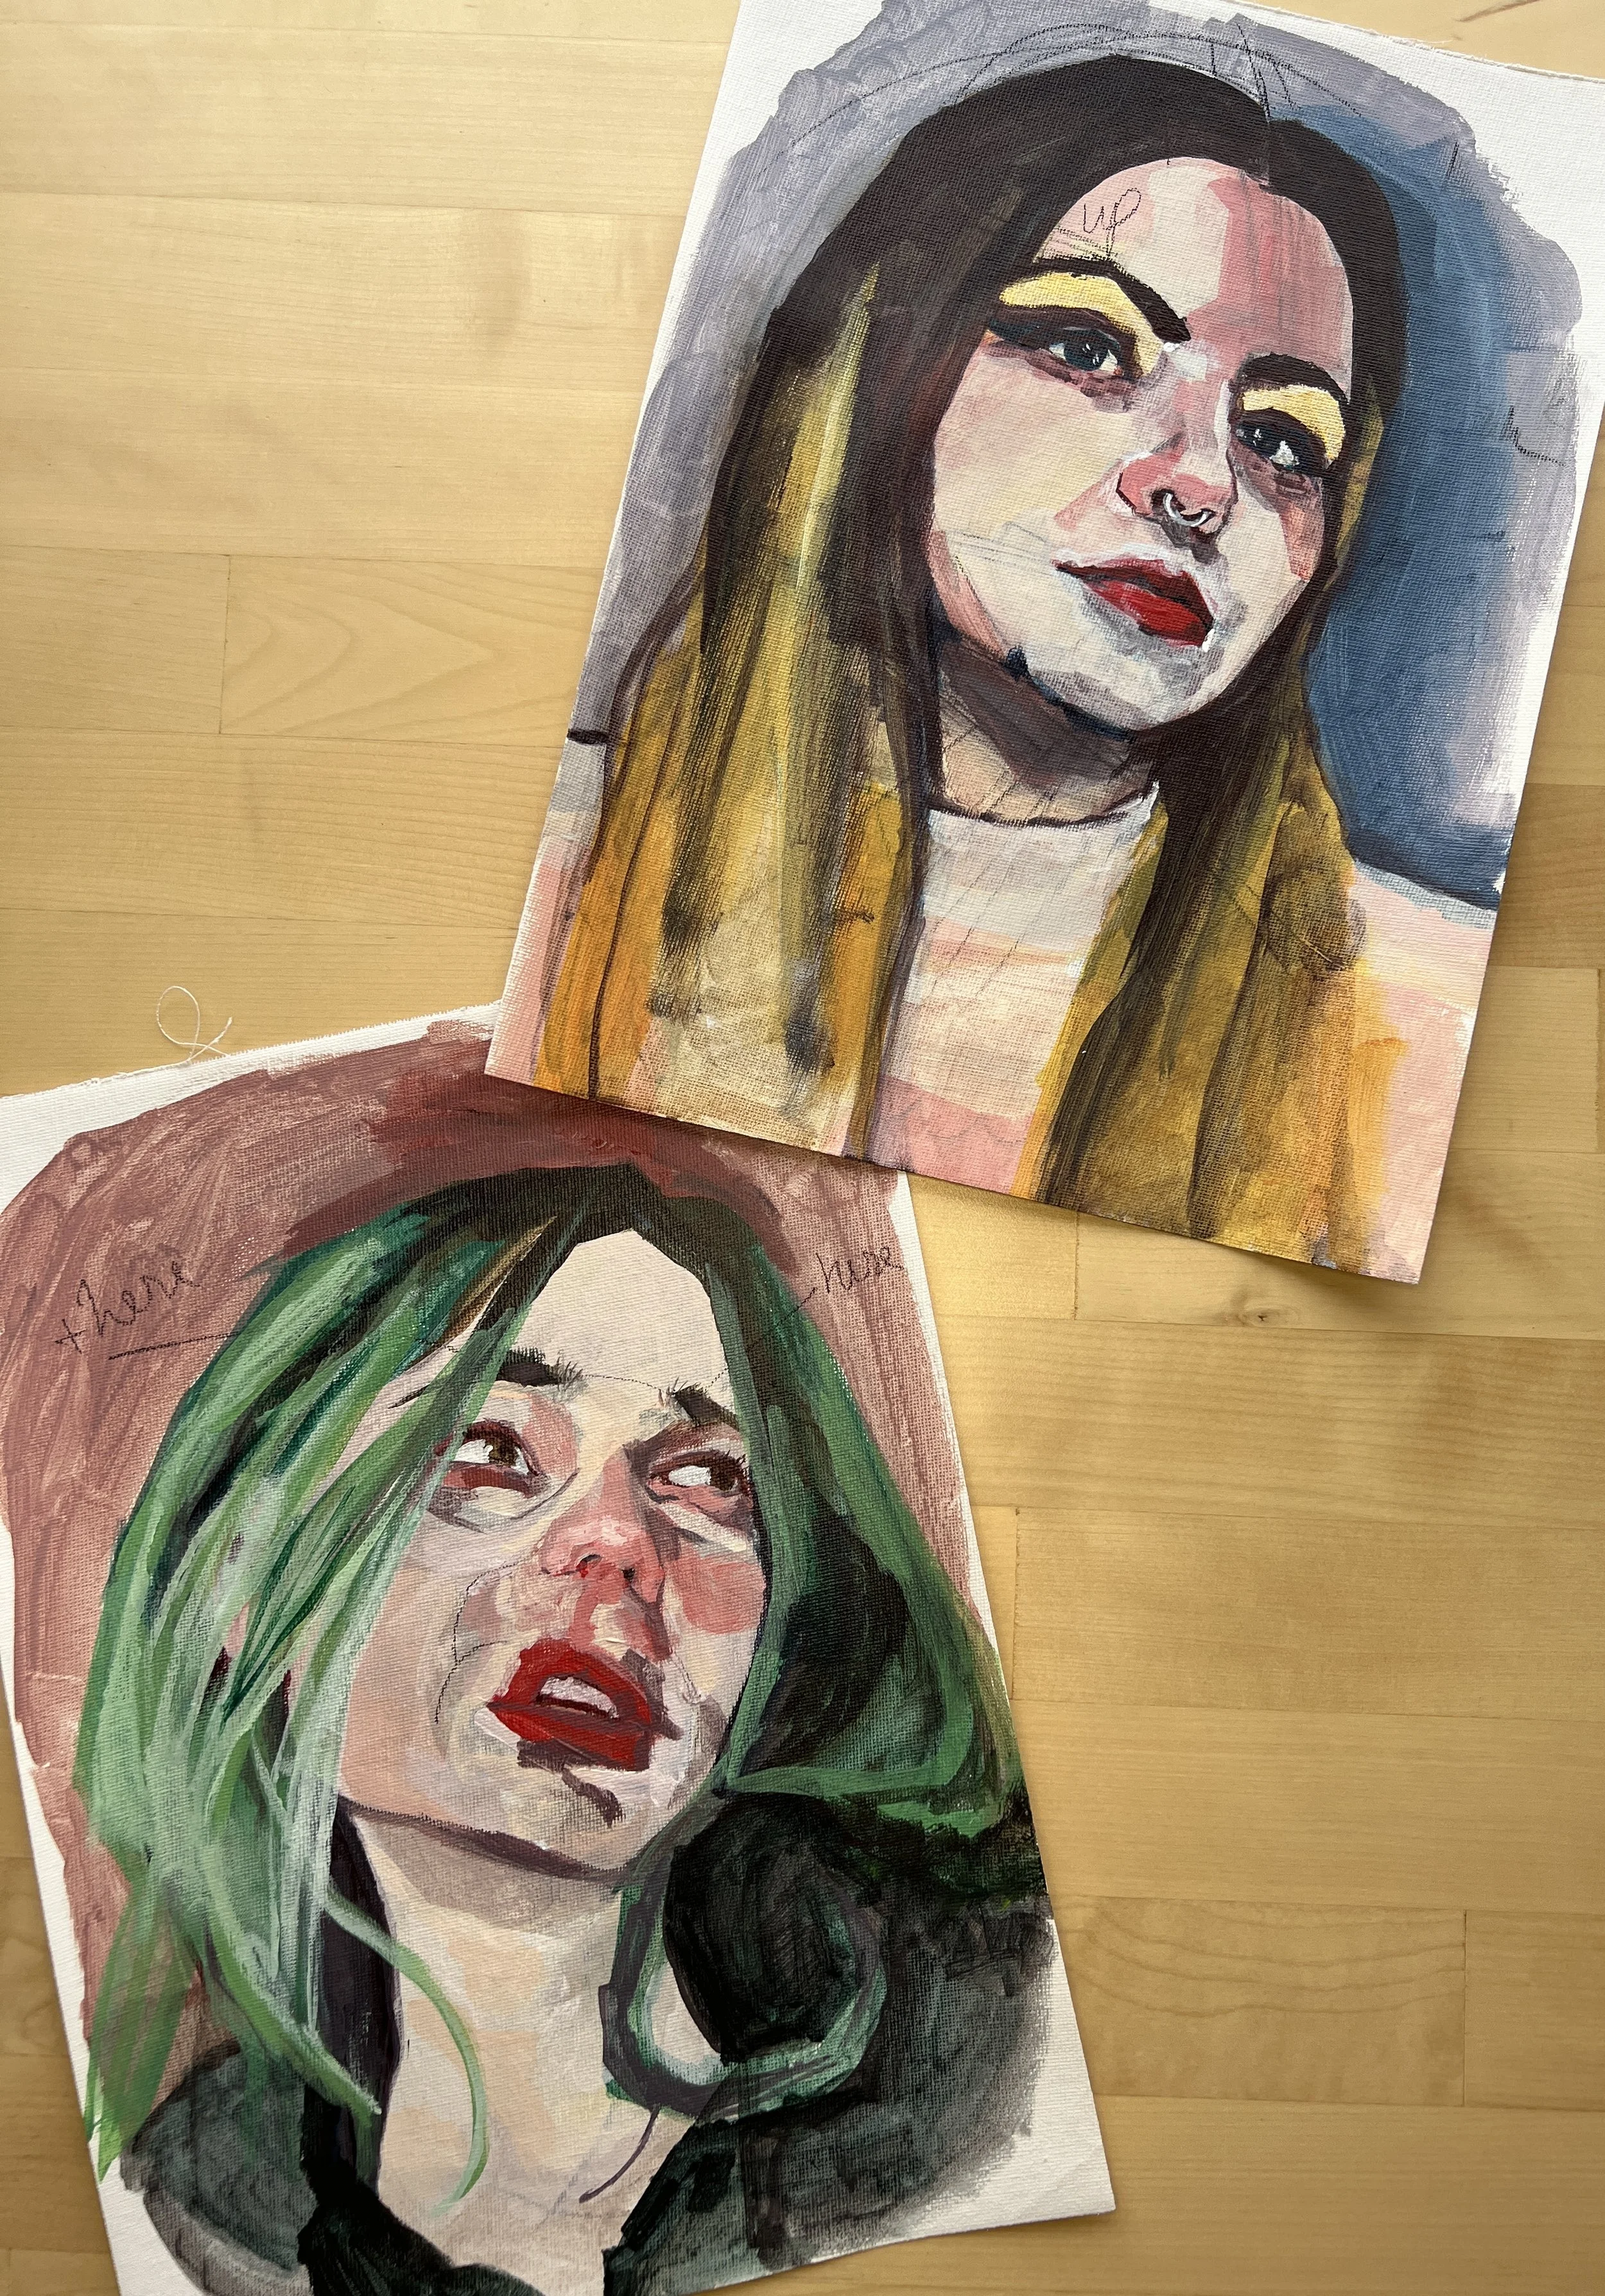
Painting sketches from February 2023. Acrylic and charcoal on gessoed canvas squares.
One of the artists that I have admired stylistically for many years is Elly Smallwood. She has a lush, expressive painting style and freedom in her marks that is enviable, at best. I look up to her painting style because I have felt that I have a similar freedom in mark-making in the way that I draw, but I have not been able to harness the same feeling of freedom in painting the way I would like to.
The type of painting style that I have adopted for myself over the last decade is one that is still expressive, though more methodical and marked by carefulness in the process. My painting process and materials are described in my Patreon video acrylic painting materials. It’s a process marked by first creating a very smooth, sanded panel that has a paper-like feel. Then, adding a detailed drawing; preserving the drawing with spray fixative; and finally, using the drawing as a “coloring page” in which to add color by using layers of paint. The painting Woman in Roses is painted this way. You can watch the painting materials video where I explain my process here. And you can read about the process of creating Woman in Roses and see process photos here.
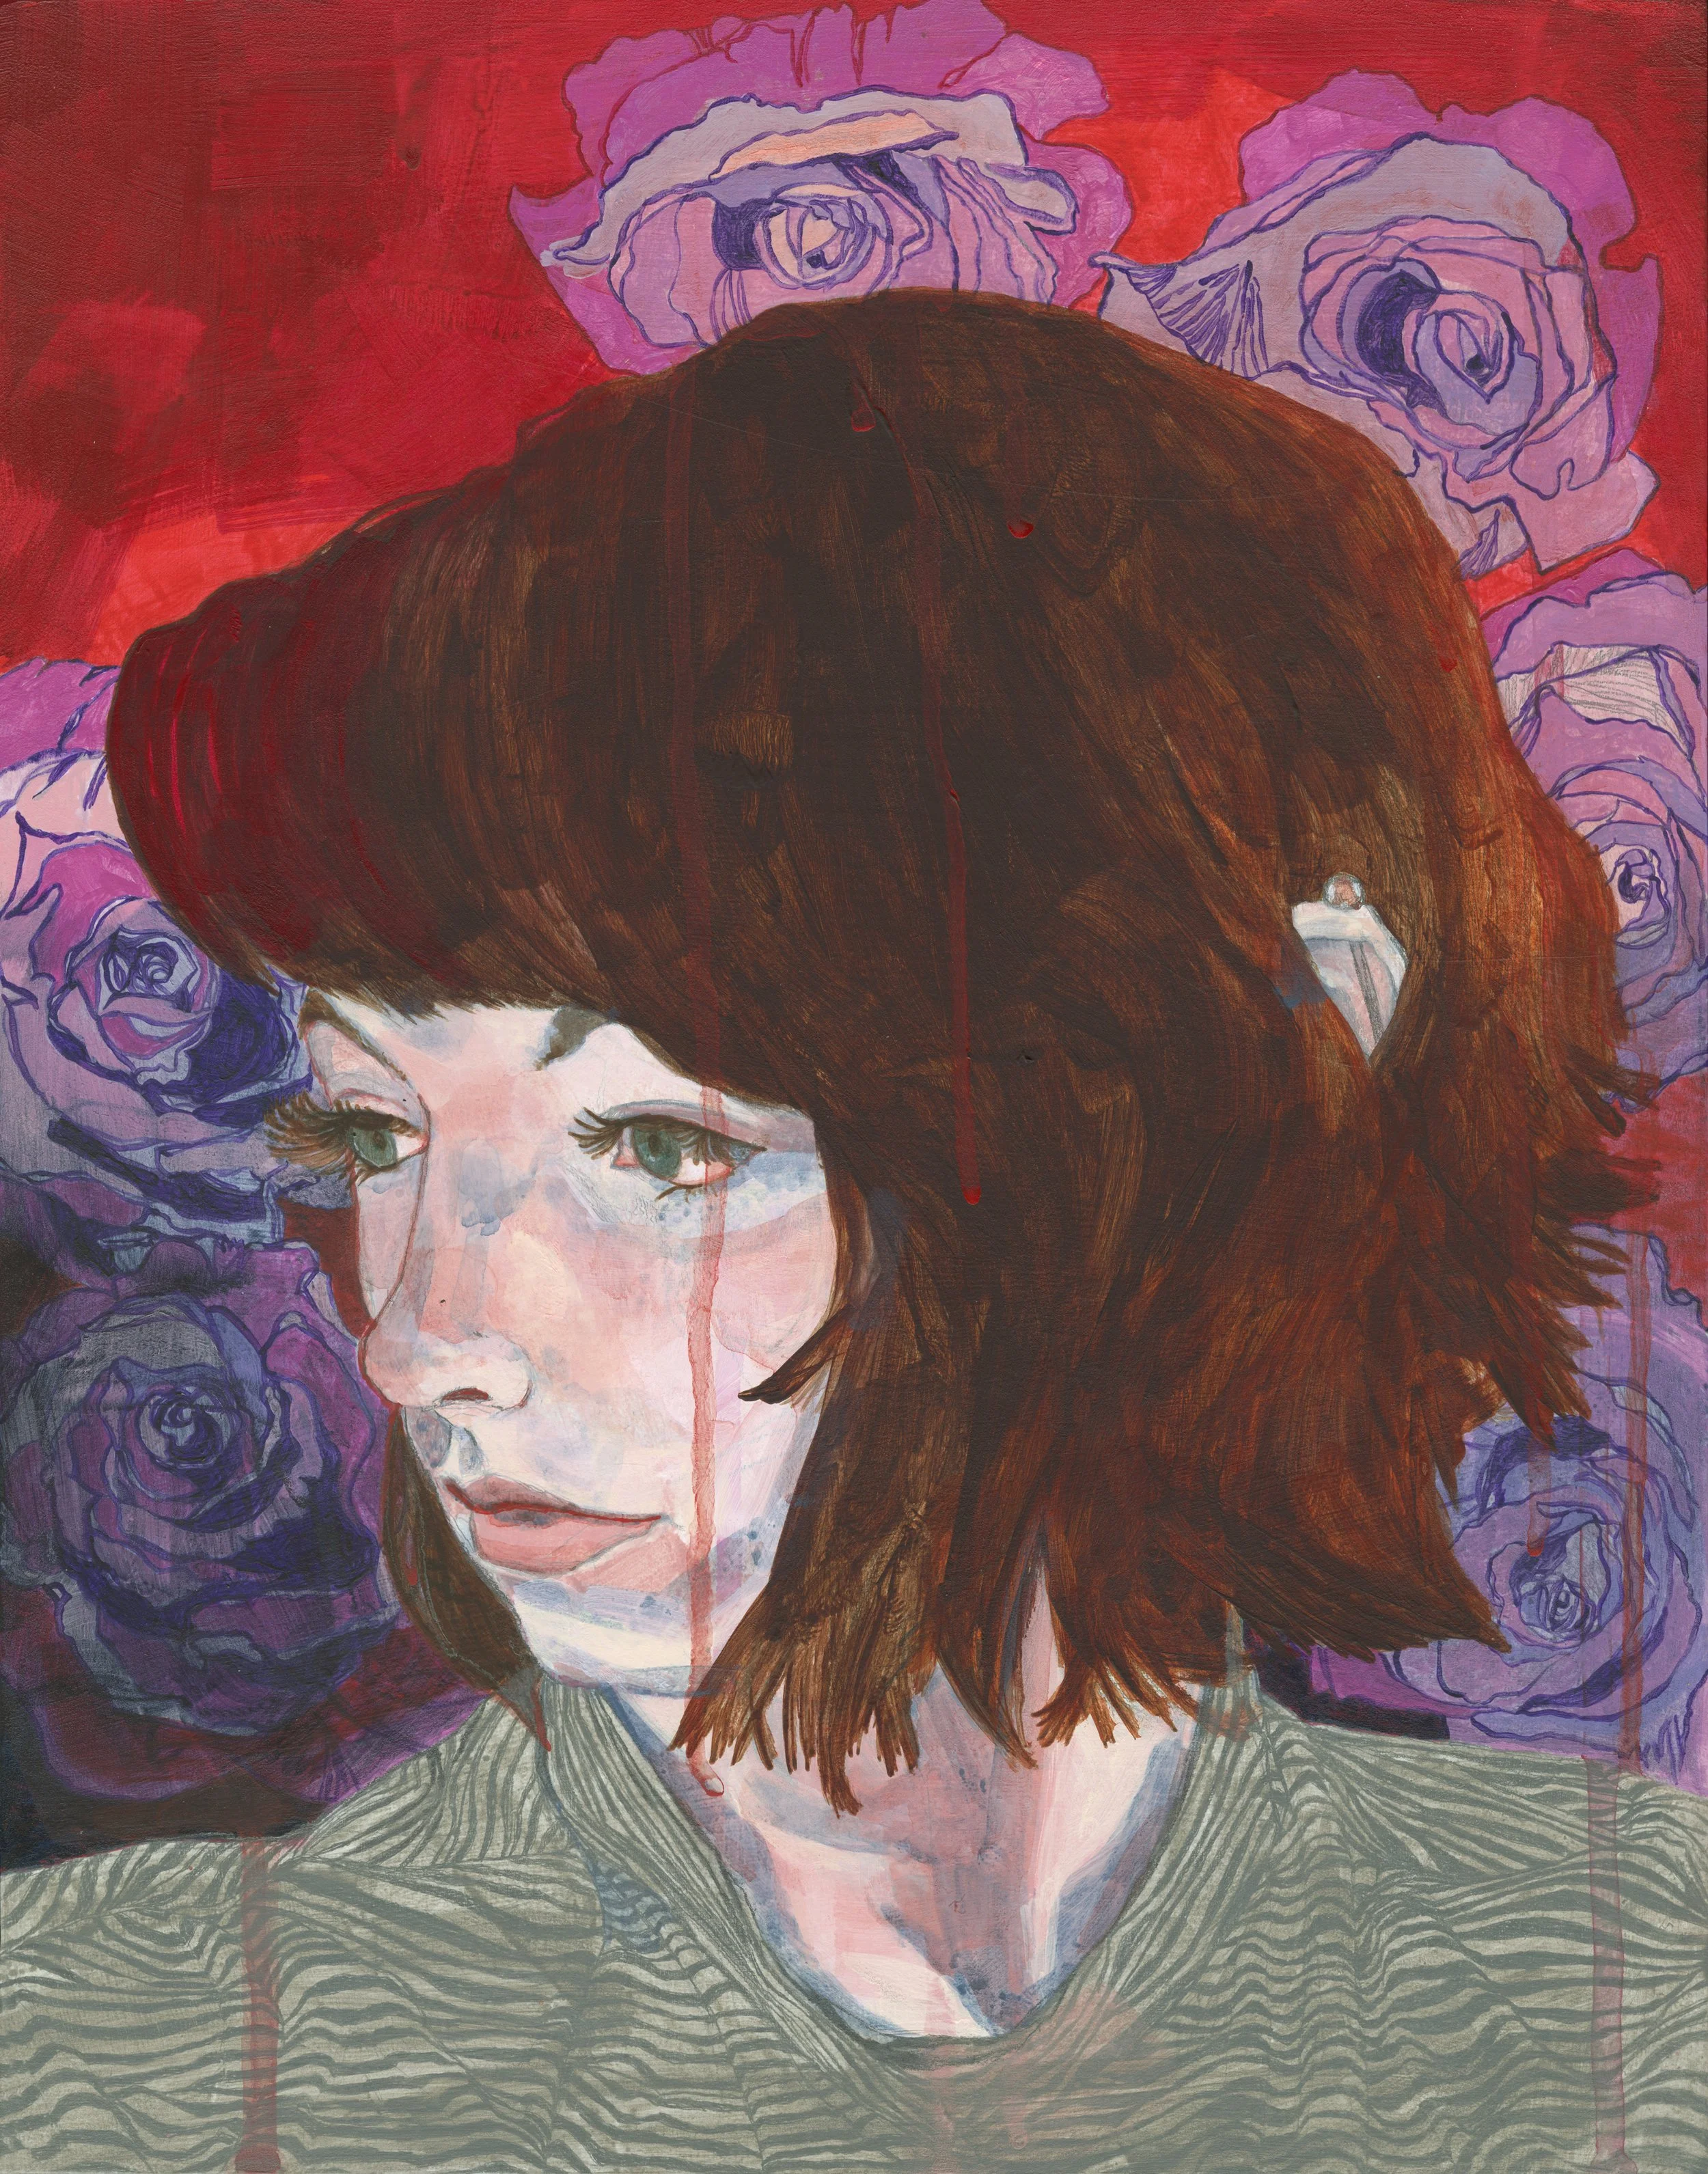
Woman in Roses, 14x11x1.5 inches, acrylic on cradeled panel, 2022.
Overall, I am happy with my painting style, and have been working toward a goal of harnessing depth and beauty in my paintings, while also doing my best to hold space for an expressive nature. Years ago, in college, I took a figure drawing class with Maria Tomasula, an art goddess and professor of painting at the University of Notre Dame.
Maria has a layered and careful approach to her painting that has consistently influenced me. While in college, I was deeply influenced by her natural good-natured way of accepting the world, people, and art. She was kind, as well as an influential art mentor to me, and I really looked up to her (and still do). While her work is marked less by expressionism than hyper-realism, I feel inspired by her paintings all the same and feel a deep sense of lushness, beauty, and womanhood from her work. She creates her paintings by using many light layers of paint and varnish, a technique used by old Flemish painting masters, and also a technique that I have taken on in my own work by way of the methodical layering process used in my paintings like Woman in Roses. You can view some of Maria’s work here.
In looking at the work of Maria and Elly, I see two strong artistic influences on my art approach, though highly different. While looking at my influences, I find myself thinking about how I can achieve a stylistic balance in my own work, including both the careful methods as well as the expressive marks, both of which I love. I feel that my drawings and paintings are different from one another in approach and style, which isn’t necessarily a bad thing. Where I feel that I can finish a drawing rather quickly, using gesture and expressive marks, painting often feels that it takes painstakingly long, despite the loose marks and drips that are visible in the final artworks. Painting is a careful and methodical process for me. Eventually, I want to marry the two styles of influence, along with my own voice, to create a consistent artistic style.
All of this has led me to where I am now: signed up for a painting workshop in Spain with Elly in hopes to “loosen up” a bit, all the while moving forward with a plan to make four additional paintings in the style of Woman in Roses in order to complete a series of five paintings, total.
Ultimately, I would love to be able to harness my own combination of influences in order to make paintings in a style that are unique to me, but that perhaps do not take me as long to complete and also feel more expressive. When I work quickly and more freely, I also feel that I more fully enjoy the process of creating.
I recently felt that I had a breakthrough with this, completing two paintings in two weeks! I set myself up with no plans or expectations in how the paintings would turn out, the only constraints were that I had to 1) complete them, 2) complete them quickly, and 3) do my best to use the painting methods that I had learned from Elly. And you know what? I did it, and they turned out pretty cool!
I was so excited with the breakthrough I experienced with these paintings! However, I finished them both on consecutive Friday afternoons, alone in the quiet of my studio, sitting in sweat pants and a messy bun, waiting for my partner to come home so I could at least tell them.
The feeling of success rushed over me for my achievement, but no one else was there to see it. Do you ever feel like you make a big win for yourself, but you can’t really describe to the world what it means? That everyday life just seems to continue on despite it? You continue to go to work, and nothing really changes, even though you feel that everything has changed? Especially if the big thing for you in your life doesn’t feel big for someone else? Or, if you tell them about it, and they don’t really understand or share in the excitement or know what it means? Or perhaps it even goes unnoticed? Save for a few close people, I totally felt alone in my excitement and the feeling of what the success meant for me.
While telling this story to my dance instructor the next day, who is also a writer, she shared this quote by Robert Louis Stevenson:
“Everyday courage has few witnesses. But yours is no less noble because no drum beats for you and no crowds shout your name.”
Afterall, its a thousand tiny steps that make a difference, and success very rarely comes overnight.
In the meantime, my job is to keep painting, to keep moving forward. To keep experimenting and pushing myself. Also in the meantime, I thought I would share the painting process photos of the painting sketches with you. And YOU can now share in my excitment!
Painting Sketches: Process Photos
Painting sketches, acrylic and charcoal pencil on gessoed canvas squares, 2023.
Painting Sketch: Elly
When I started the painting sketch of Elly, I wasn’t sure how it would turn out and decided from the beginning that I would push myself through no matter what. The starting photo was a self-portrait that Elly provided as a “prompt” for a painting hangout group that I am a part of through her Patreon page. I joined Elly’s Patreon in preparation for the painting workshop that I will take with her this summer in June. The group is a fun and interesting range of women from all over the world, and we meet on Zoom bi-weekly.
The subjects we draw in the group range from nude models (poses come from professional models and photographers who make a living creating reference photos for artists); some are photographs of Elly’s friends that give her permission to use their photos; and one time we even tried drawing from AI-generated imagery . Together, we mostly work in acrylic paint, but occasionally we try other mediums as a group and talk about our experiences using the new mediums in live time.
About a month ago, Elly provided the reference image below with a plan for our painting group to focus on creating a loose painting. I was very excited for this “assignment” because it is the painting style of hers that I admire and am excited to learn. I was unable to attend the painting hangout where we worked on this together, and surprisingly, I think it turned out for the better. I was able to work on the painting alone, which turned out to be helpful in trying a new technique that required my focus.
Reference image that Elly provided for our painting hangout group.
I chose to work on an inexpensive canvas pad. You can purchase 9x12” pads with 10 canvas sheets for under $8. It sometimes helps me to work with materials that are not expensive when I am trying a new technique and want to remove the added stress of ruining nice materials when trying something new.
This way, I felt that I wouldn’t be wasting expensive materials on experimentation, or wasting space in my studio by using bulky panels, especially if the painting did not work out. I used large c-clamps from my garage to affix the canvas pad to the top of my drafting table in order to use it as a makeshift easel so that I could stand while working.
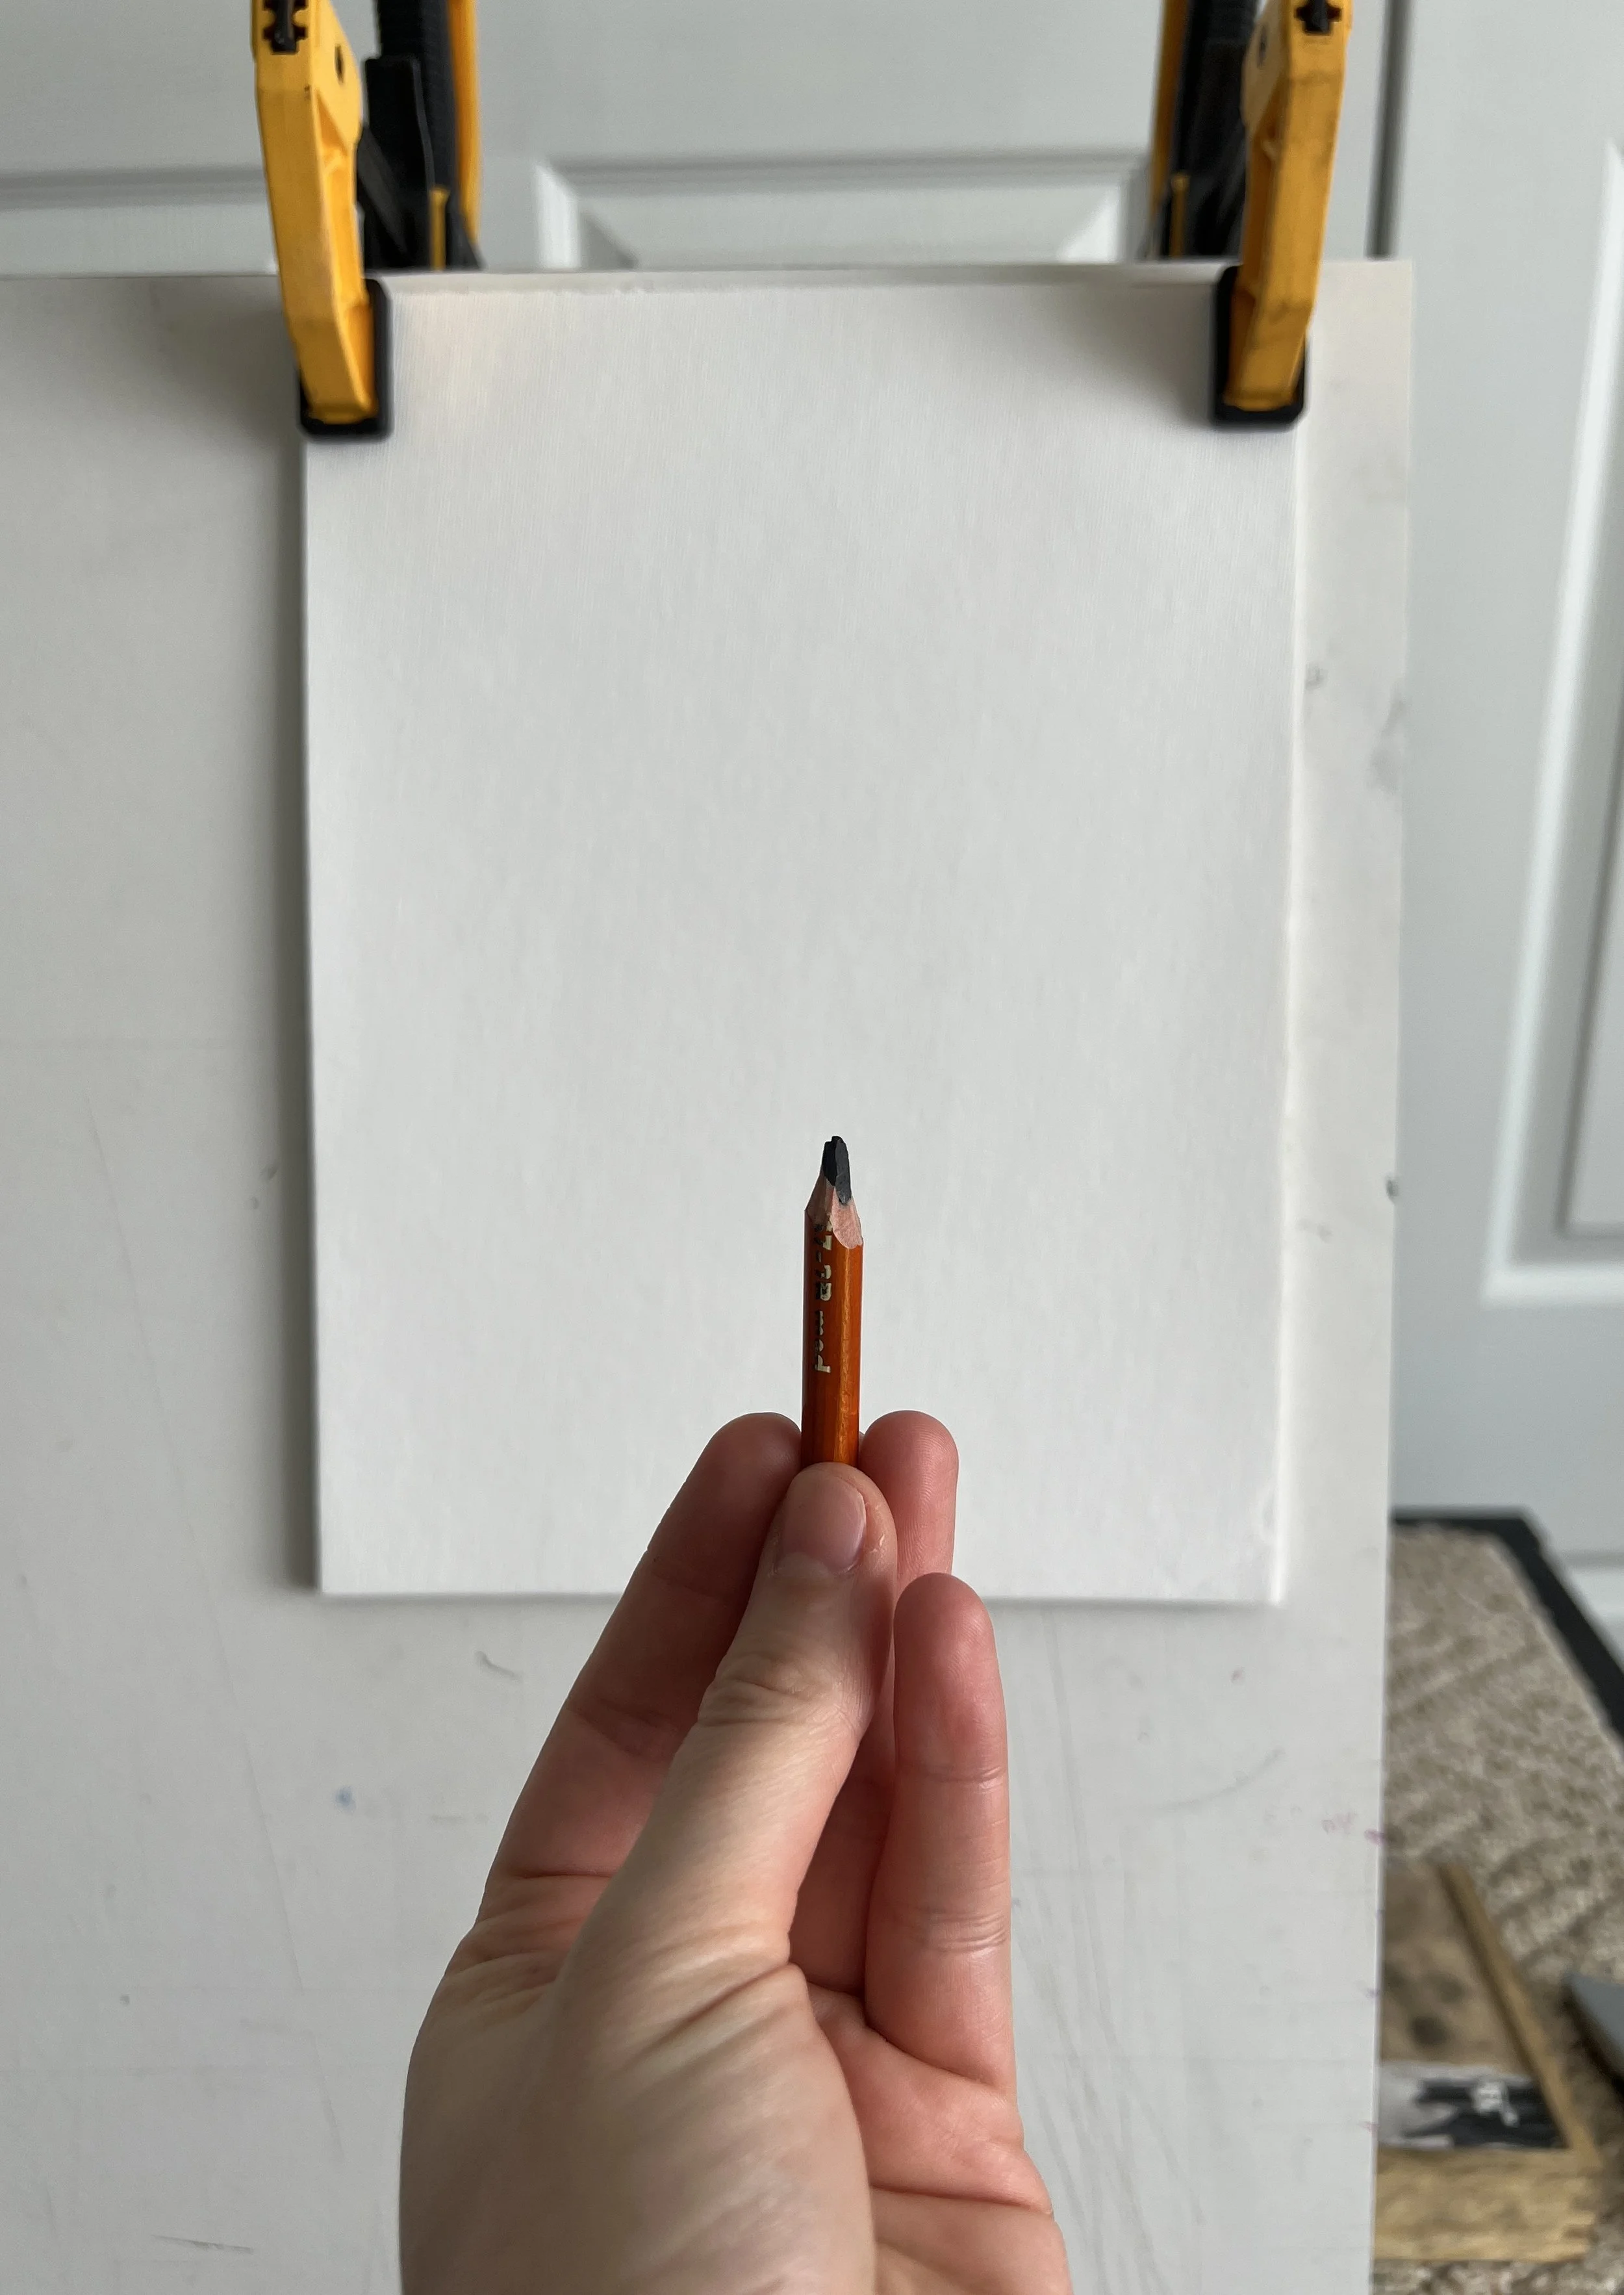
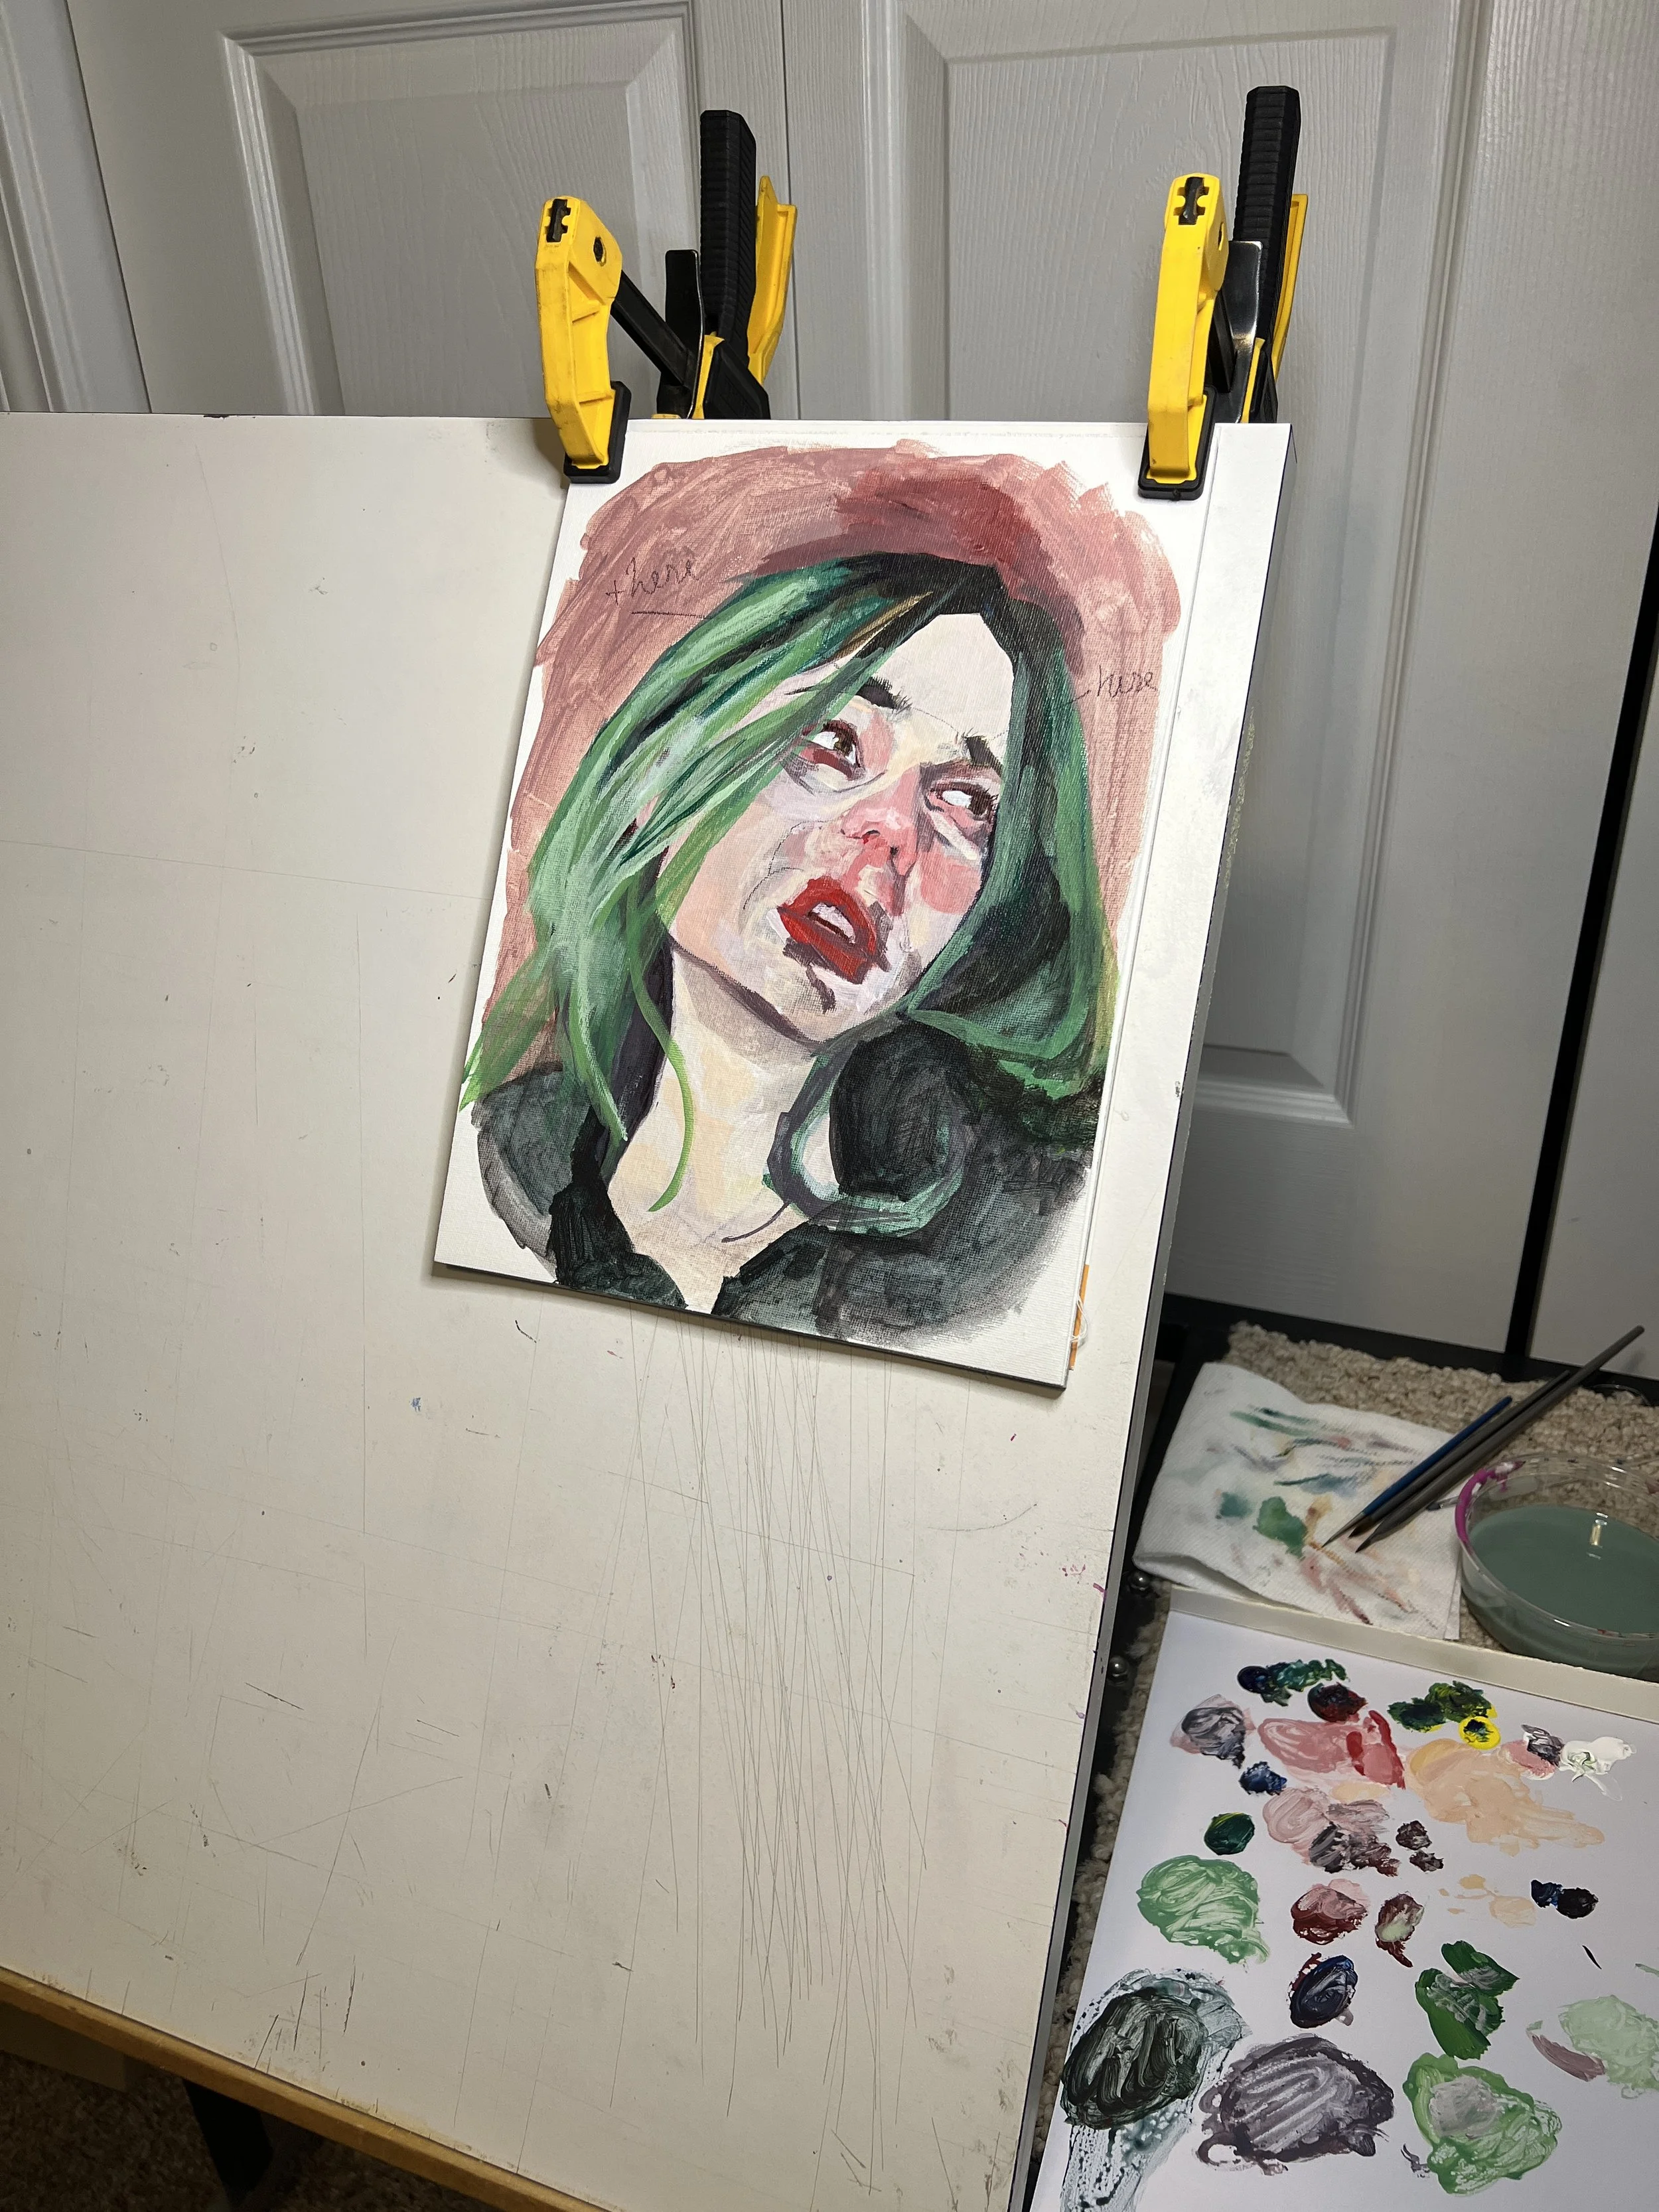
Canvas pad affixed to my drawing table with charcoal pencil that I used for the underdrawing.
The initial line drawing on canvas is frequently referred to as an underdrawing, which, in the art world, is a preliminary sketch made on a surface, such as a canvas or panel, prior to painting.
For the initial line drawing, I used a charcoal pencil to make a loose sketch in order to locate the general placement for the portrait on my canvas. I used a contour drawing approach, which is a technique used by artists to define the outline of a form, without the use of shading. In other words, it is a quick way to define the initial layout of a subject, without being too labor intensive or time consuming. This way, you can make corrections early on in the process without wasting too much time. The worst feeling is when you spend a lot of time drawing out an area in detail, only to find out later that the proportion or composition is off.
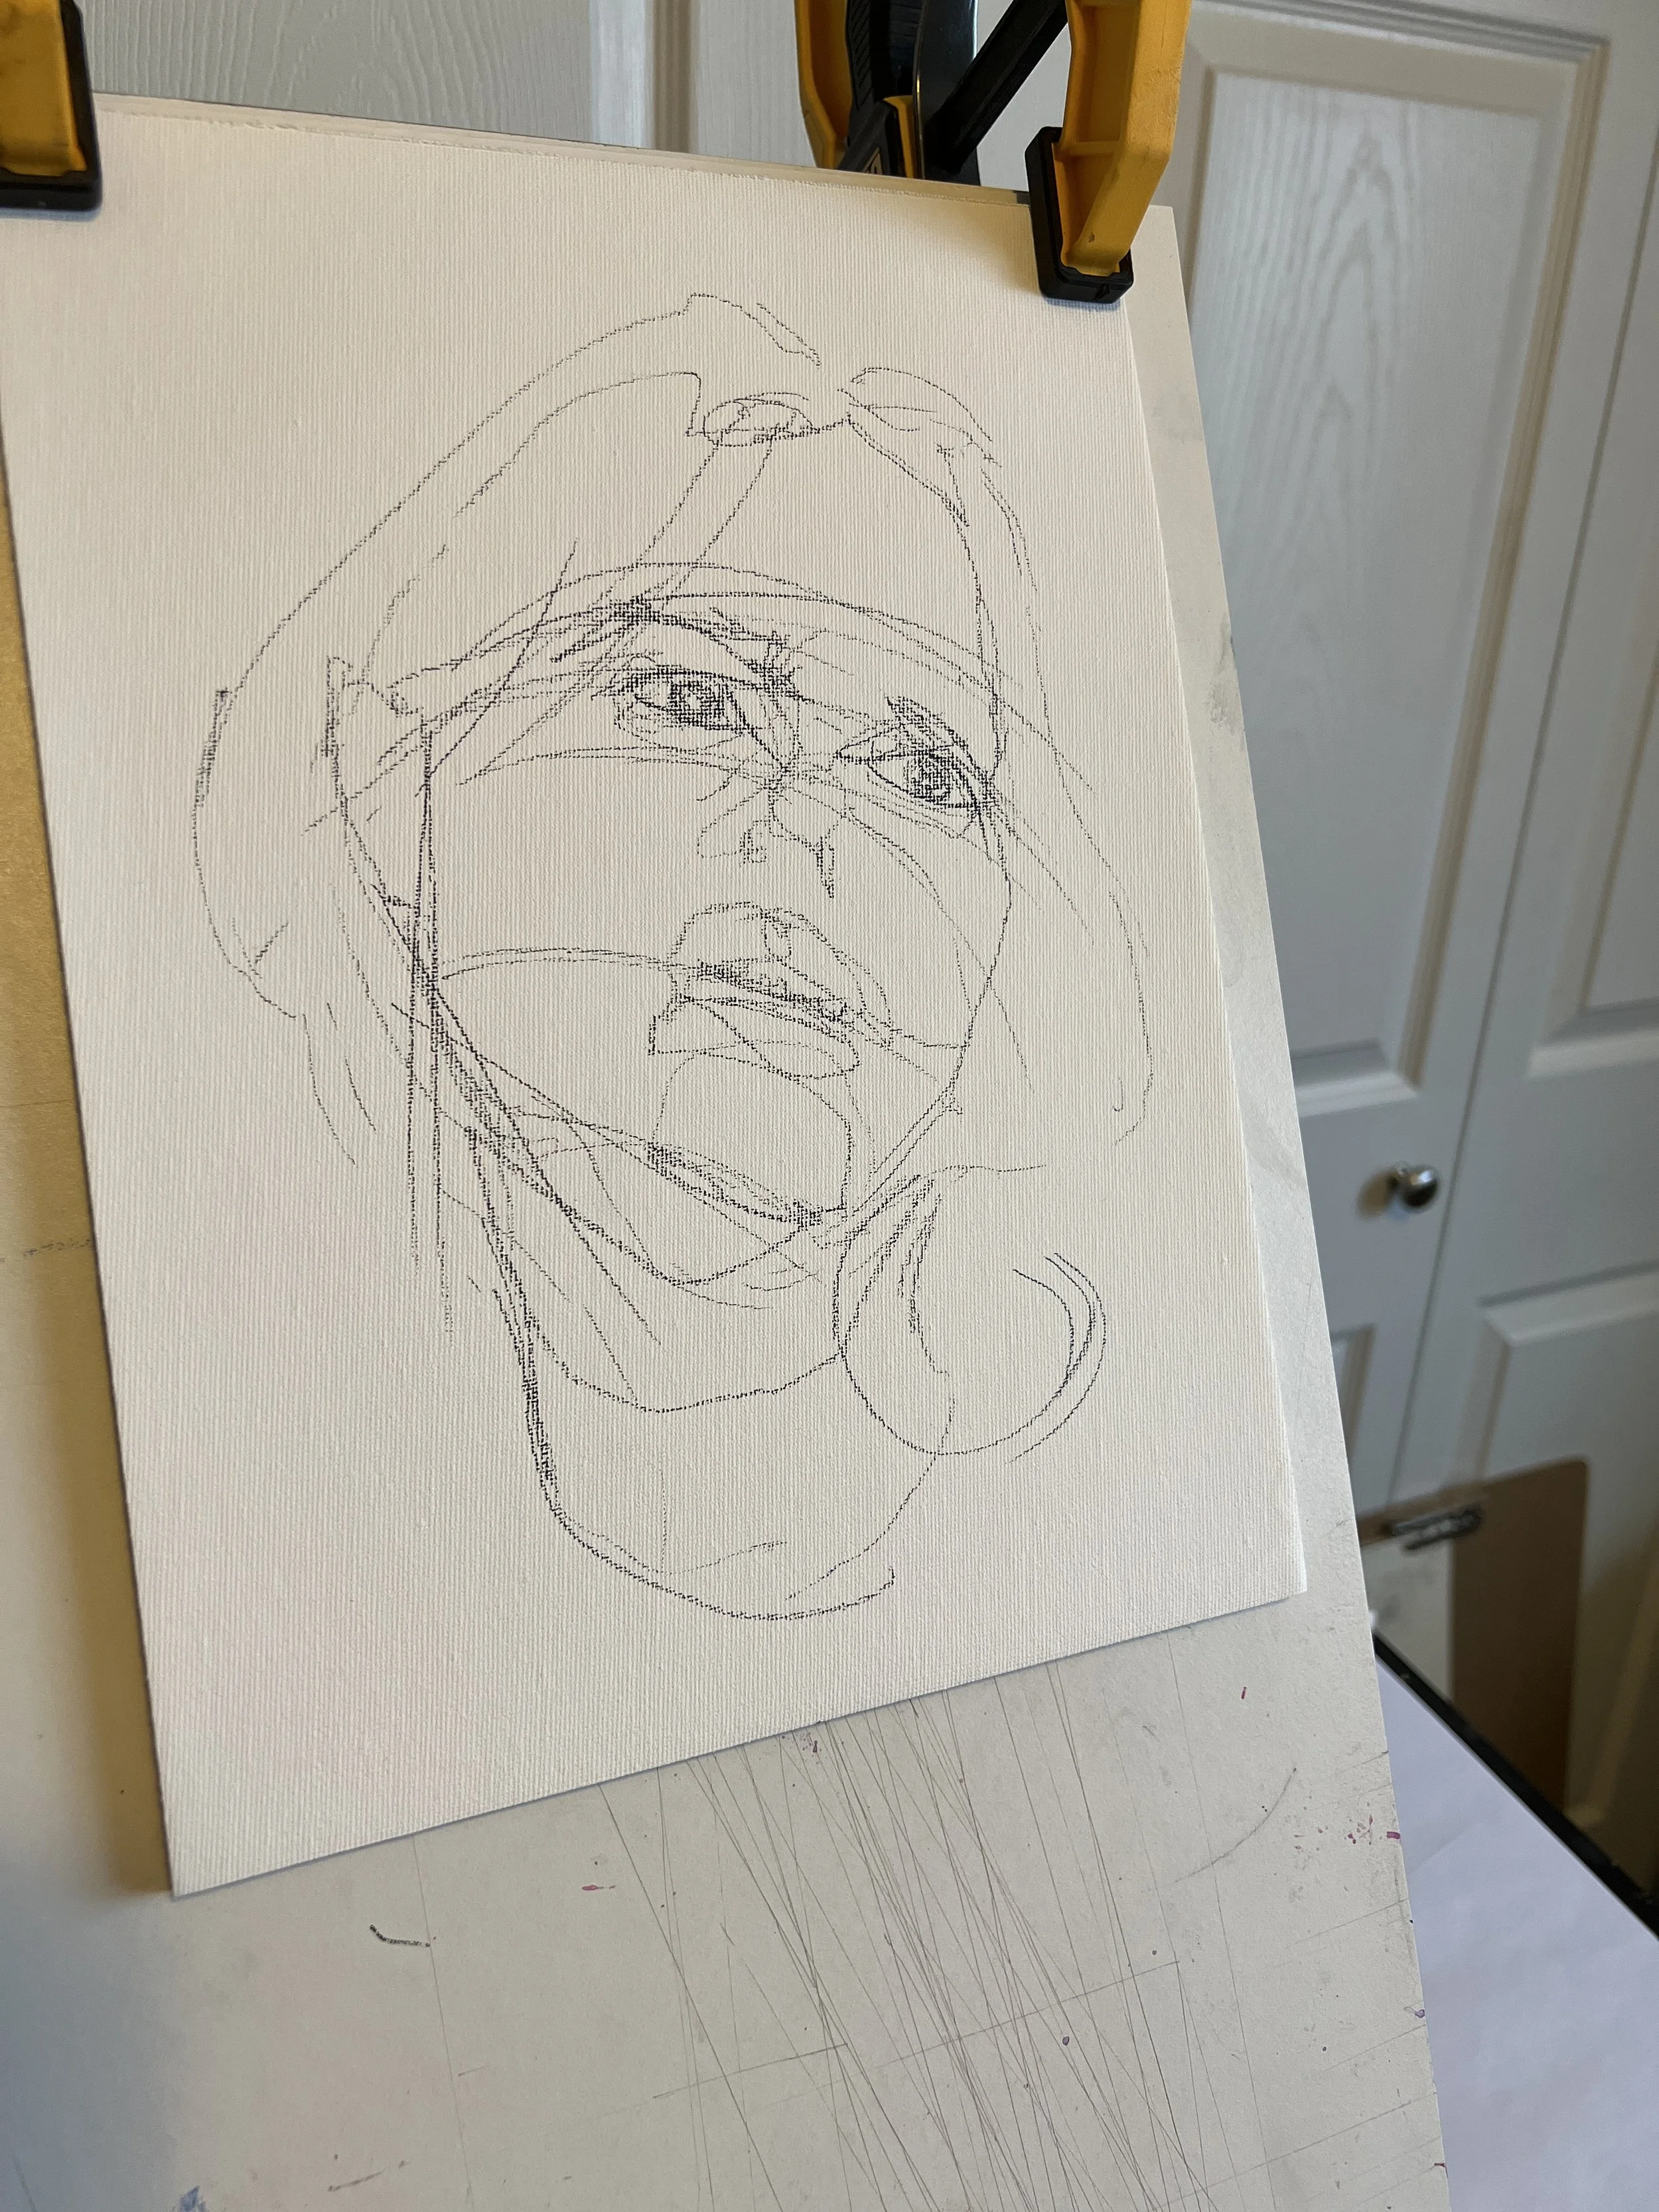
Line drawing on canvas in charcoal pencil.
I have learned through attending Elly’s painting hangout sessions and watching her tutorials on Patreon, that the trick to keeping a painting from getting “muddy” (dirty because the fresh paint mixes with the charcoal from the underdrawing) is to use as little charcoal as possible, and therefore, as little detail as possible in the underdrawing. By doing this, you allow the paint do the work for you later. That is, you draw with the paint.
I began to add more charcoal lines to define the drawing, but soon felt that I was adding too much charcoal. You can “erase” charcoal by adding water to a paintbrush and rubbing it off, so that’s what I did. This created a gray charcoal wash over most of the face and some dripping over the drawing, which created an aesthetic that I loved. Since I had come to a point in the underdrawing process where I was removing charcoal for fear it would create a muddy painting, I decided that I had put enough down on the canvas and would let the now wet charcoal dry over night and add paint the next day when the underdrawing was dry.
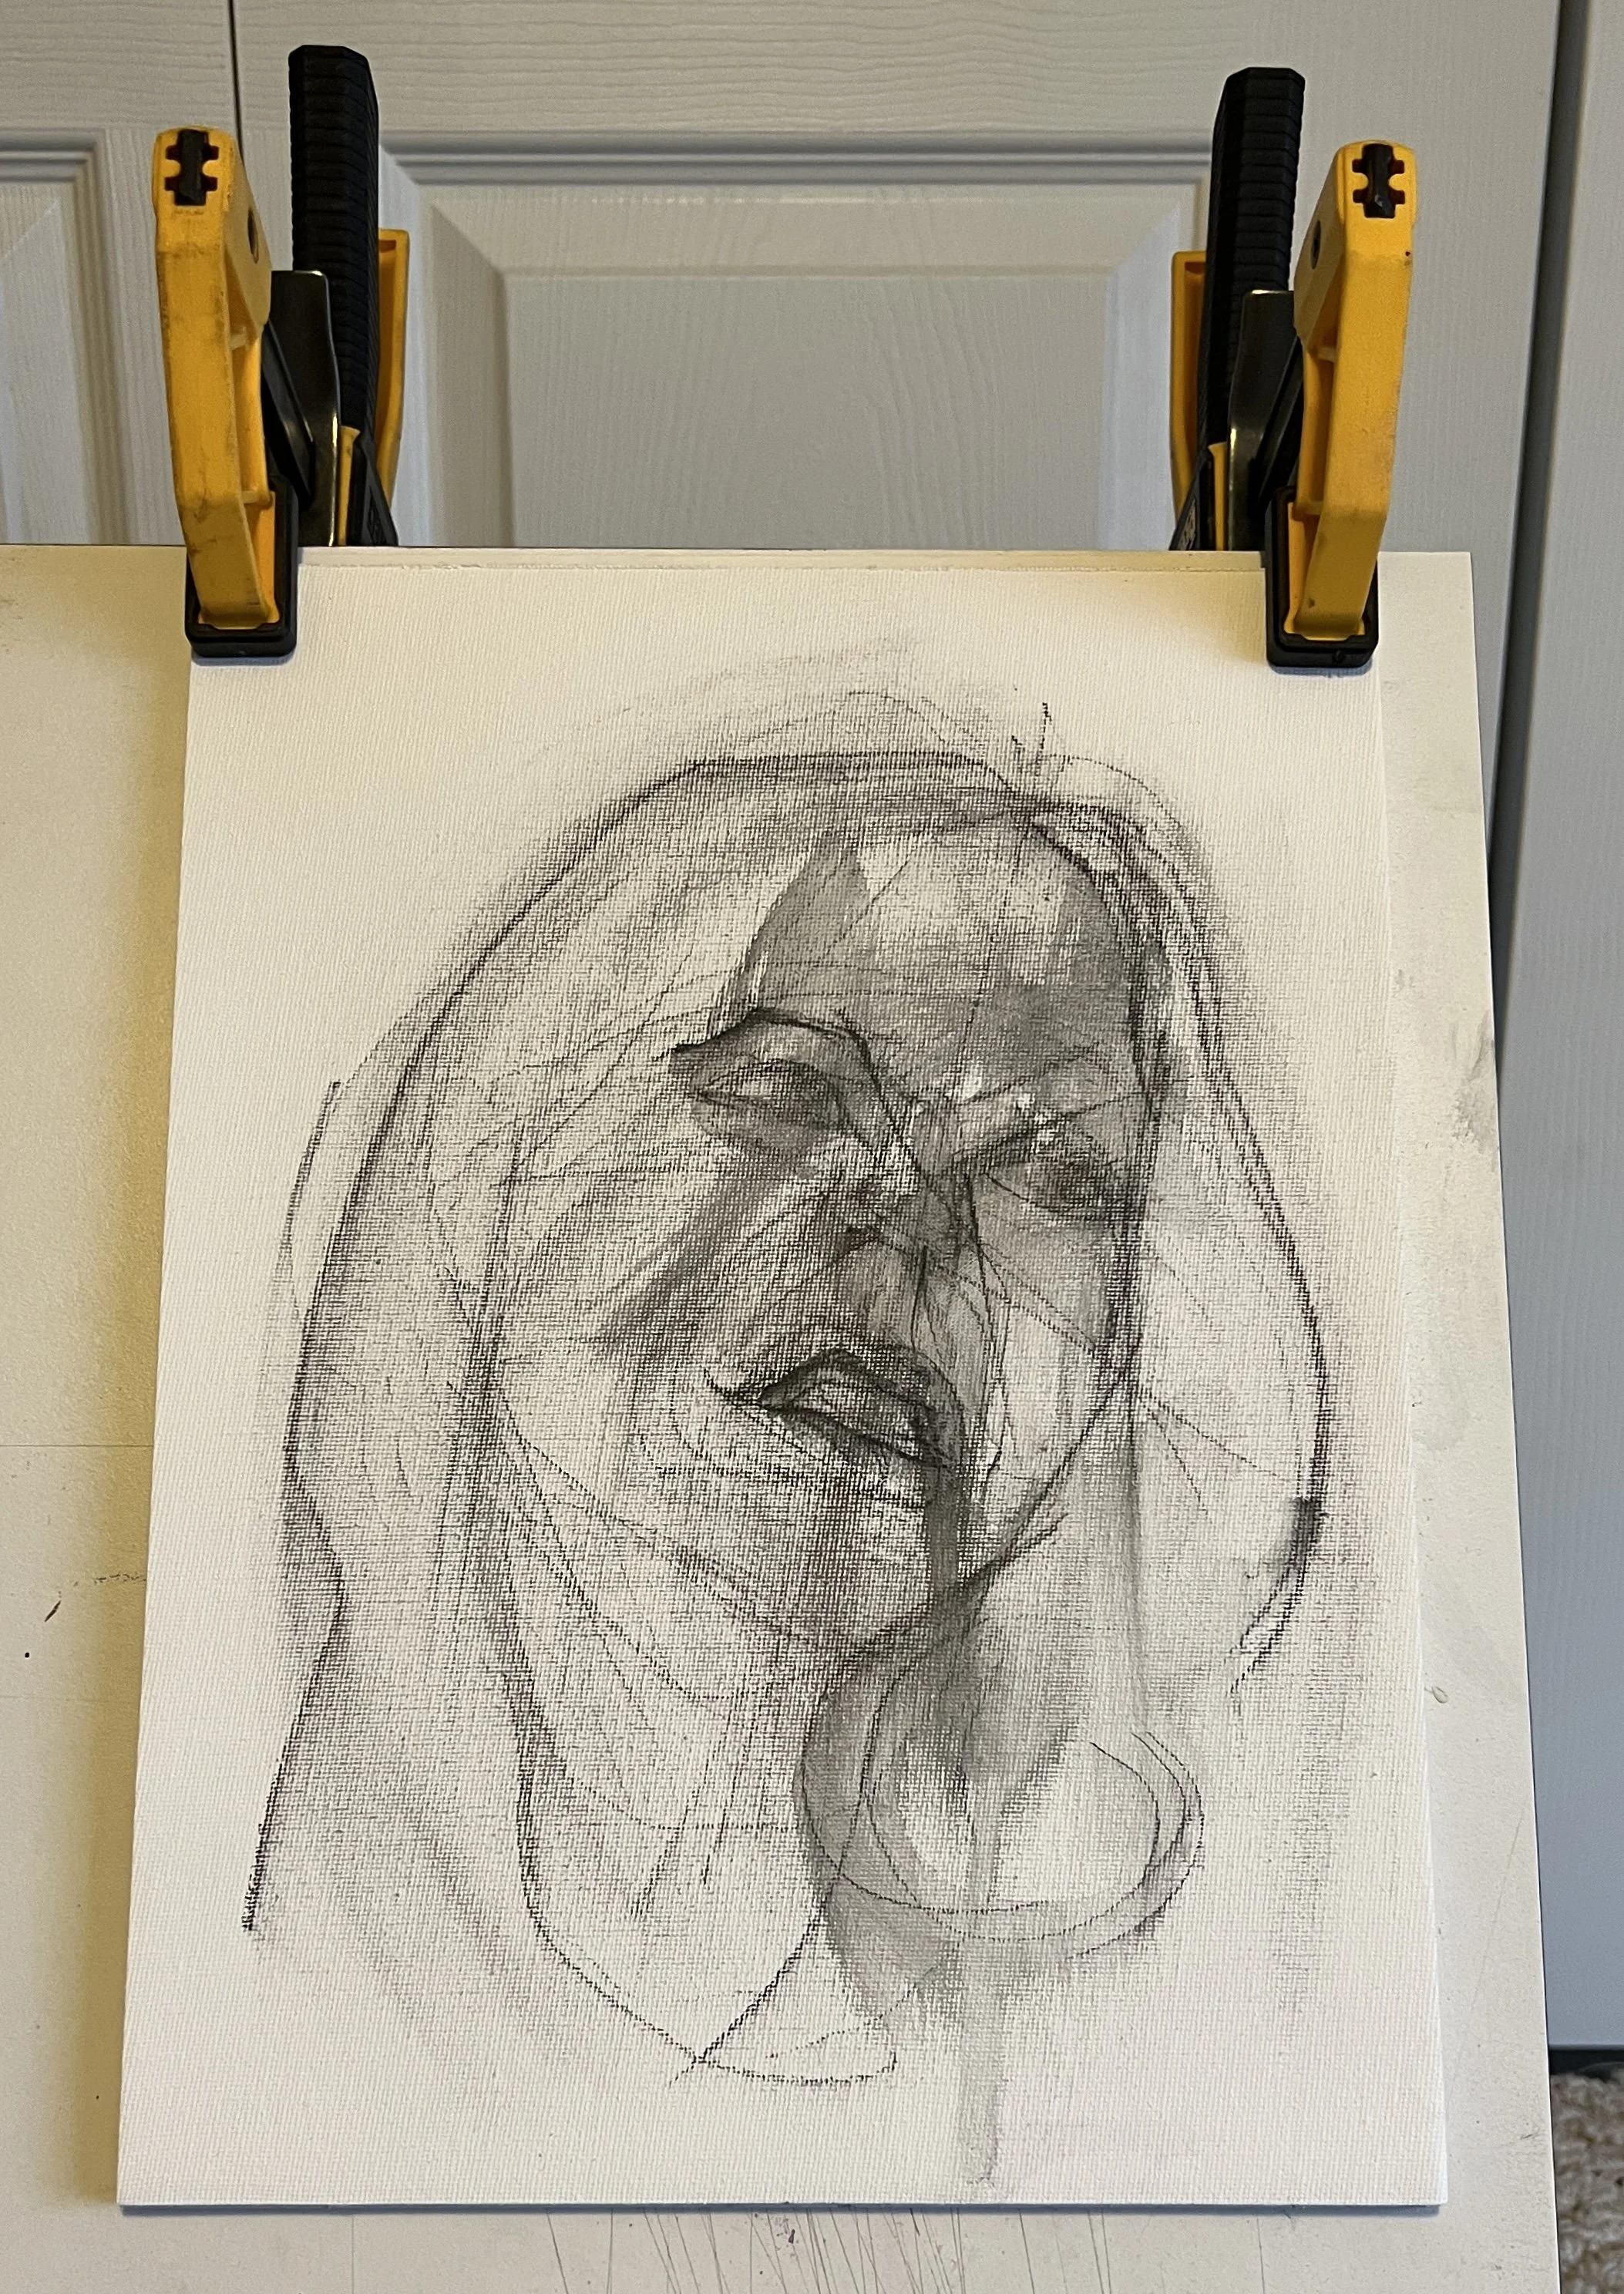
Underdrawing with charcoal wash and drip marks from water.
The next day, I began to add the first layers of paint. As described in my Patreon video on acrylic painting materials, I used the Golden brand paints that Elly recommends and used the primary colors of titanium white, pthalo blue, cadmium red, and primary yellow.
I started the painting by using the largest paintbrush I felt was appropriate for the size of the painting. By working with a larger paintbrush at the beginning, I could keep my marks wide, loose, and not too detailed. I did this for the same reason that I used a contour drawing technique in the initial underdrawing. As I progressed through the painting and refined the details, I used smaller and smaller brushes.
With the first pass of acrylic paint, I found that the dried charcoal from the day before did not mix with the paint as much as I thought it would, and so my color was fairly vivid from the get-go. I did my best to start out with a neutral, medium color for the skin tone, with plans to add more dark colors and light colors later as I added more details.
Creating the flesh tones, however, was challenging for me at first, and you can see in the photo below that I had several skin tones visible on the face at this point. I left the eyes and lips colorless so that I could see where they were located and not accidentally lose them by painting them over. I took the same approach with the hair and the background, adding a neutral color that was middle-toned, enabling myself to add darker colors and lighter colors later in order to define the areas in more detail.
In the right side of the photo below, you can see that I placed the paint colors out on my painting palette in order from darkest to lightest. This technique helps to streamline the color mixing process. I used a disposable paper palette pad, and you can buy a 9x12” pad for under $10, which is a good working size. The one I use is an Artsmith pad from Joann Fabric and Craft Stores.
Since I was practicing with this painting, the disposable palette pad made it easy for me to quickly remove the top sheet and dispose of it if I was unhappy with the colors I mixed. This was handy because I could continue to work without losing my flow or stopping to clean my palette.
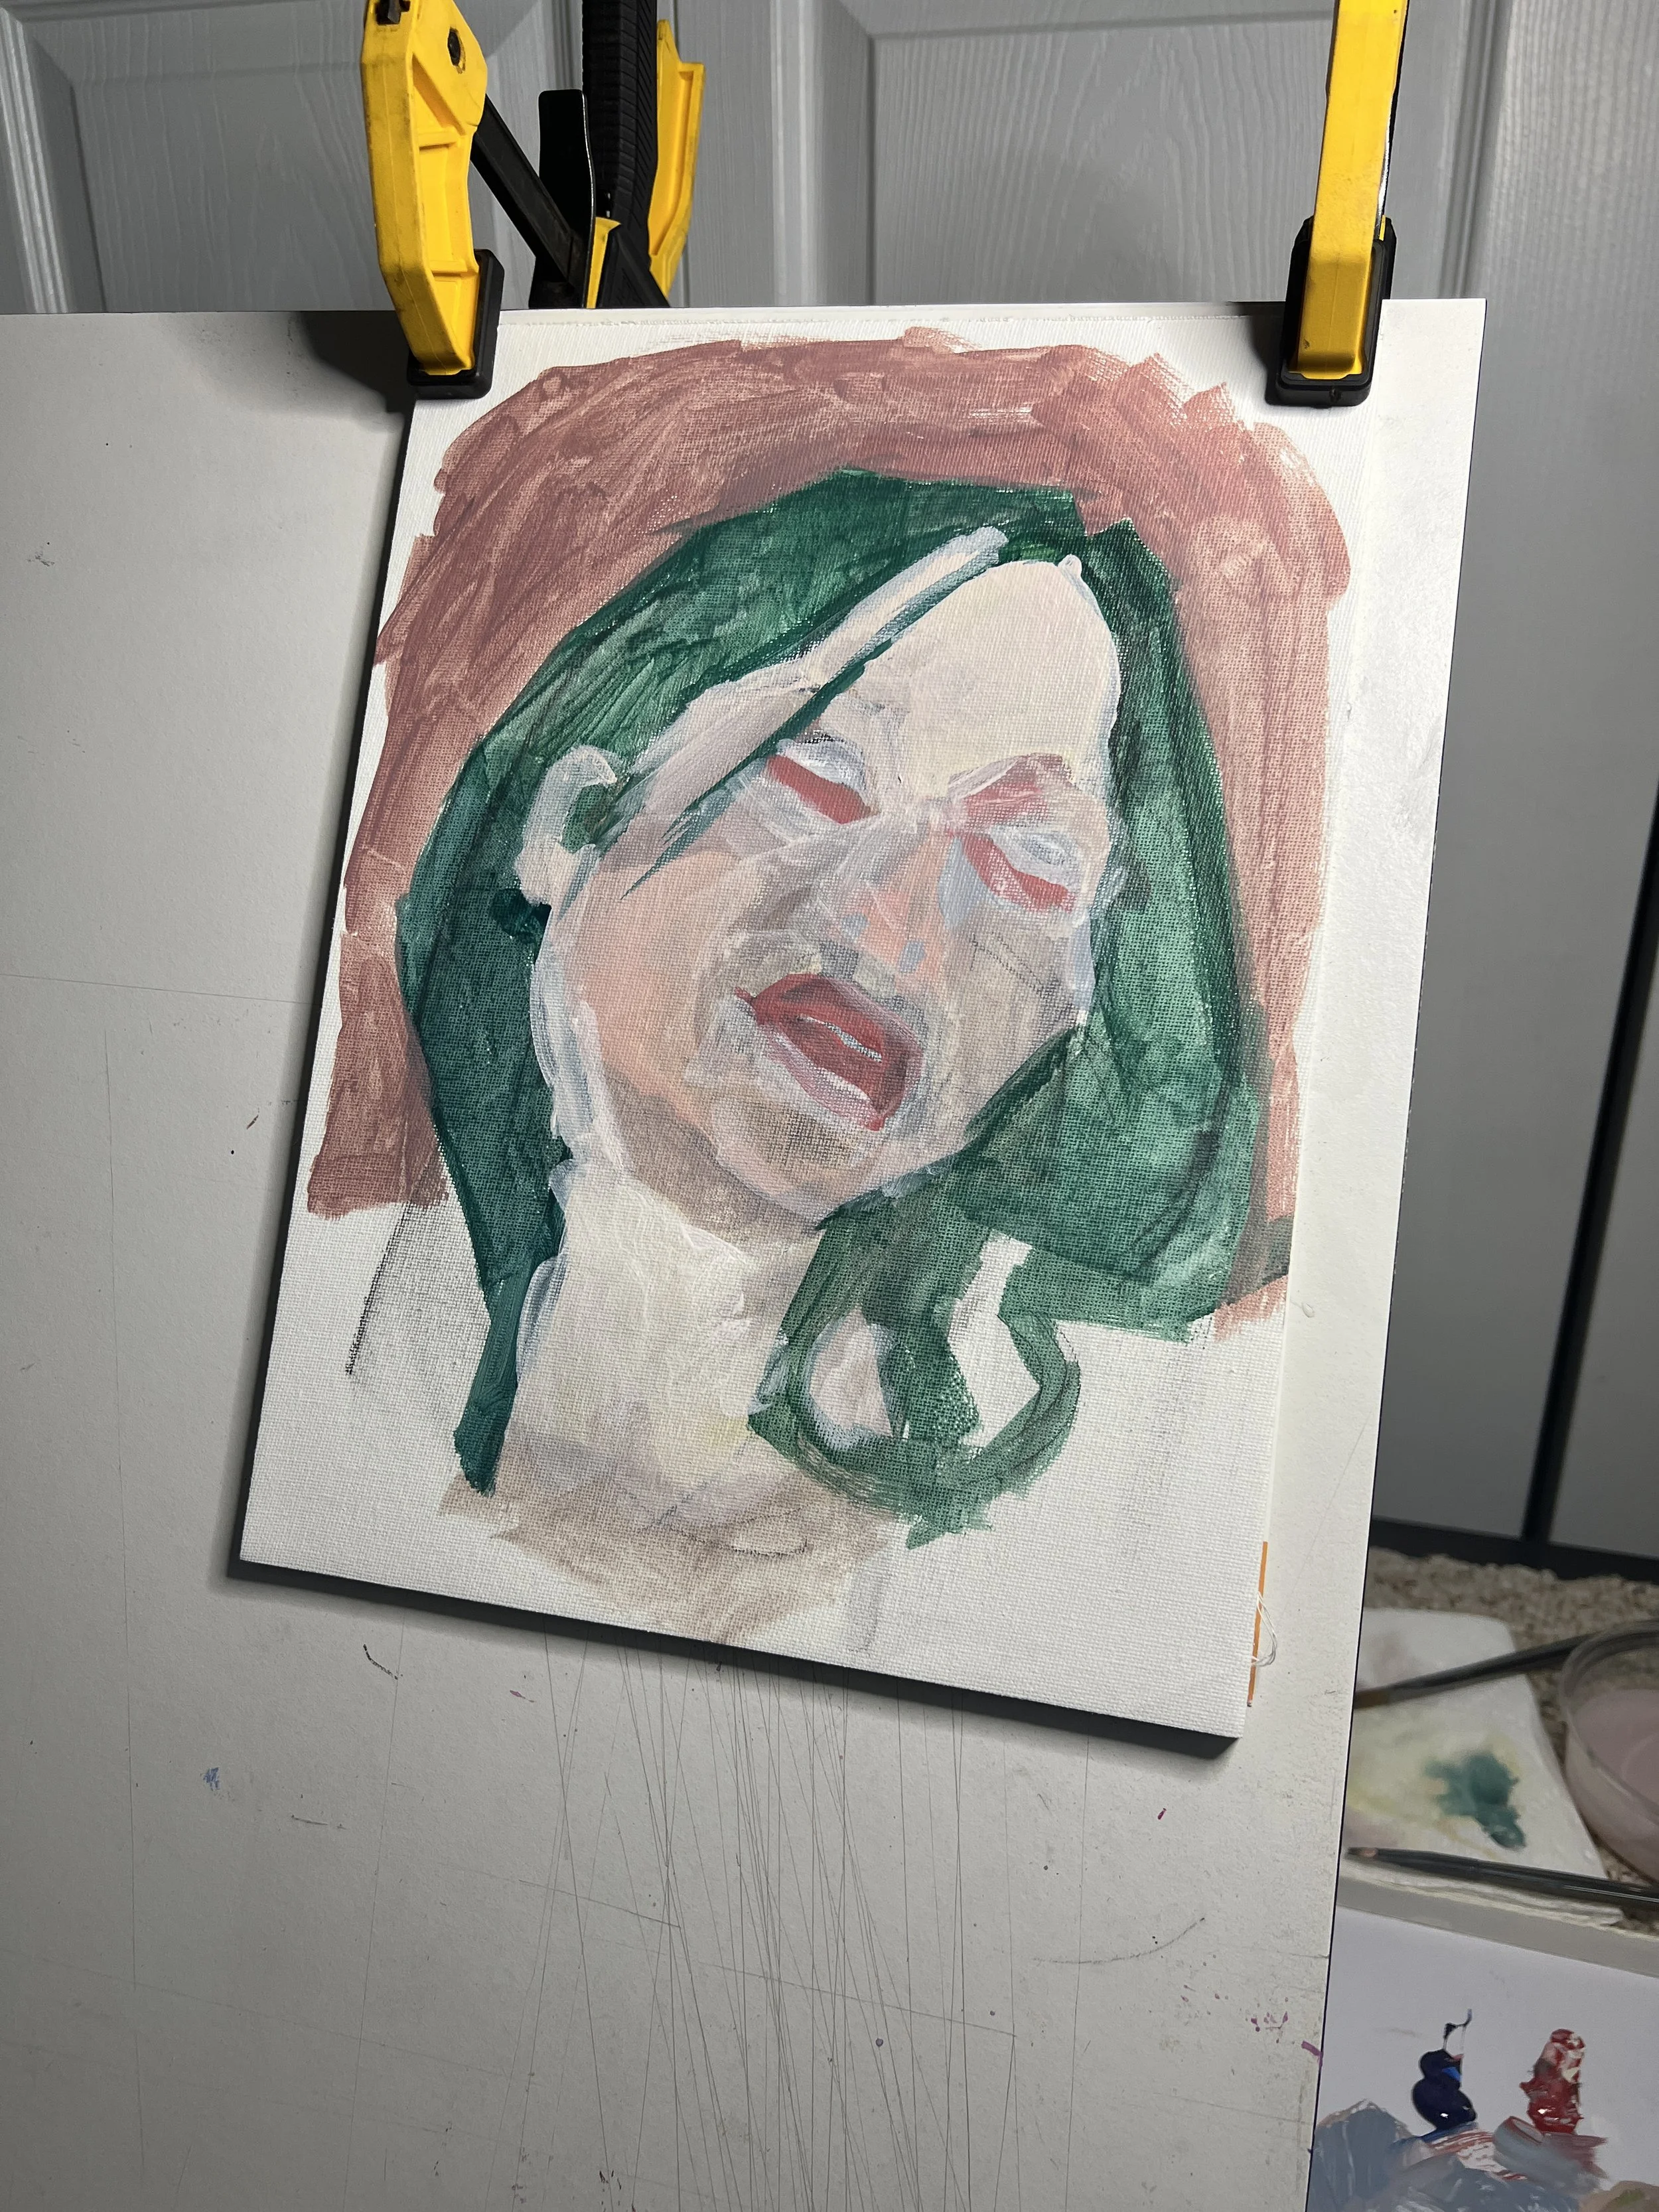
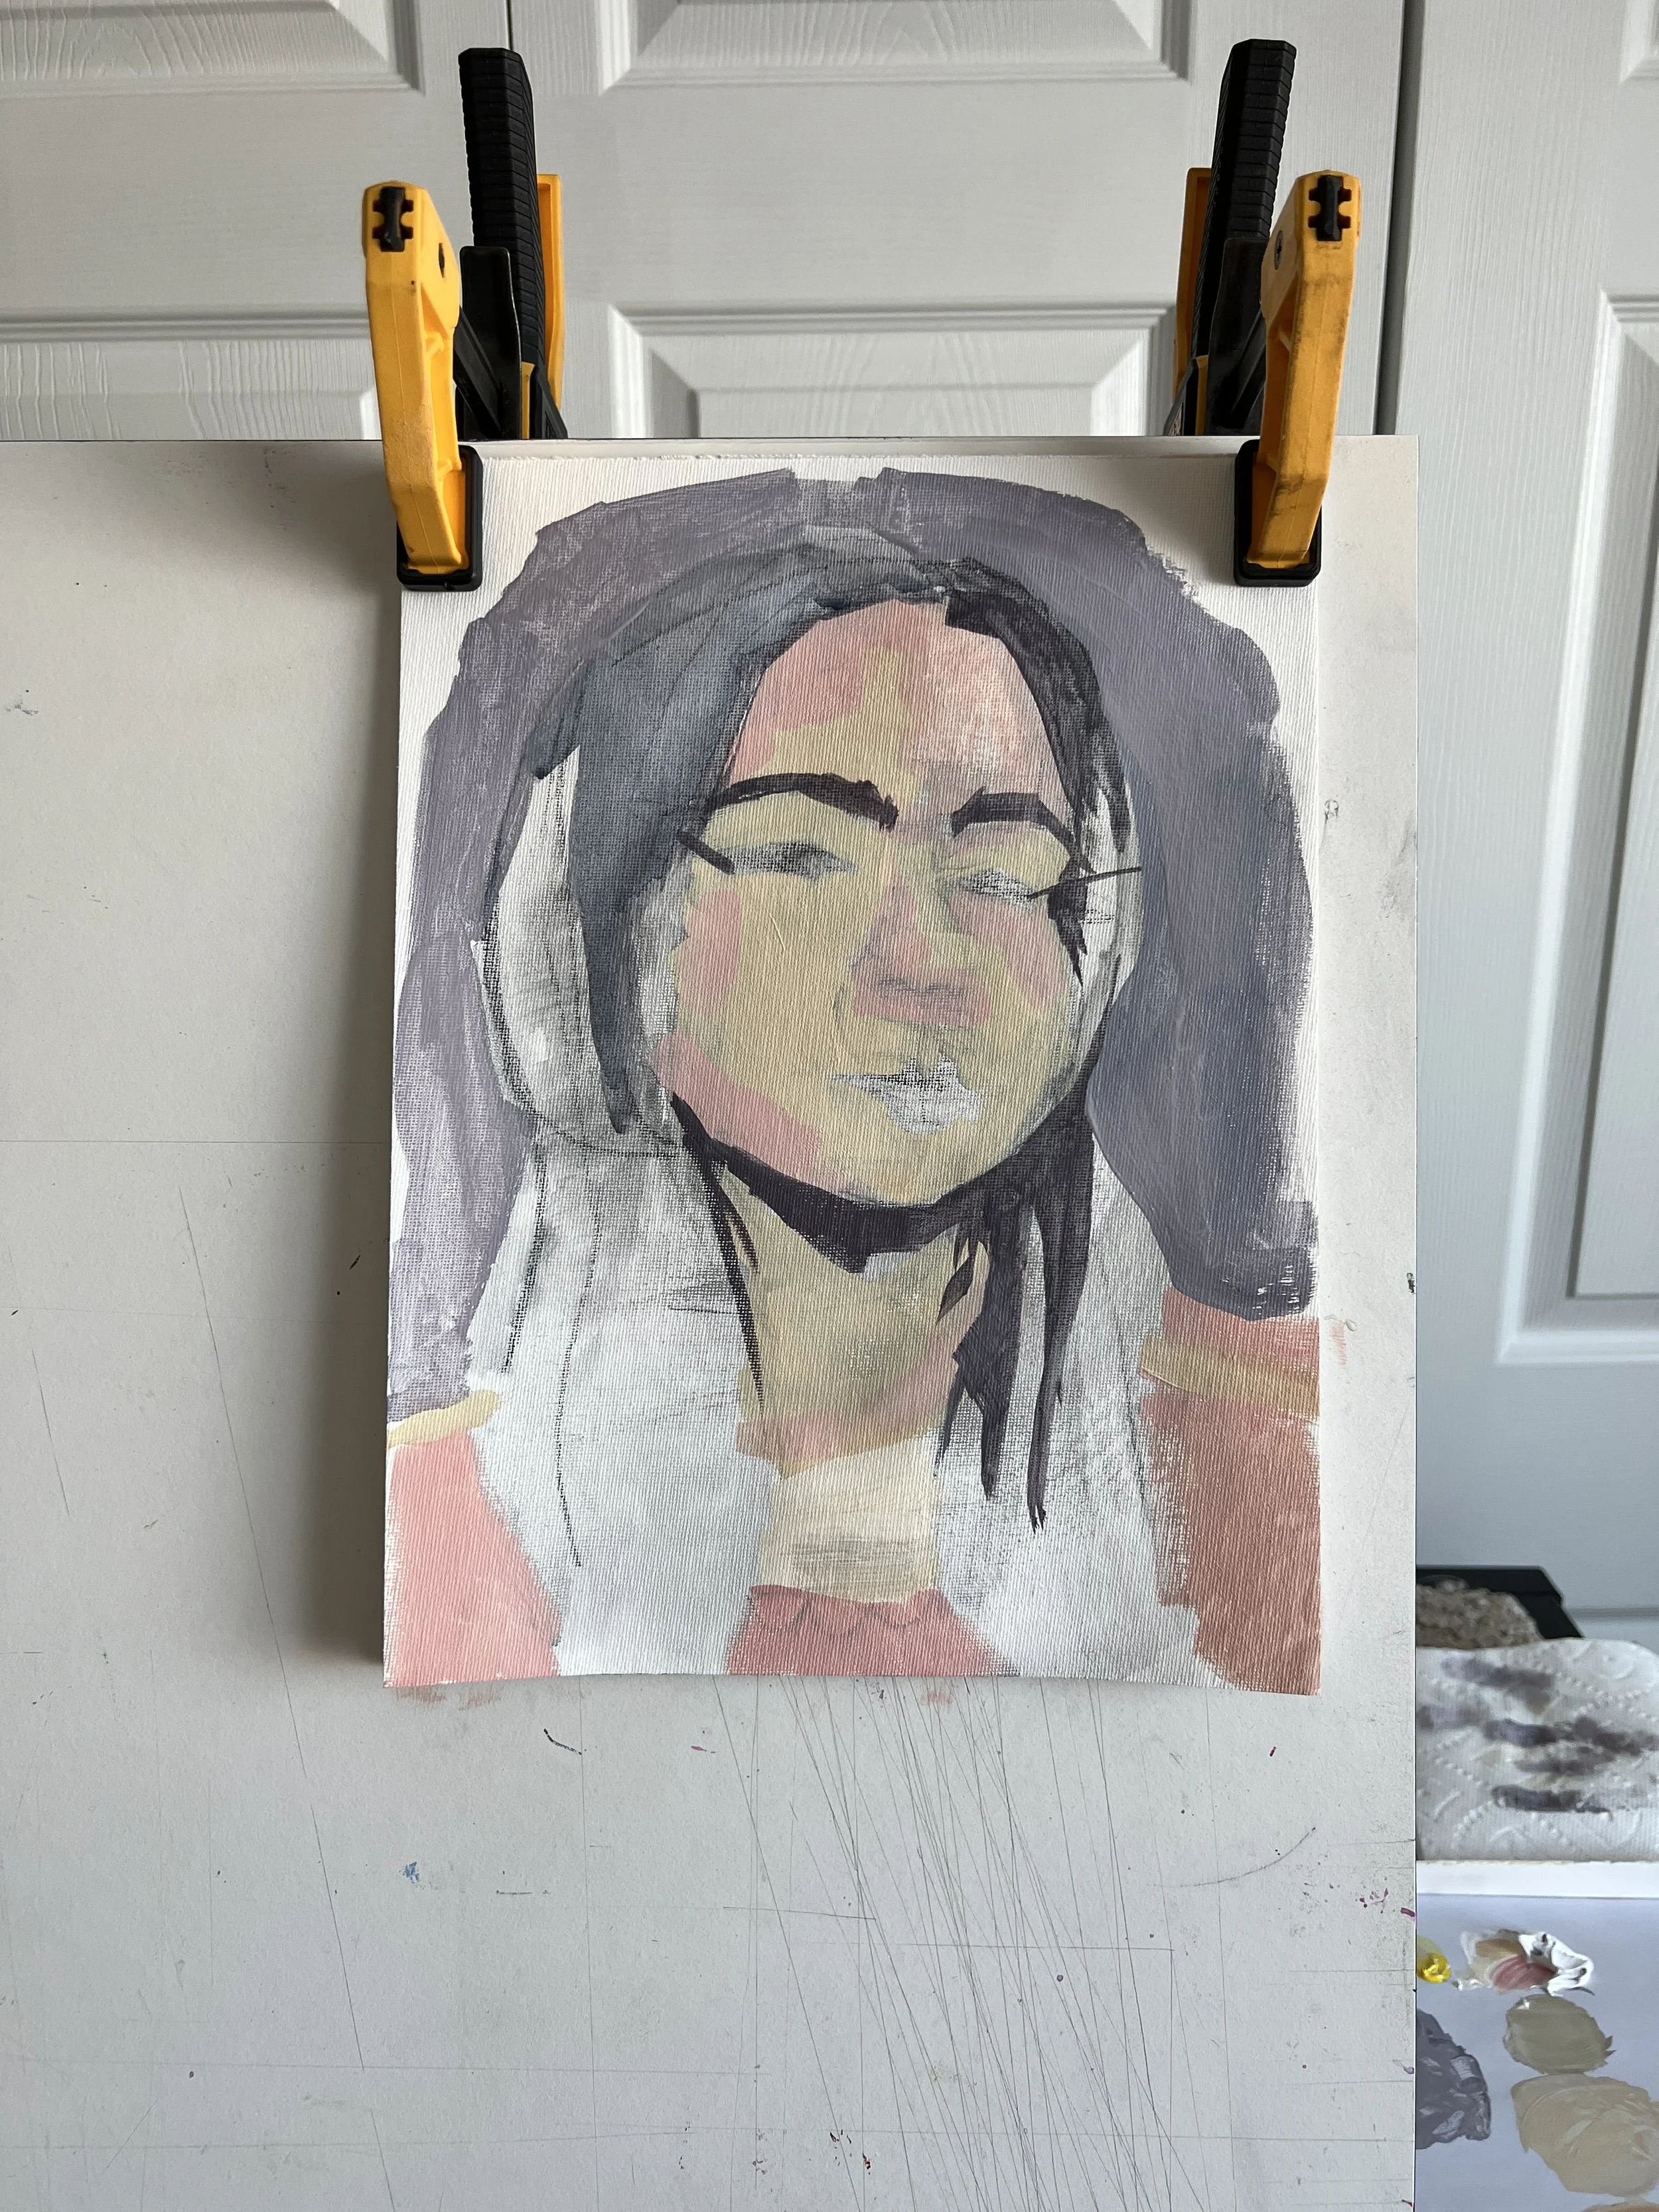
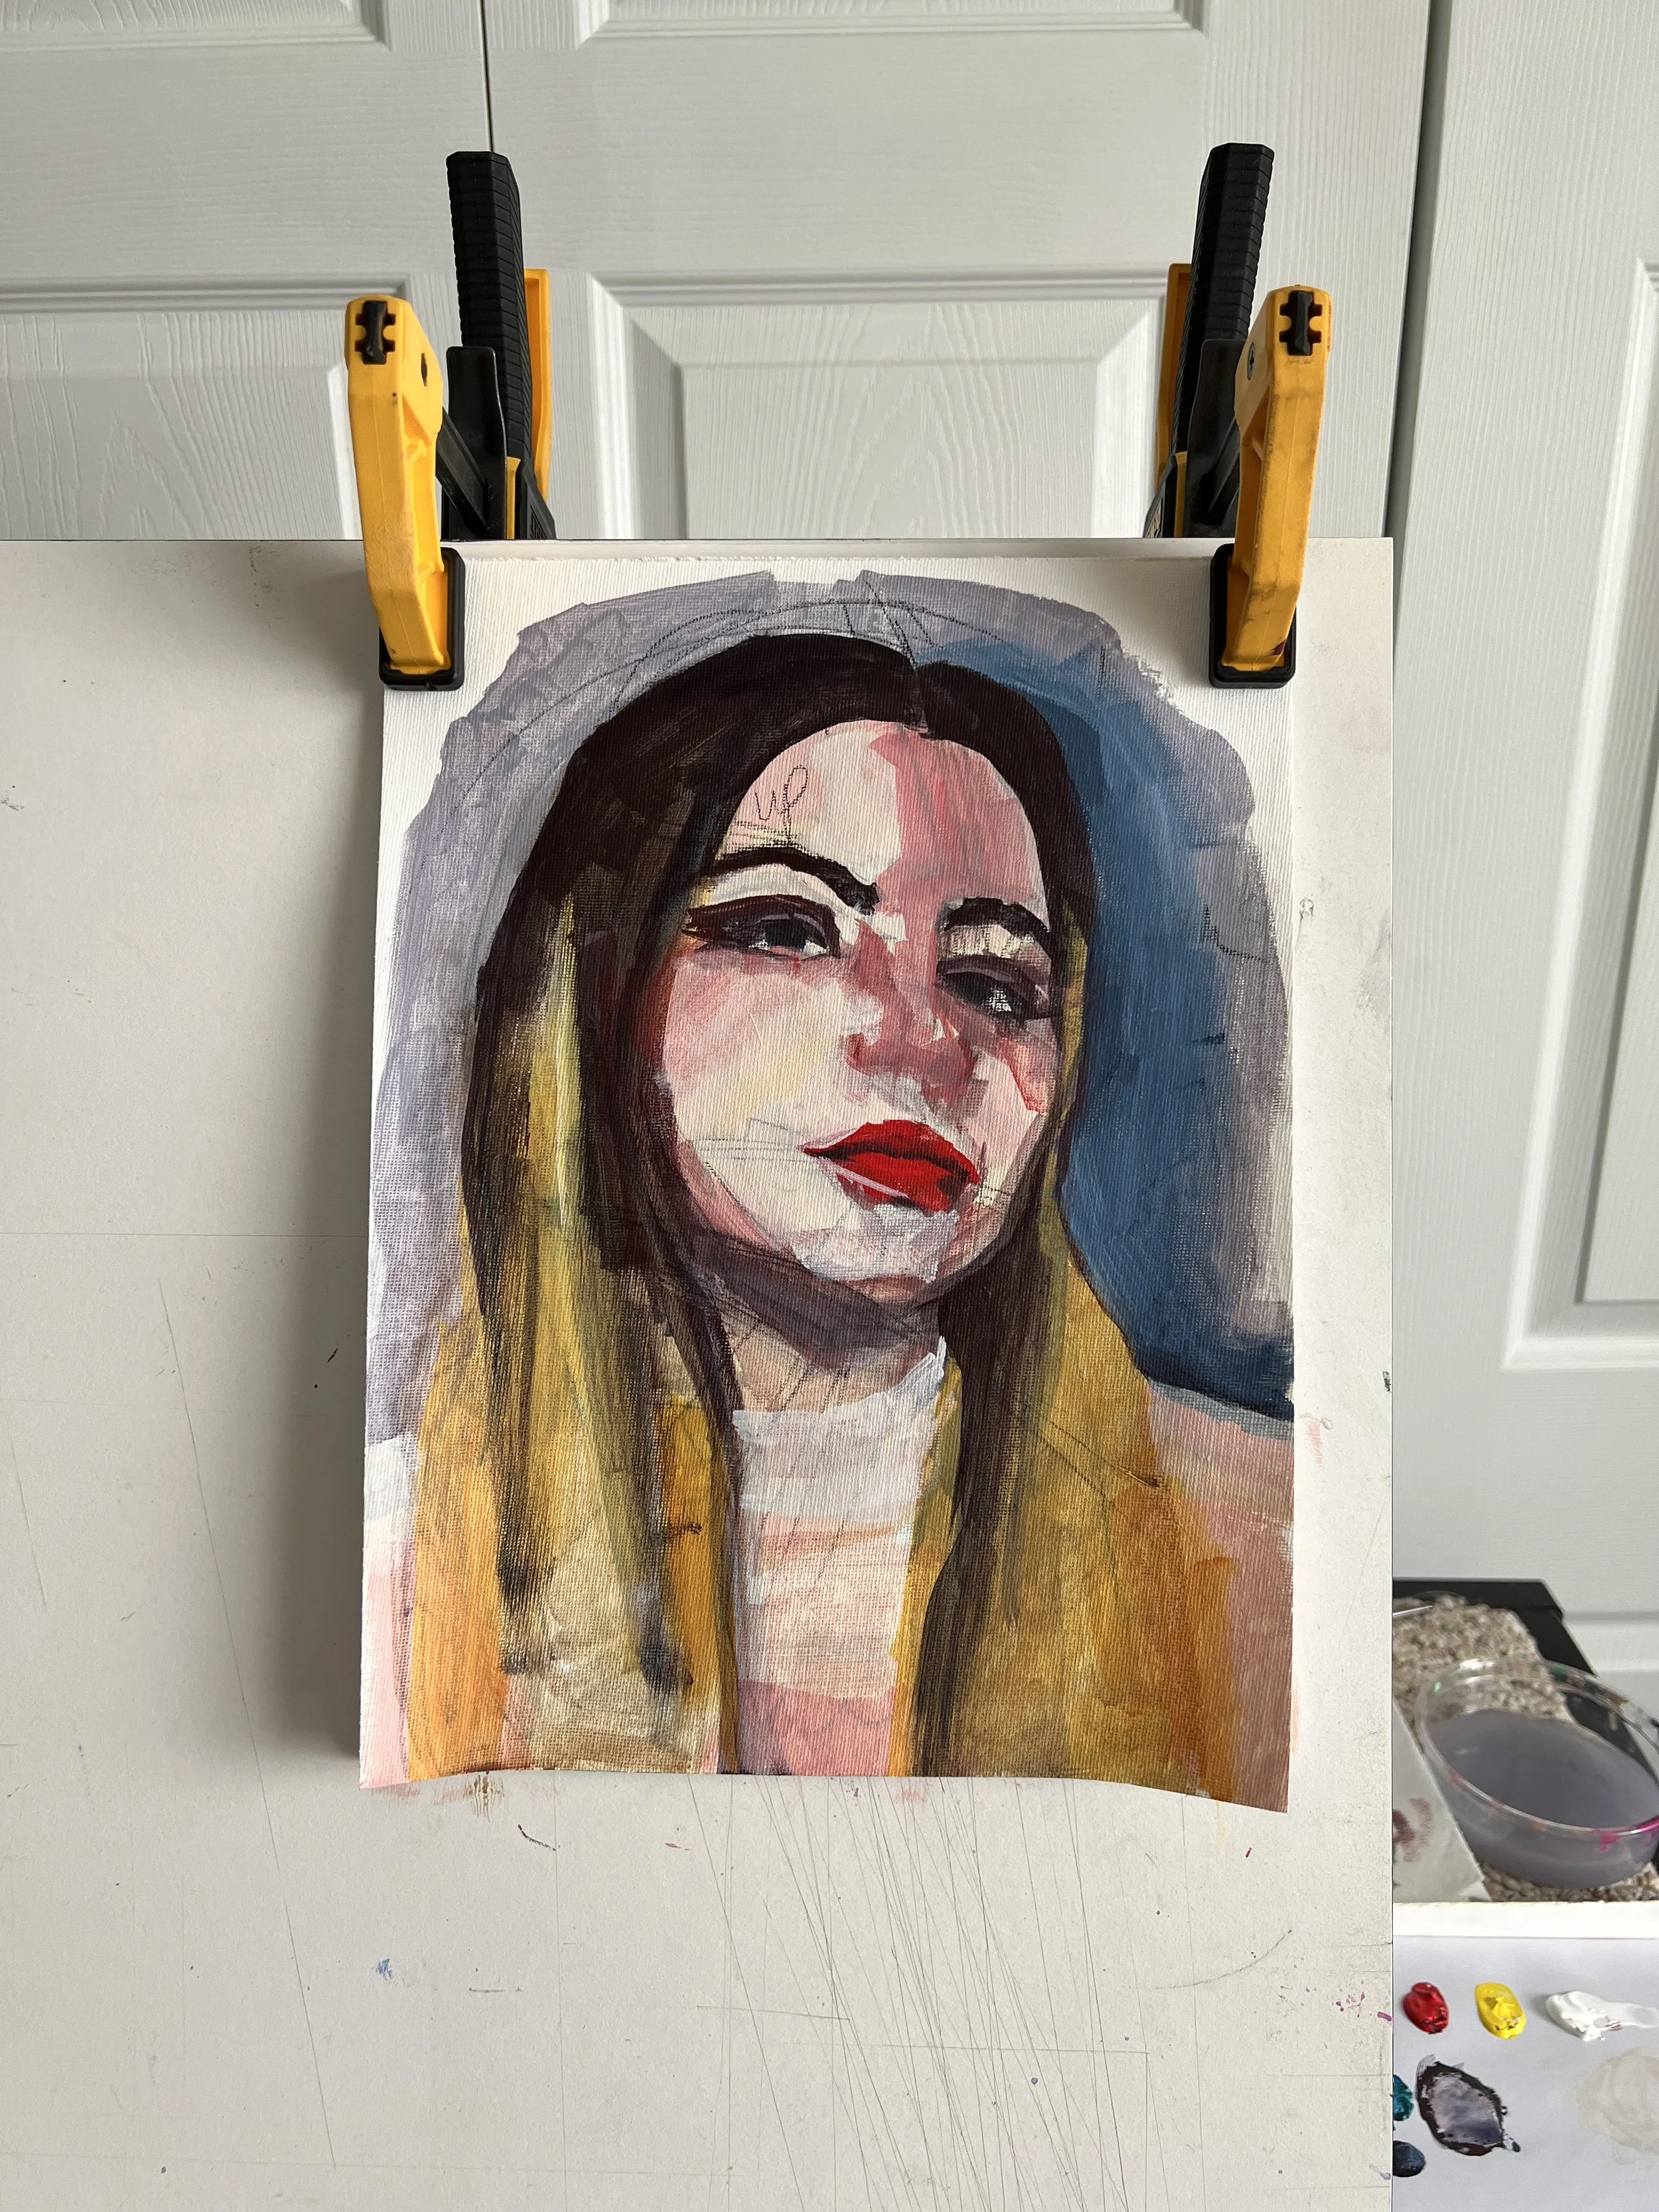
First pass over charcoal sketch with acrylic paint.
With the second pass of paint over the charcoal sketch, I was able to gain a more consistent flesh tone throughout the face. I also felt that I had the confidence to cover the eyes and lips with paint. I used a neutral red for the lips and for the darker areas under the eyes and off-white for the eyes themselves. There was about 20 minutes of time that passed between the first and second passes, which are pictured here. I was intentionally working quickly because I was still pushing myself to not be too precious with the work. I was saving the detail and focus for later.
After the first and second passes were complete, I left the painting to dry for a few hours so that I could come back later that day and continue to work on it and add more details.
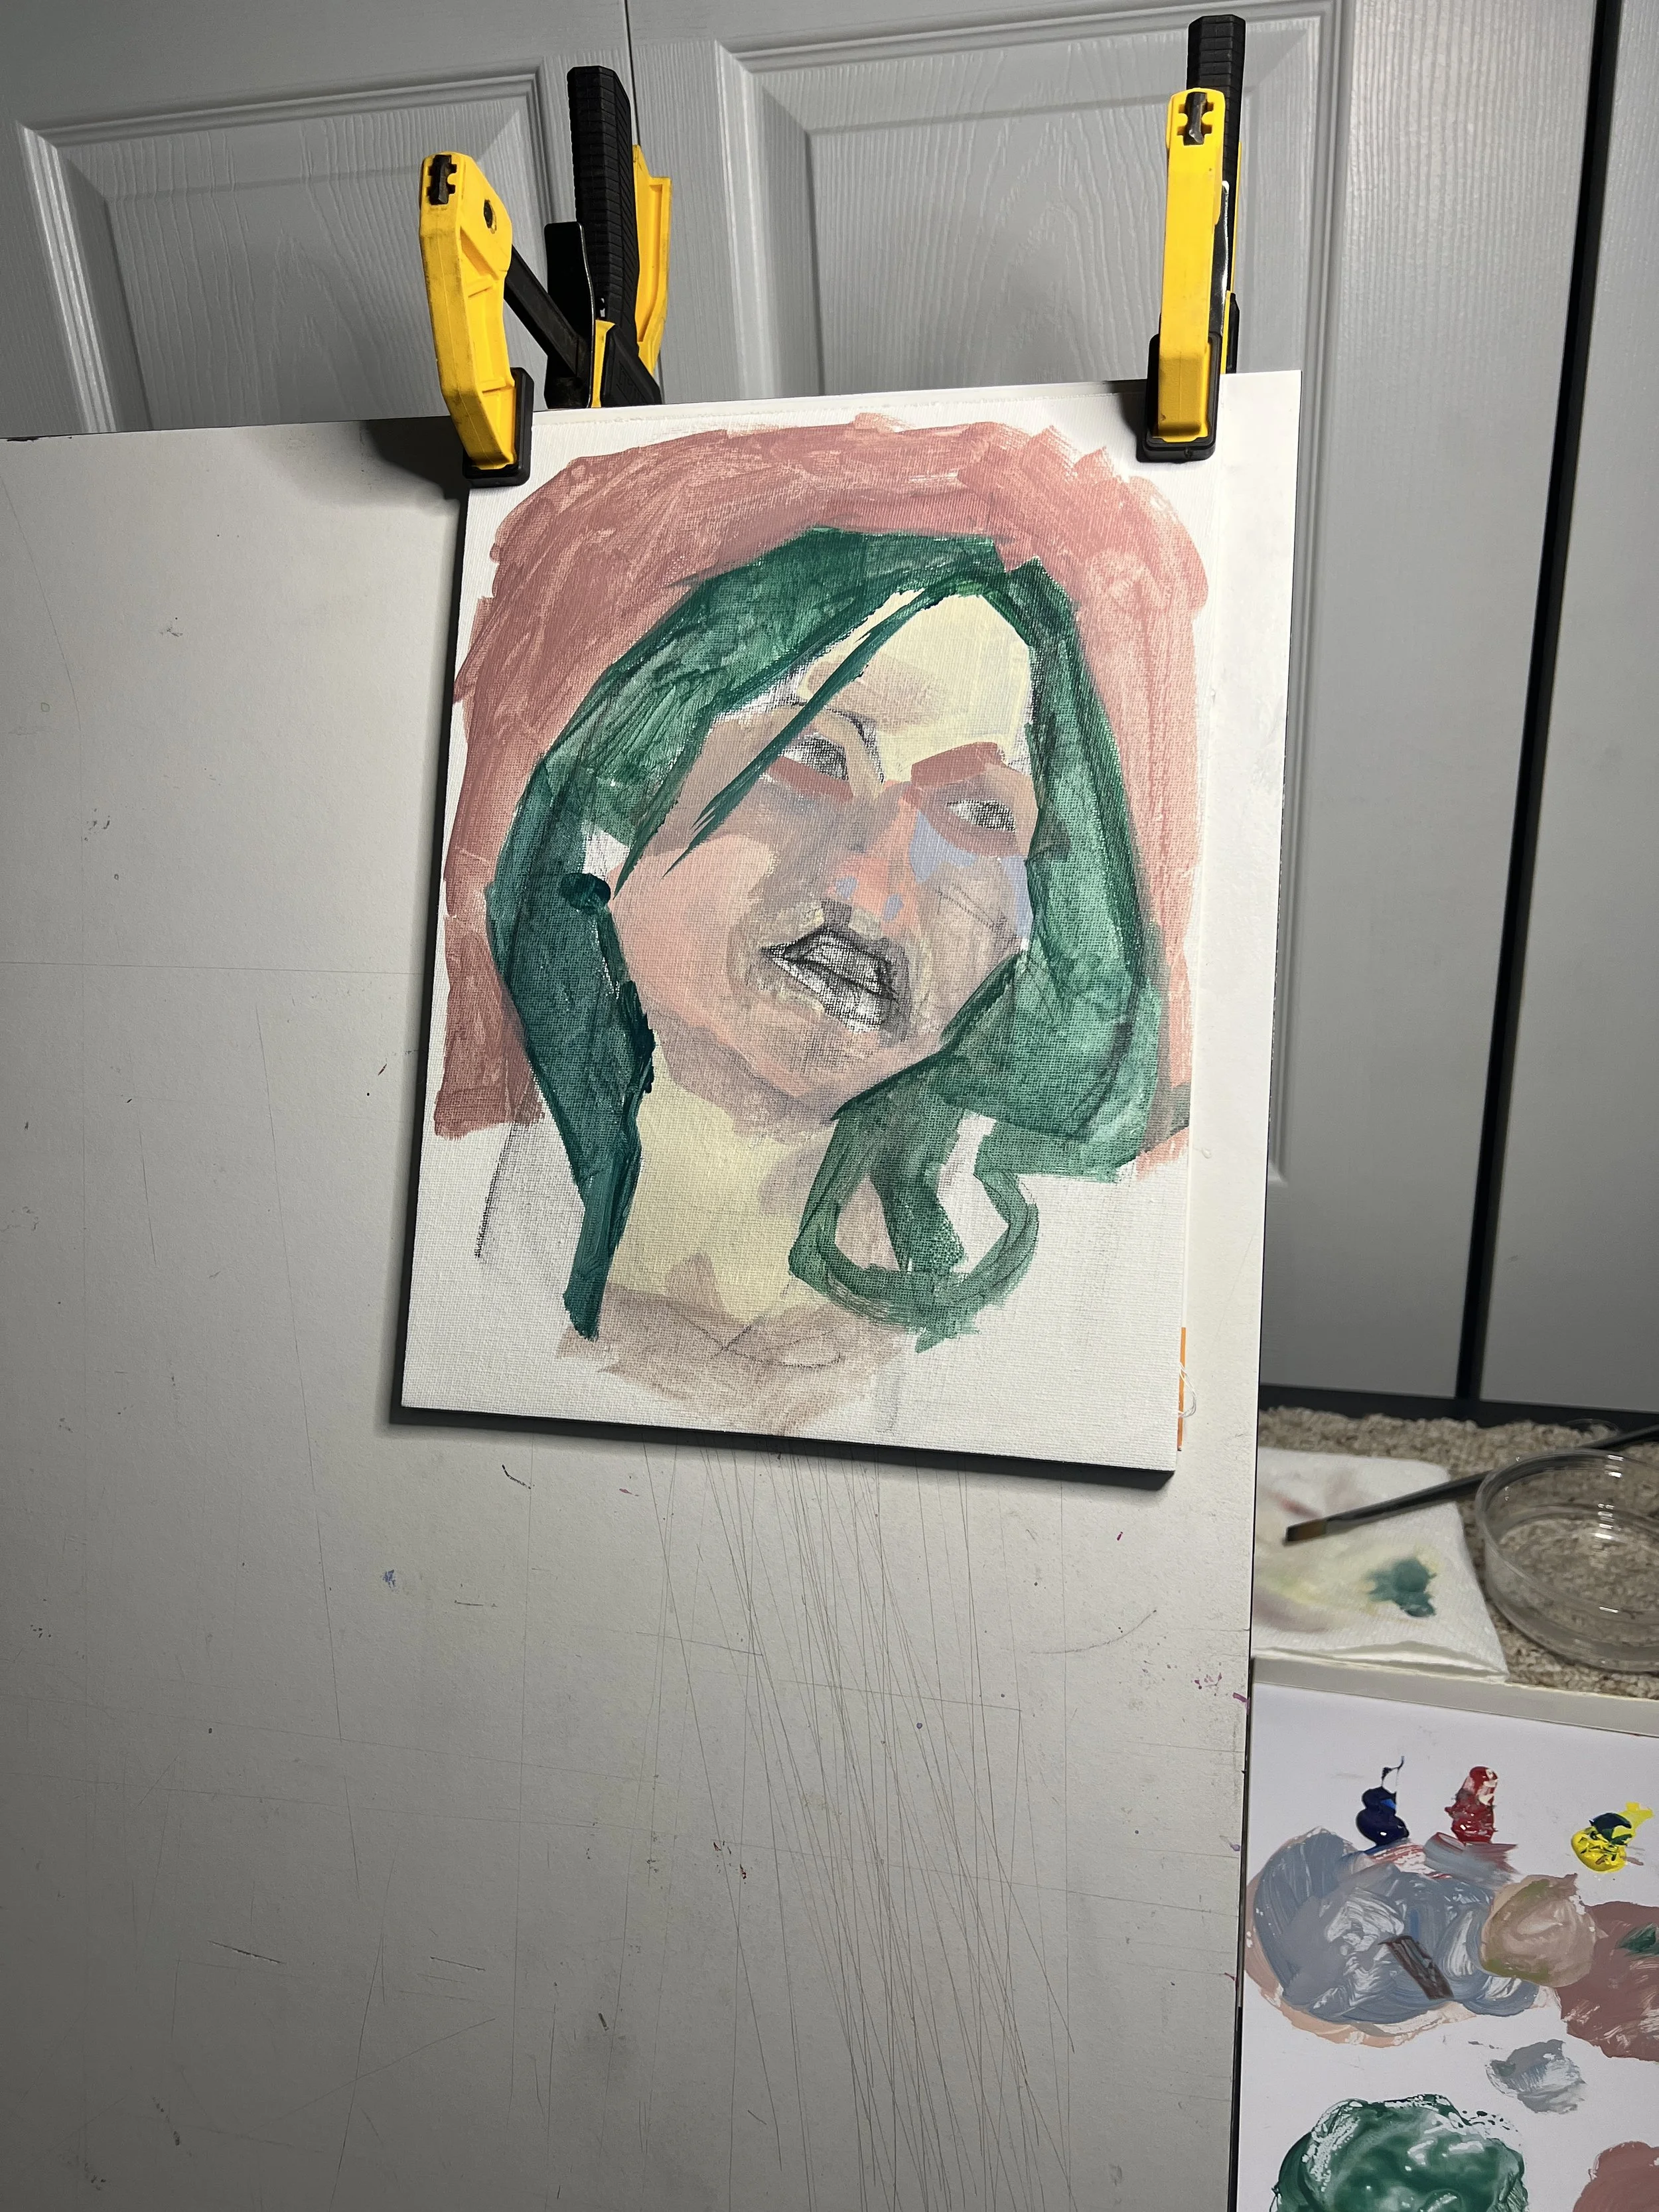
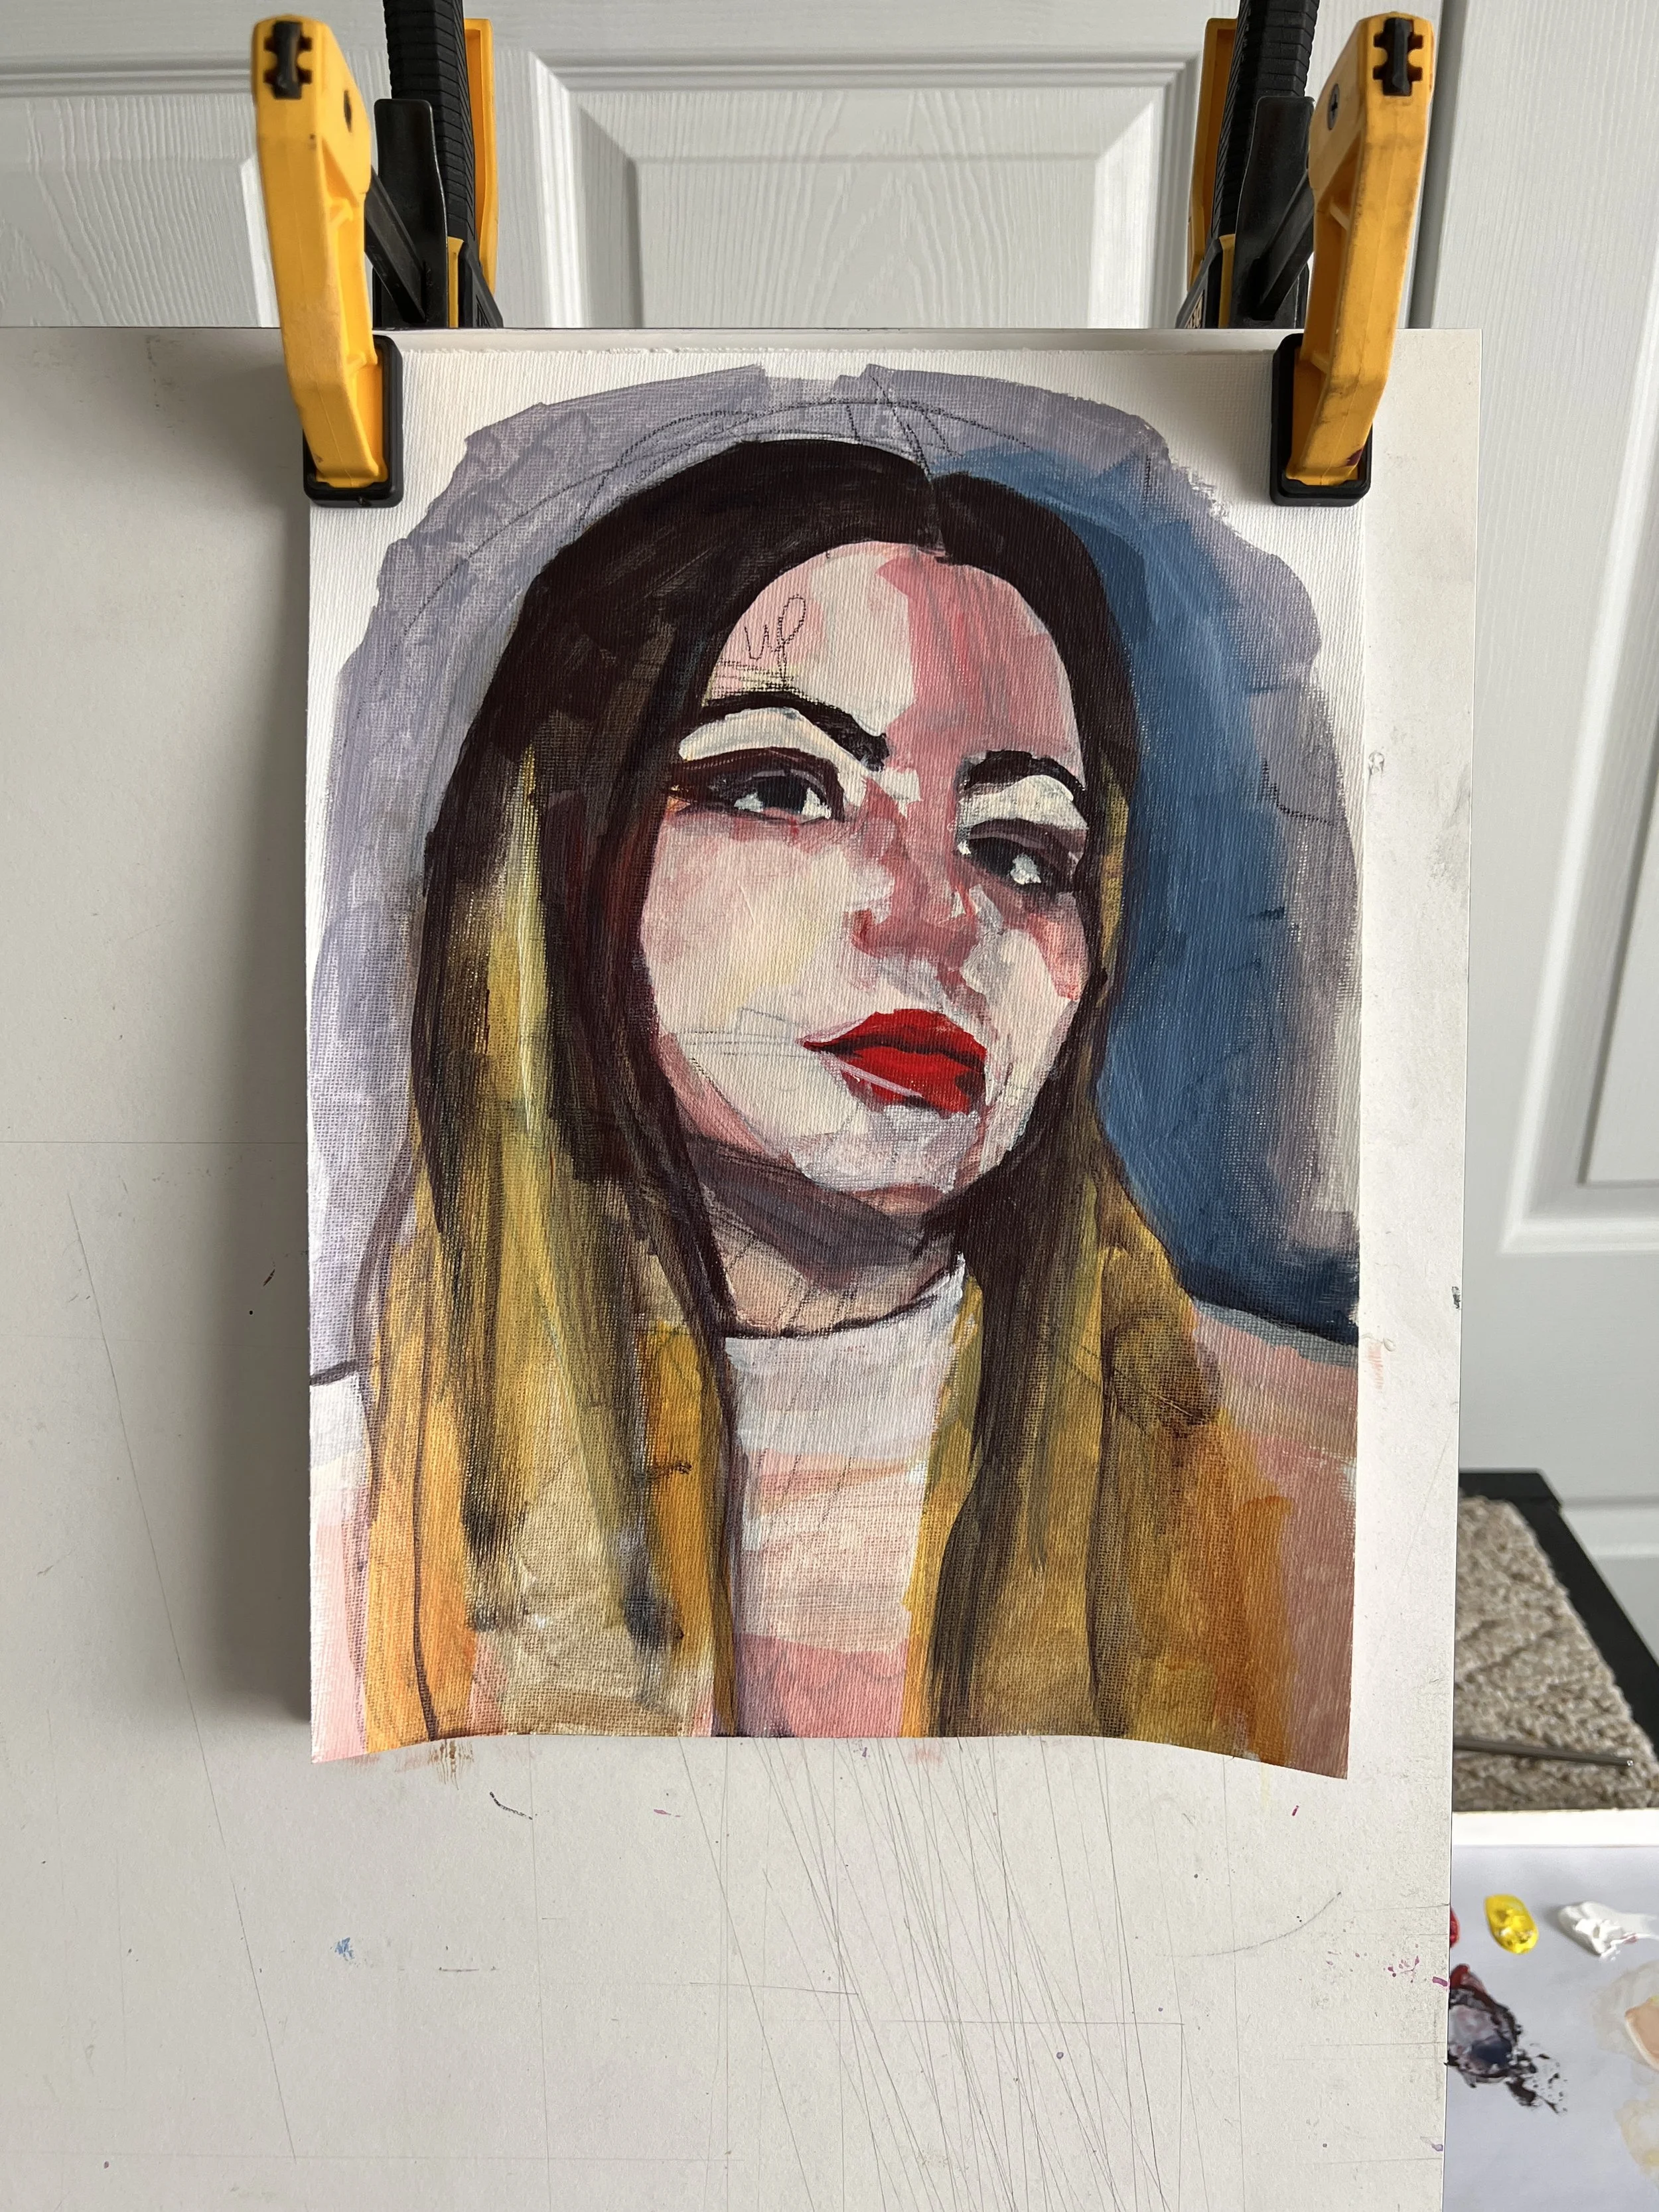
Second pass of acrylic paint on top of charcoal sketch.
Close-up of second pass of acrylic paint on top of charcoal sketch.
Later that afternoon, I came back to paint the third pass, which was much more layered and detailed. For this part of the painting, I moved from a large brush down to a medium-sized brush. Moving down a brush size helped as I added more details and began to “tighten up” the looseness of the painting. At this point, I was finally able to see the subject coming out!
The third pass was a very aggressive back-and-forth between me and the canvas using my paint and paintbrush. I very nearly scrapped this painting in frustration right before the photo below was taken. There was a lot of working and re-working, mixing color and re-mixing color. But it all came through for me in the end.
You can see in the photo below that there are fresh charcoal lines across the face of the painting. Throughout the course of making this painting, I really struggled with the nose and how it flowed into the upper lip and mouth area.
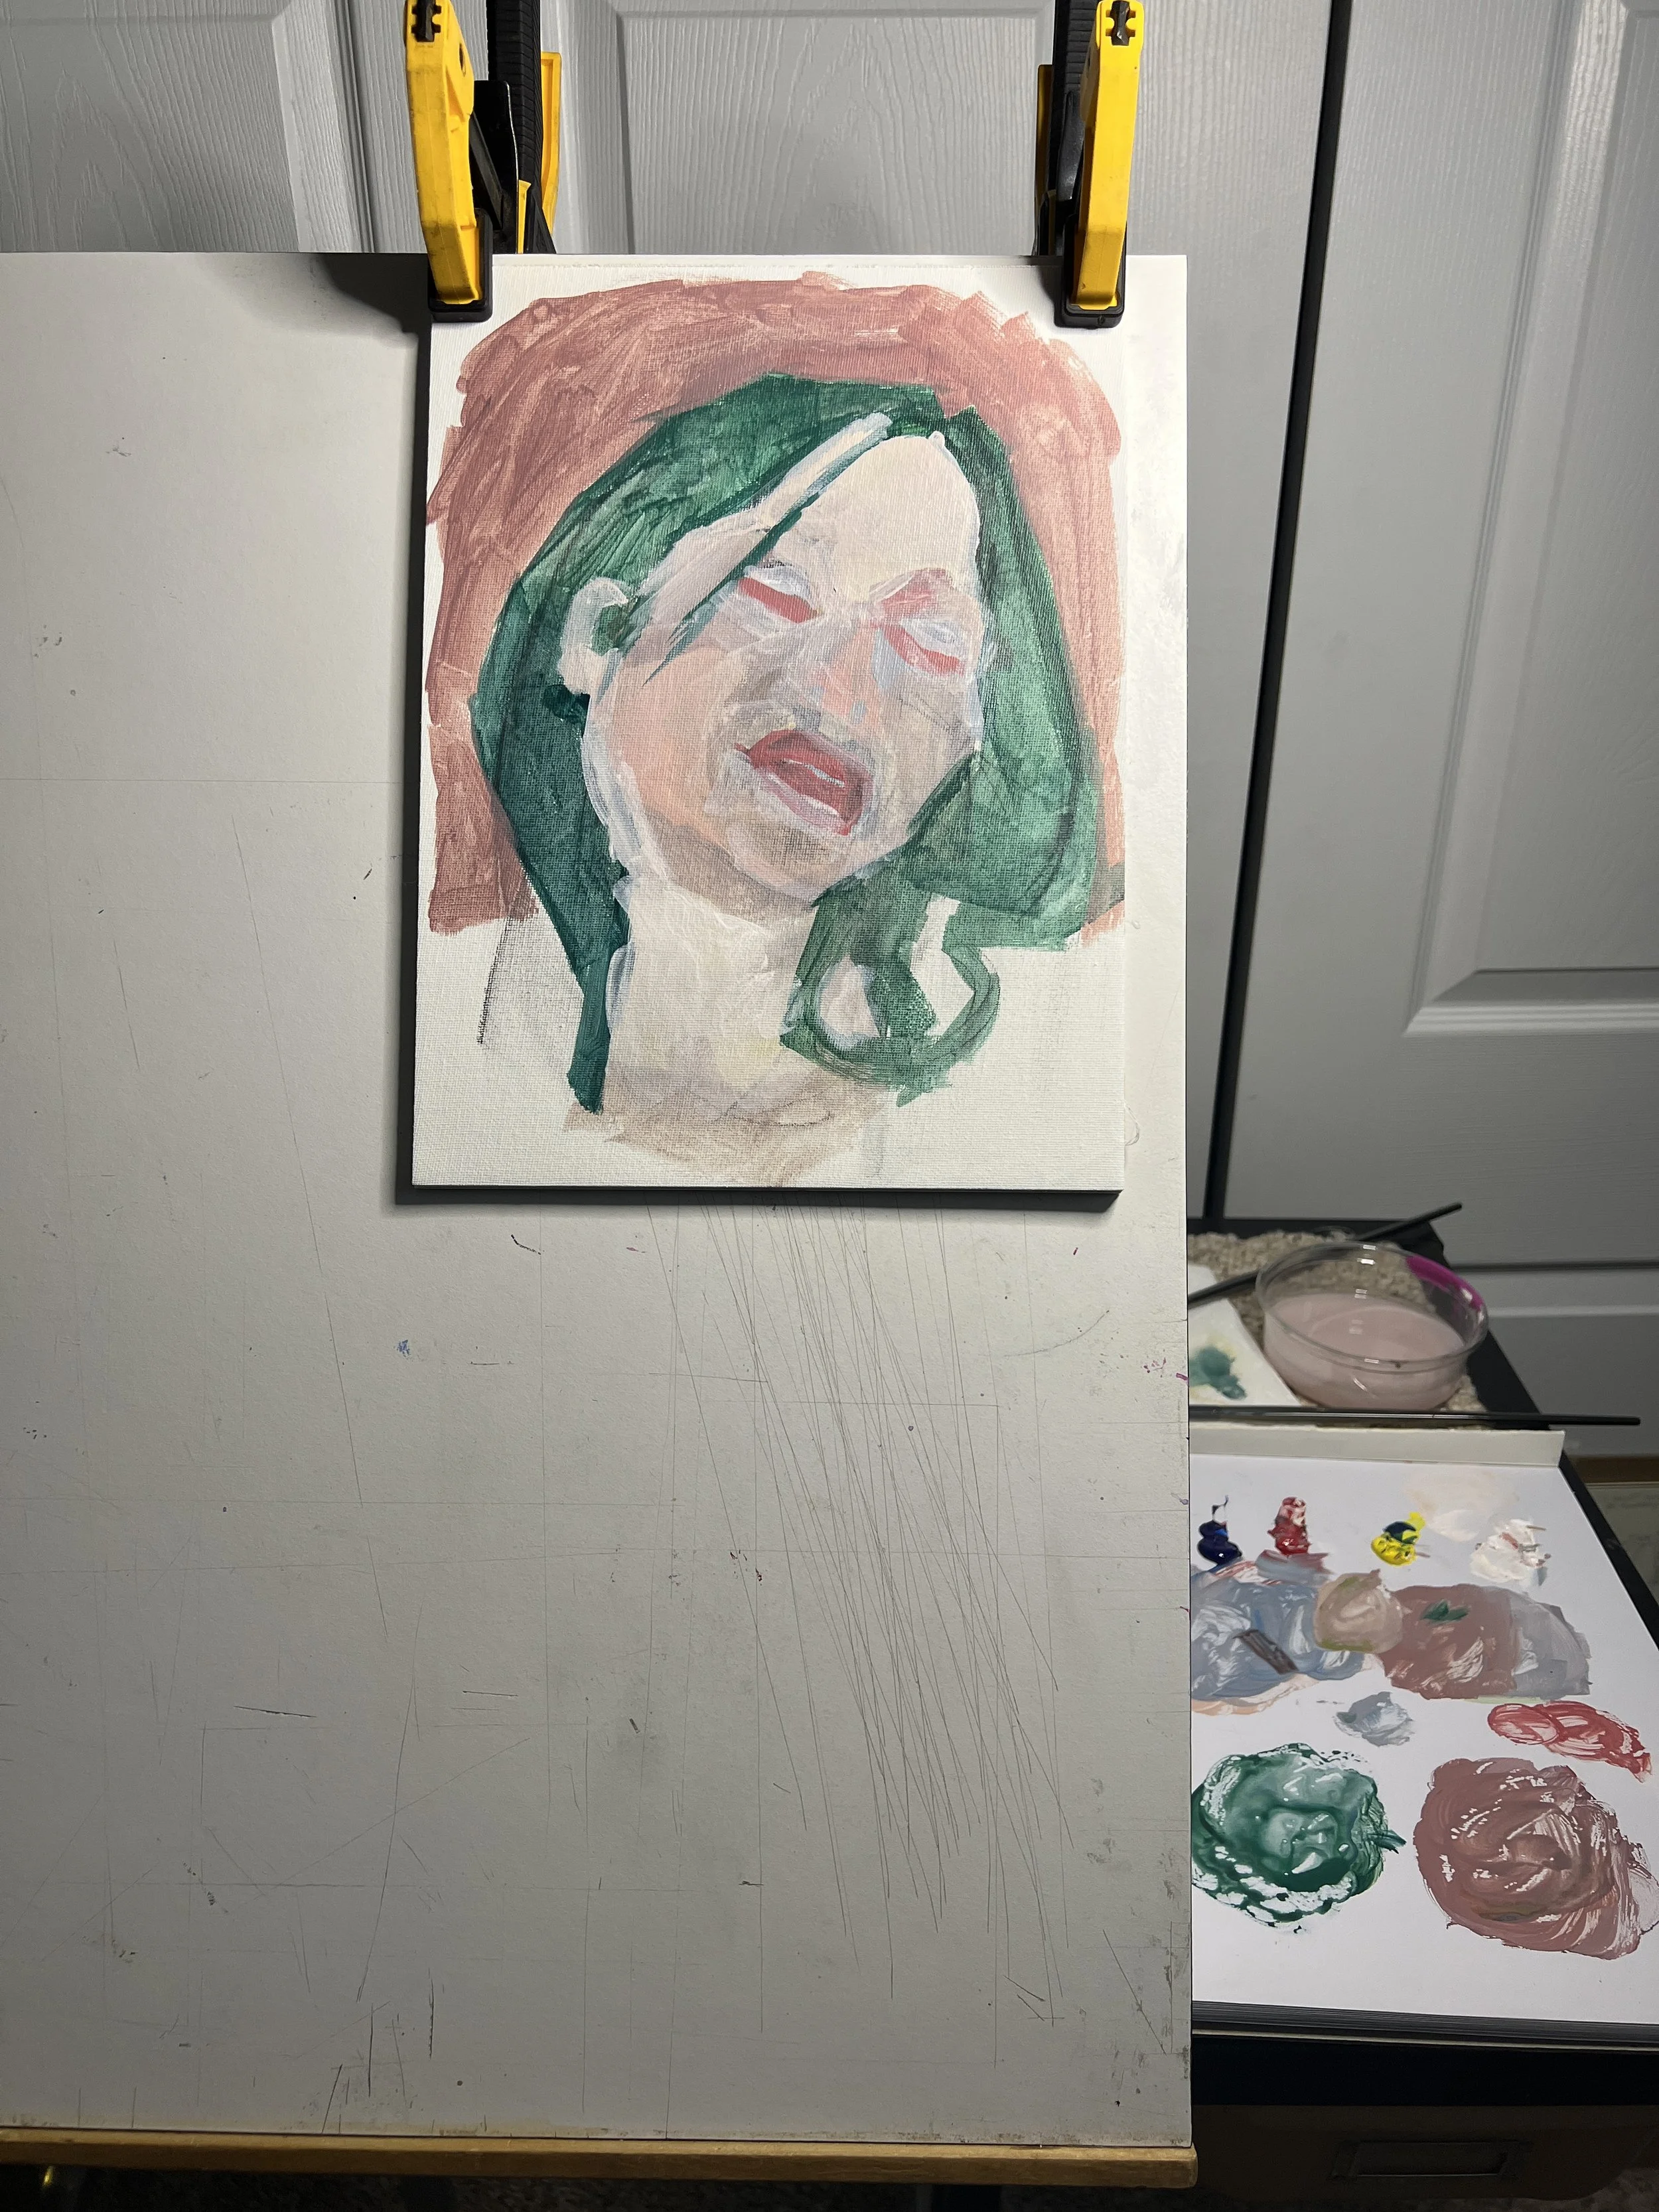
To create a fresh start for myself, I painted over the nose and mouth with thick, flesh-colored paint. When the paint was still tacky, I once again took my charcoal pencil and used it to re-draw the nose anew, as well as create some circles around the mouth area to mark for myself the fleshy, voluptuous parts found around the lips and teeth. With nearly pure red paint, I painted in the shape of the mouth, again not paying much attention to detail so much as placement and form.
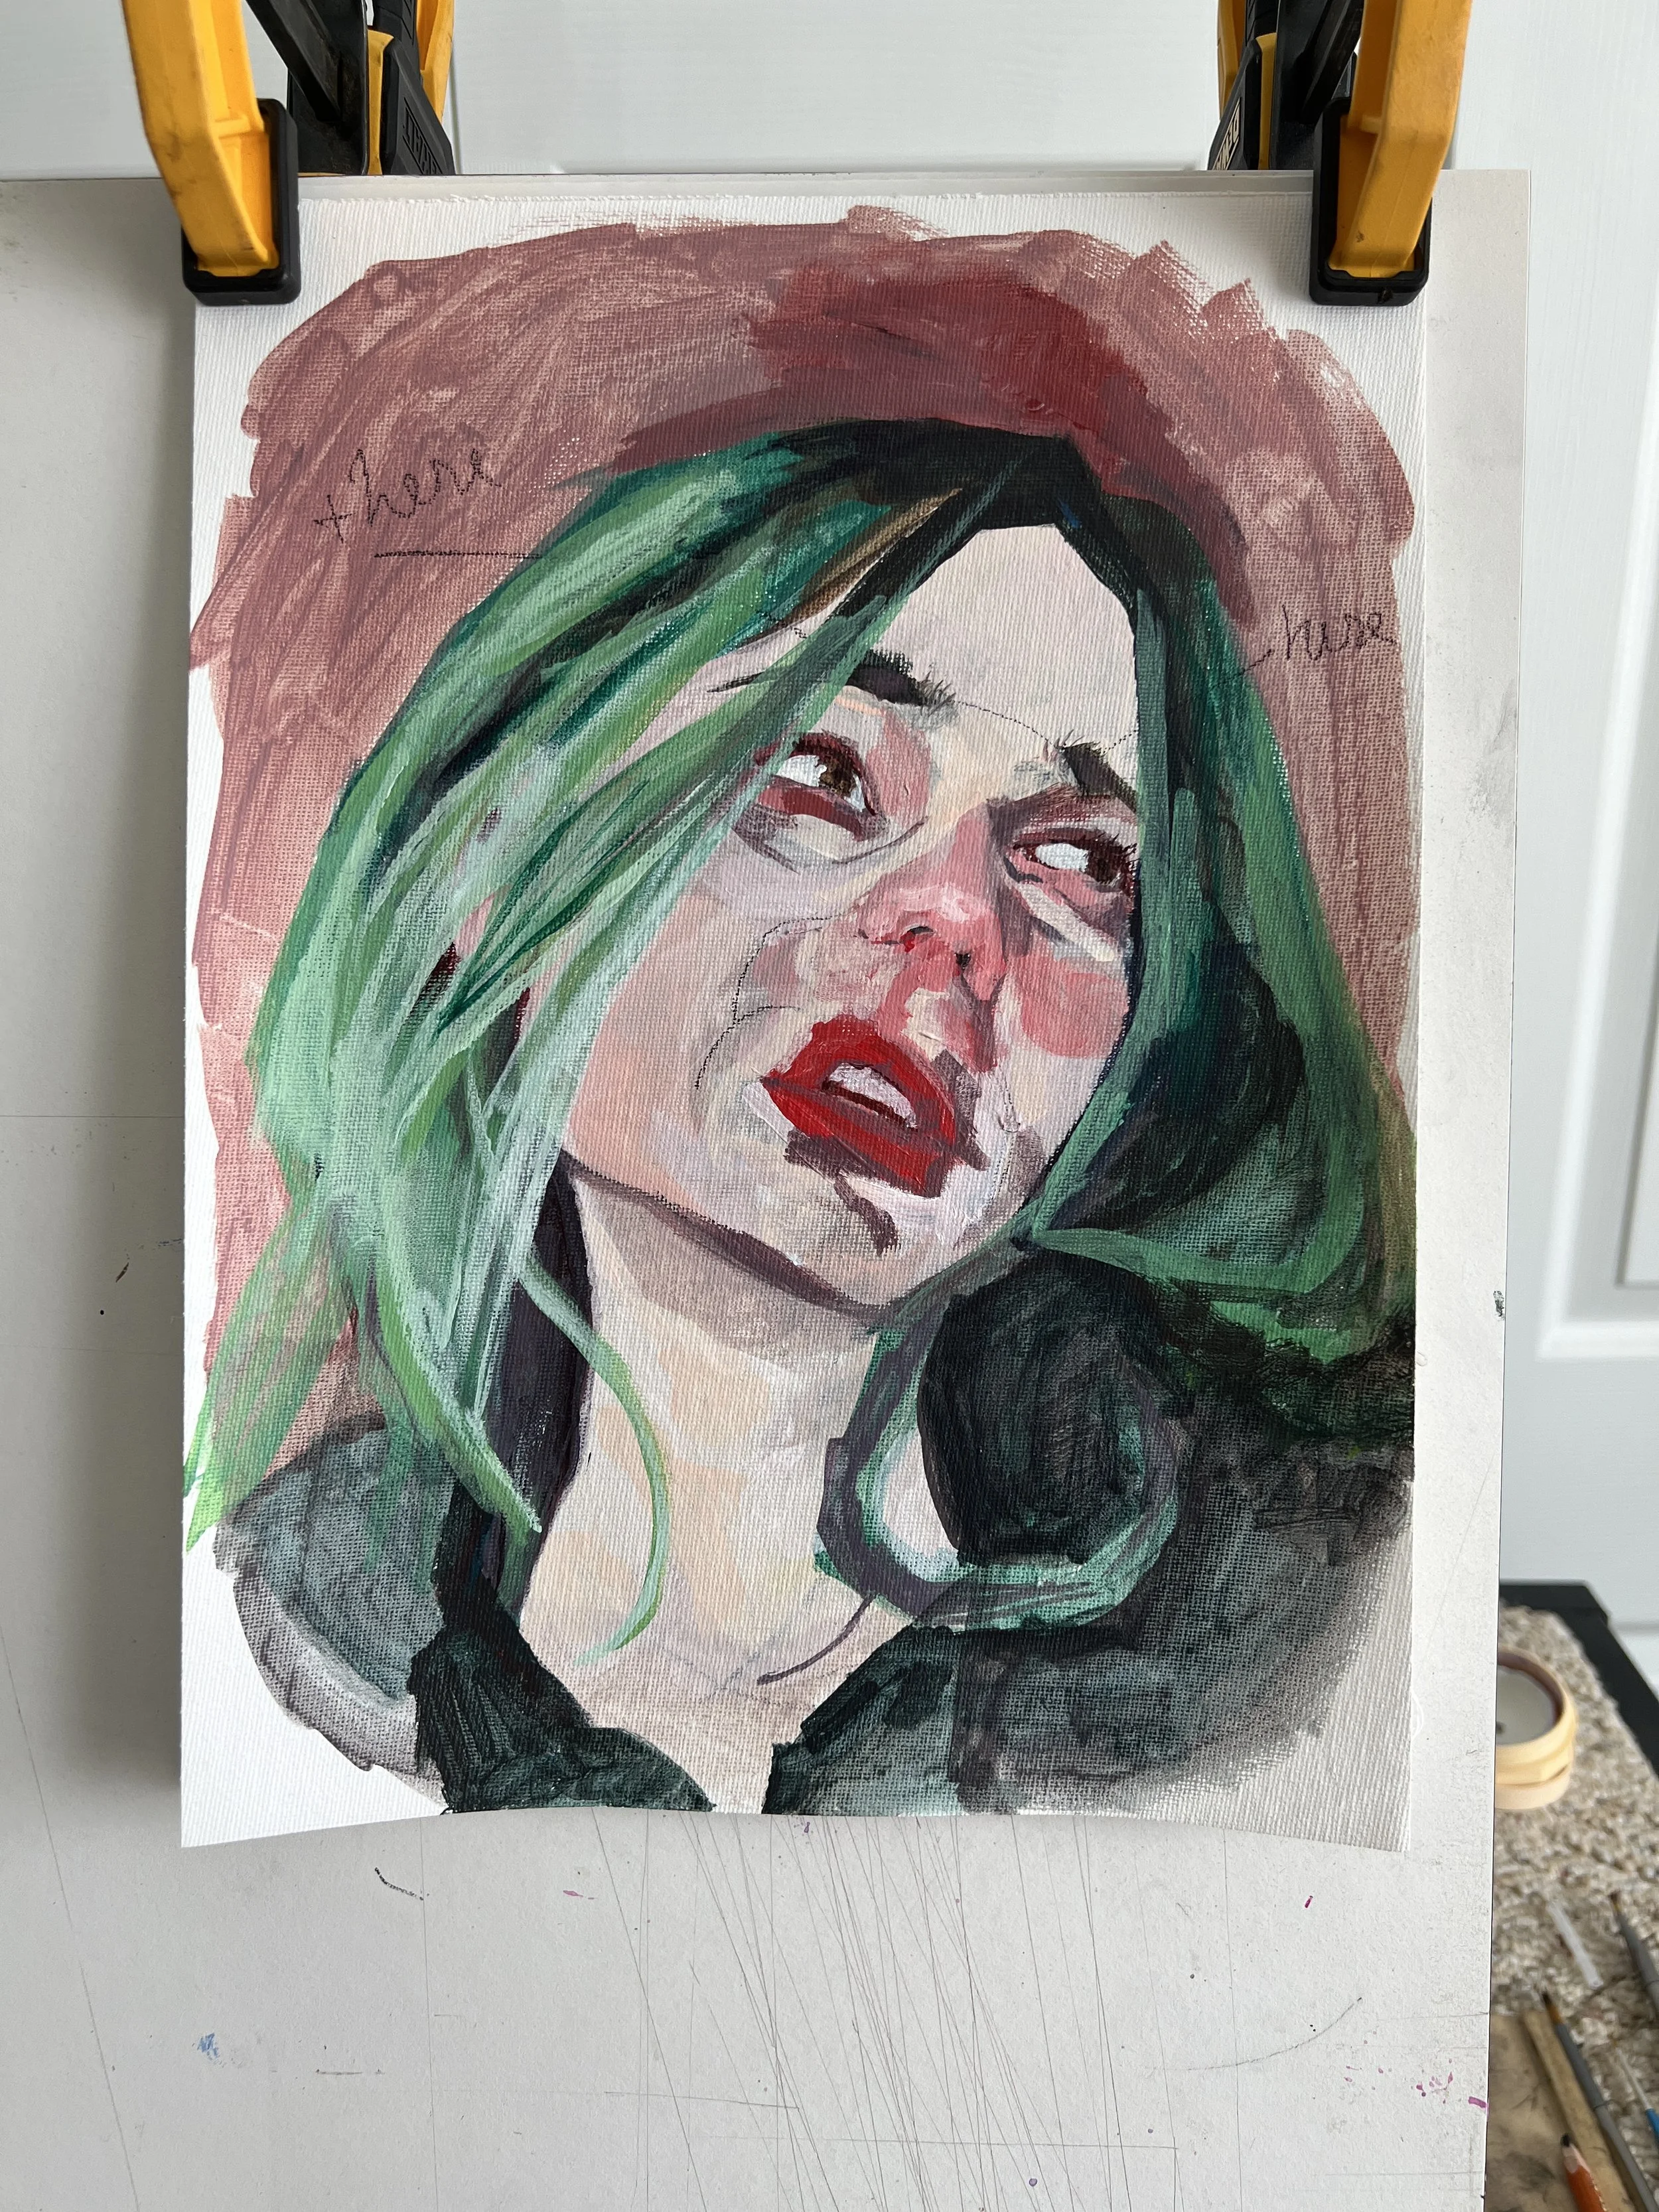
Thinking that the eyebrows were too full and placed too low, I again took my charcoal pencil, drawing a “cut-off” line on the nose bridge for each eyebrow where I felt they should end instead. I drew a line from the first mark and wrote, “here” on the right side of the canvas so that I could remember the new eyebrow length when I came back to paint the next day. On the left side, I drew a line to the other eyebrow, made a mark, and wrote, “+ here.” I liked how the writing turned out and found that it looked like it read “here” and “there.” I wasn’t sure if this writing would get covered up later or not, but I hoped for the best. I stopped the painting where it was, cleaned up my studio, and planned to come back to work on it the next day.
I enjoyed the painting at this phase and found it quite beautiful.
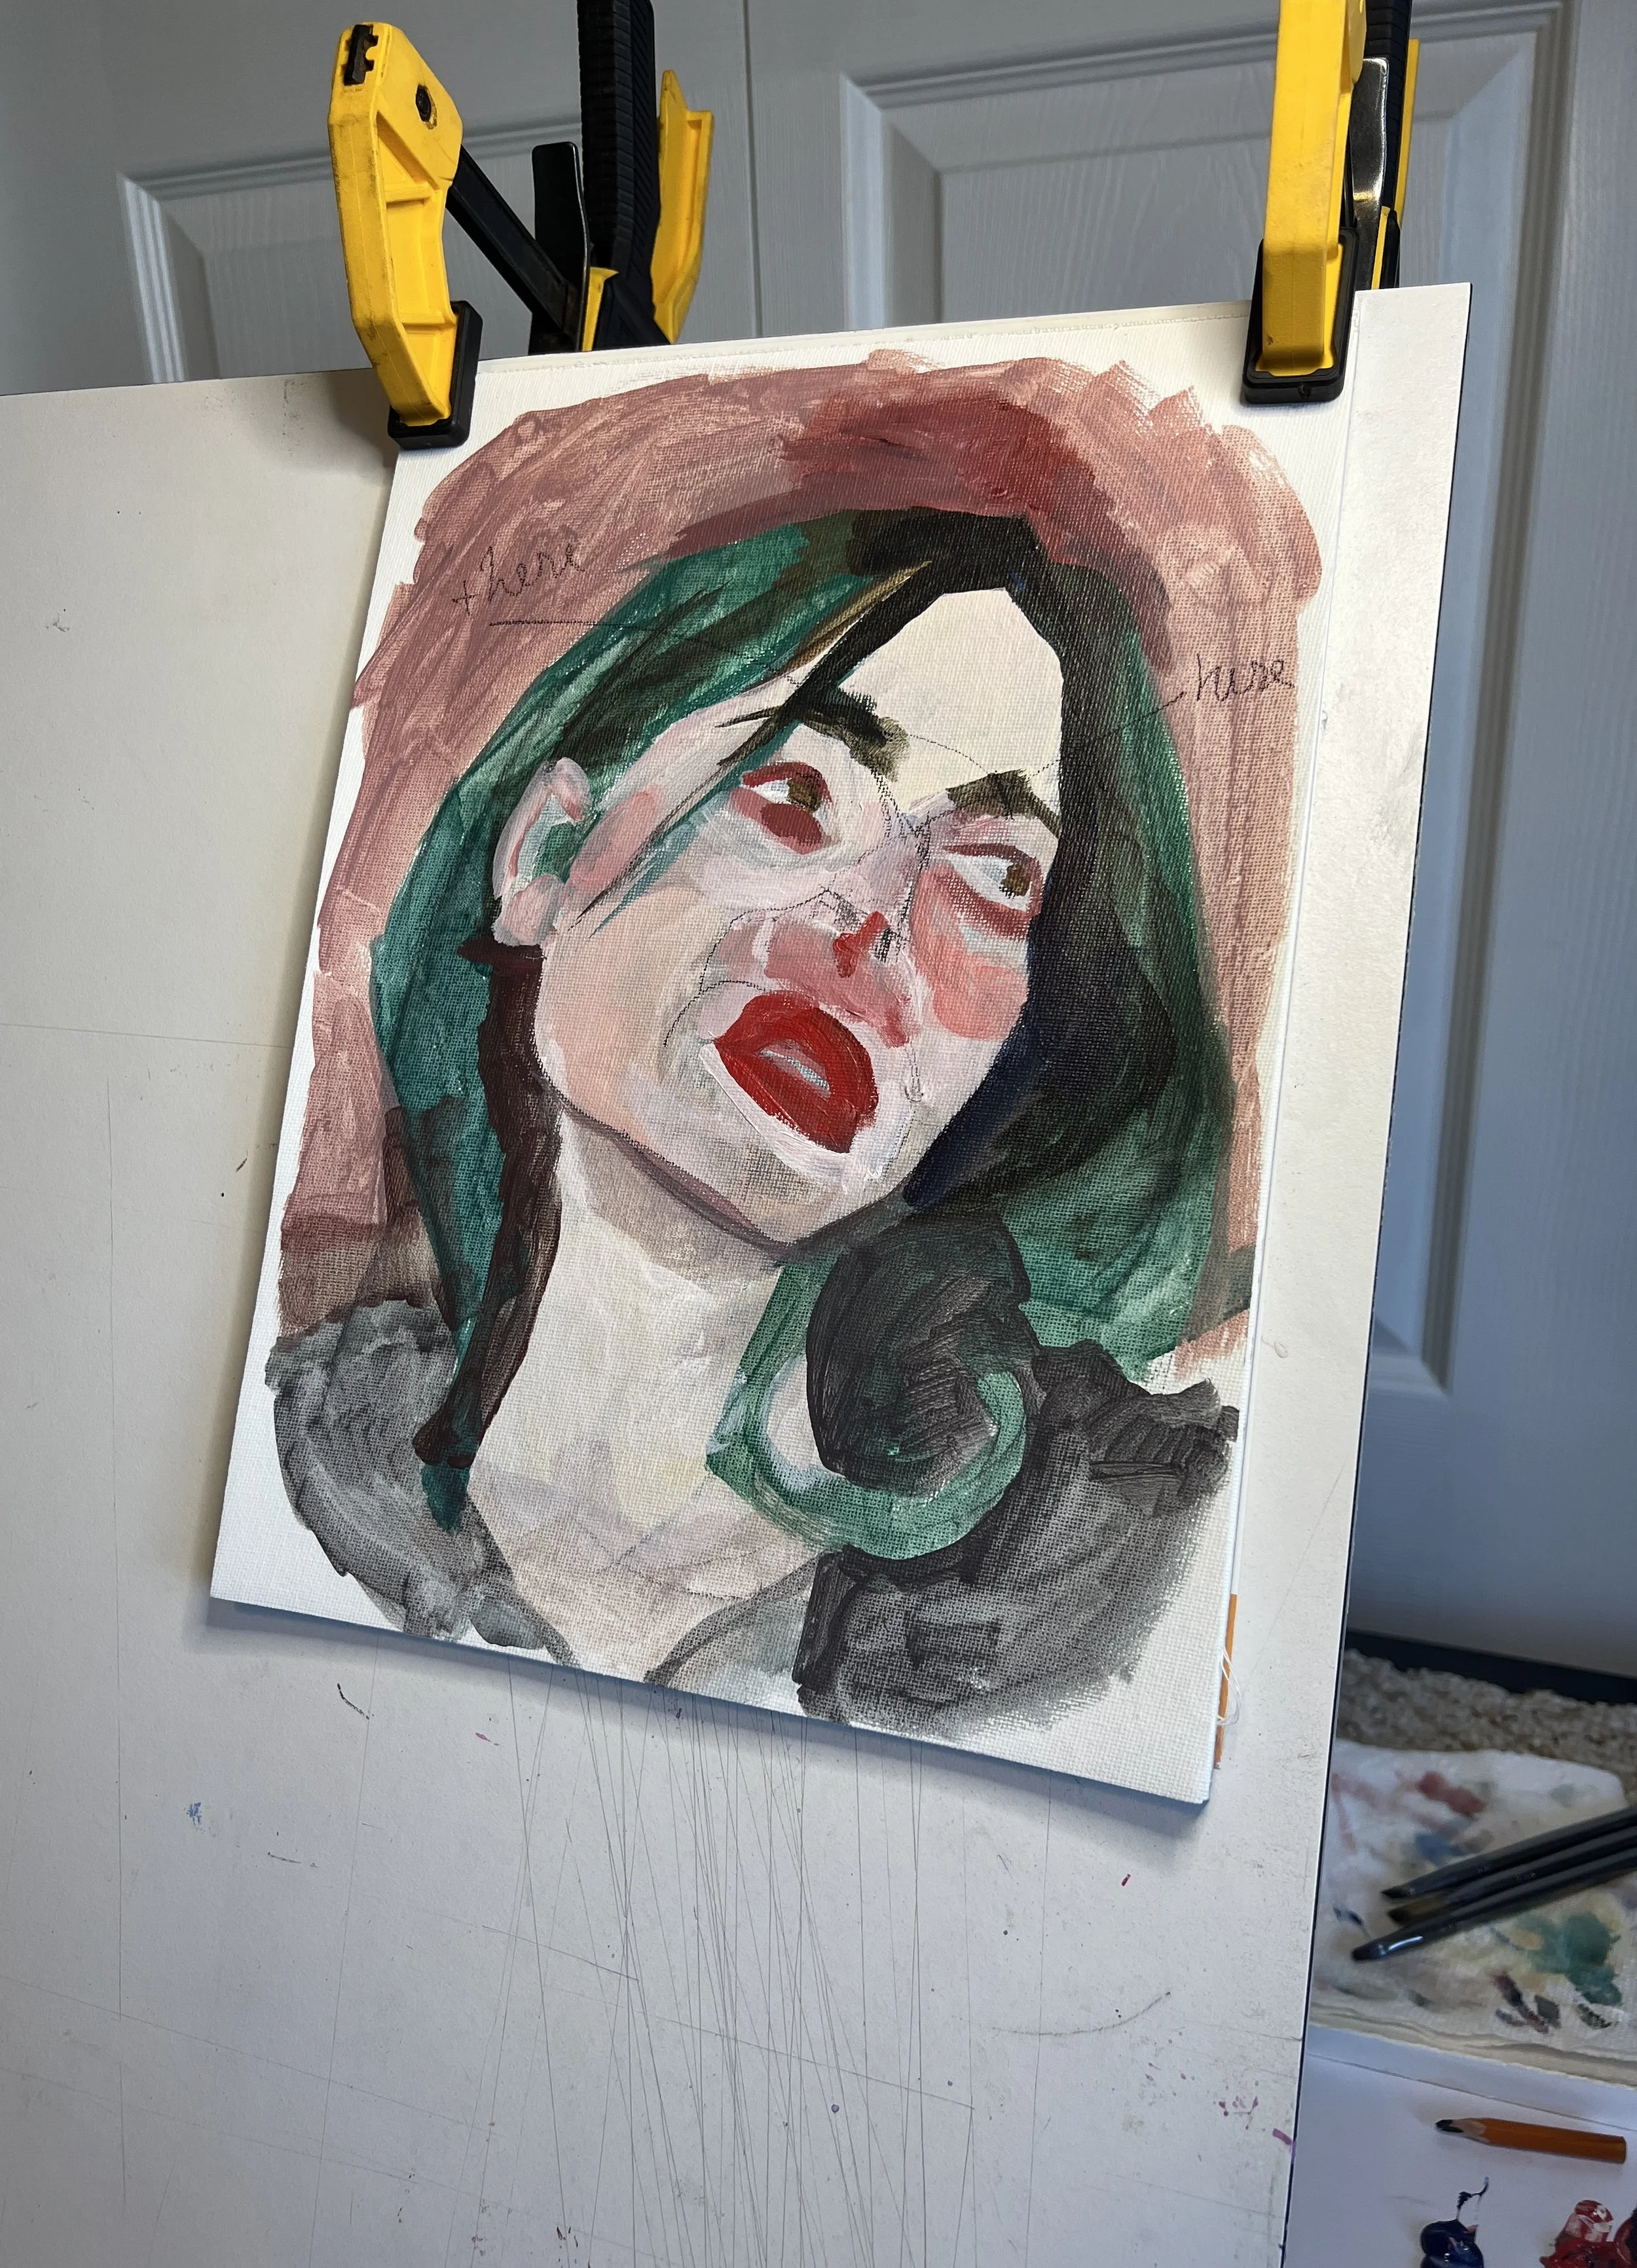
Third pass with acrylic paint.
When I came back to work the next day, I moved on from using a medium brush to using a medium-small brush so that I could begin to add finer details, tighten the overall painting more fully, and really head toward the finish line.
I knew I needed to work on the eyes, especially the one on the right, so I began to cut in around the eyes with some pink flesh tones in order to create a more believable eye shape and eyelid. I also painted in the nose using different gradients of the same pink over the charcoal sketch that I had made the night before. I added rosy areas in the cheeks, eyes, and nose, as well as white highlights on the skin to show where it caught the light. I used flesh-colored paint on the eyebrows to paint up to the marks I had made with charcoal on the eye brows the night before, in order to make the eyebrows appear smaller.
I used the medium-small brush to paint lines of light green paint over the existing dark green of the hair in order to represent individual pieces of hair across the face.
At this point in the painting, each new mark brought the painting leagues closer to completion. I was heading toward the finish line fast and I could not wait for the painting to be done!
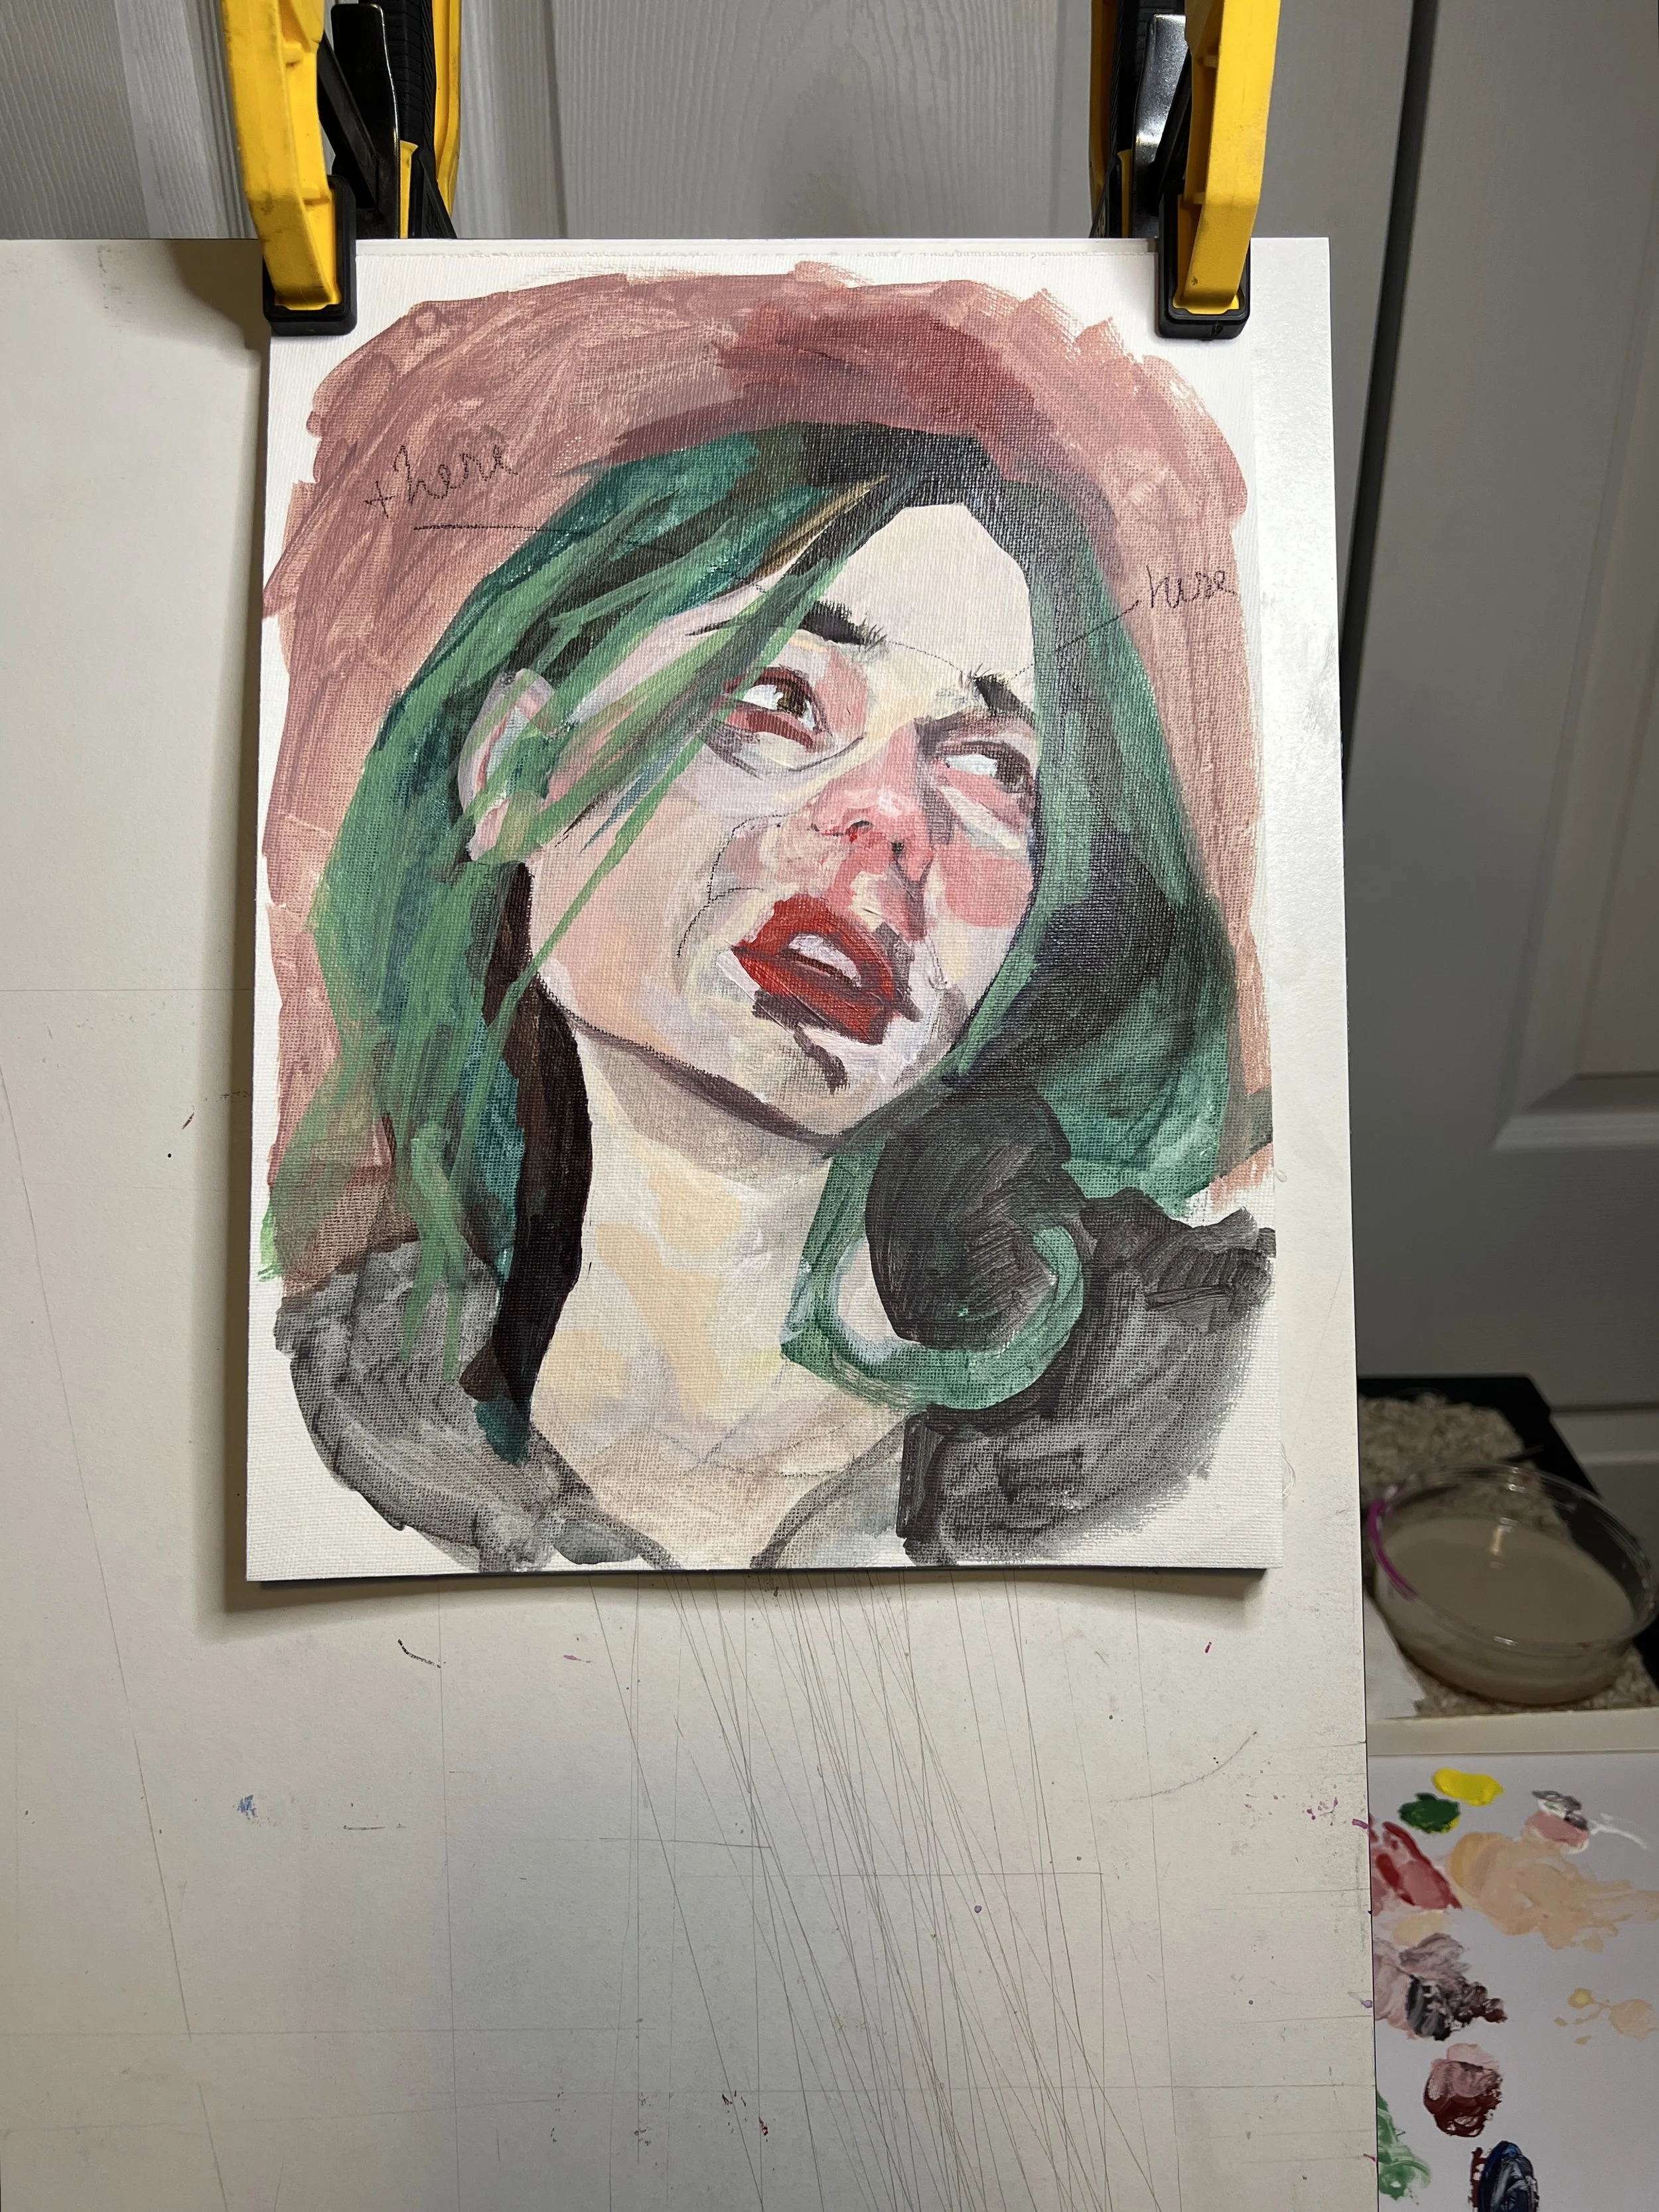
Refining the eyes, nose, and face, as well as adding green sections of hair over the face.
Refining the eyes, nose, and face, as well as adding green sections of hair over the face. (3/4 view).
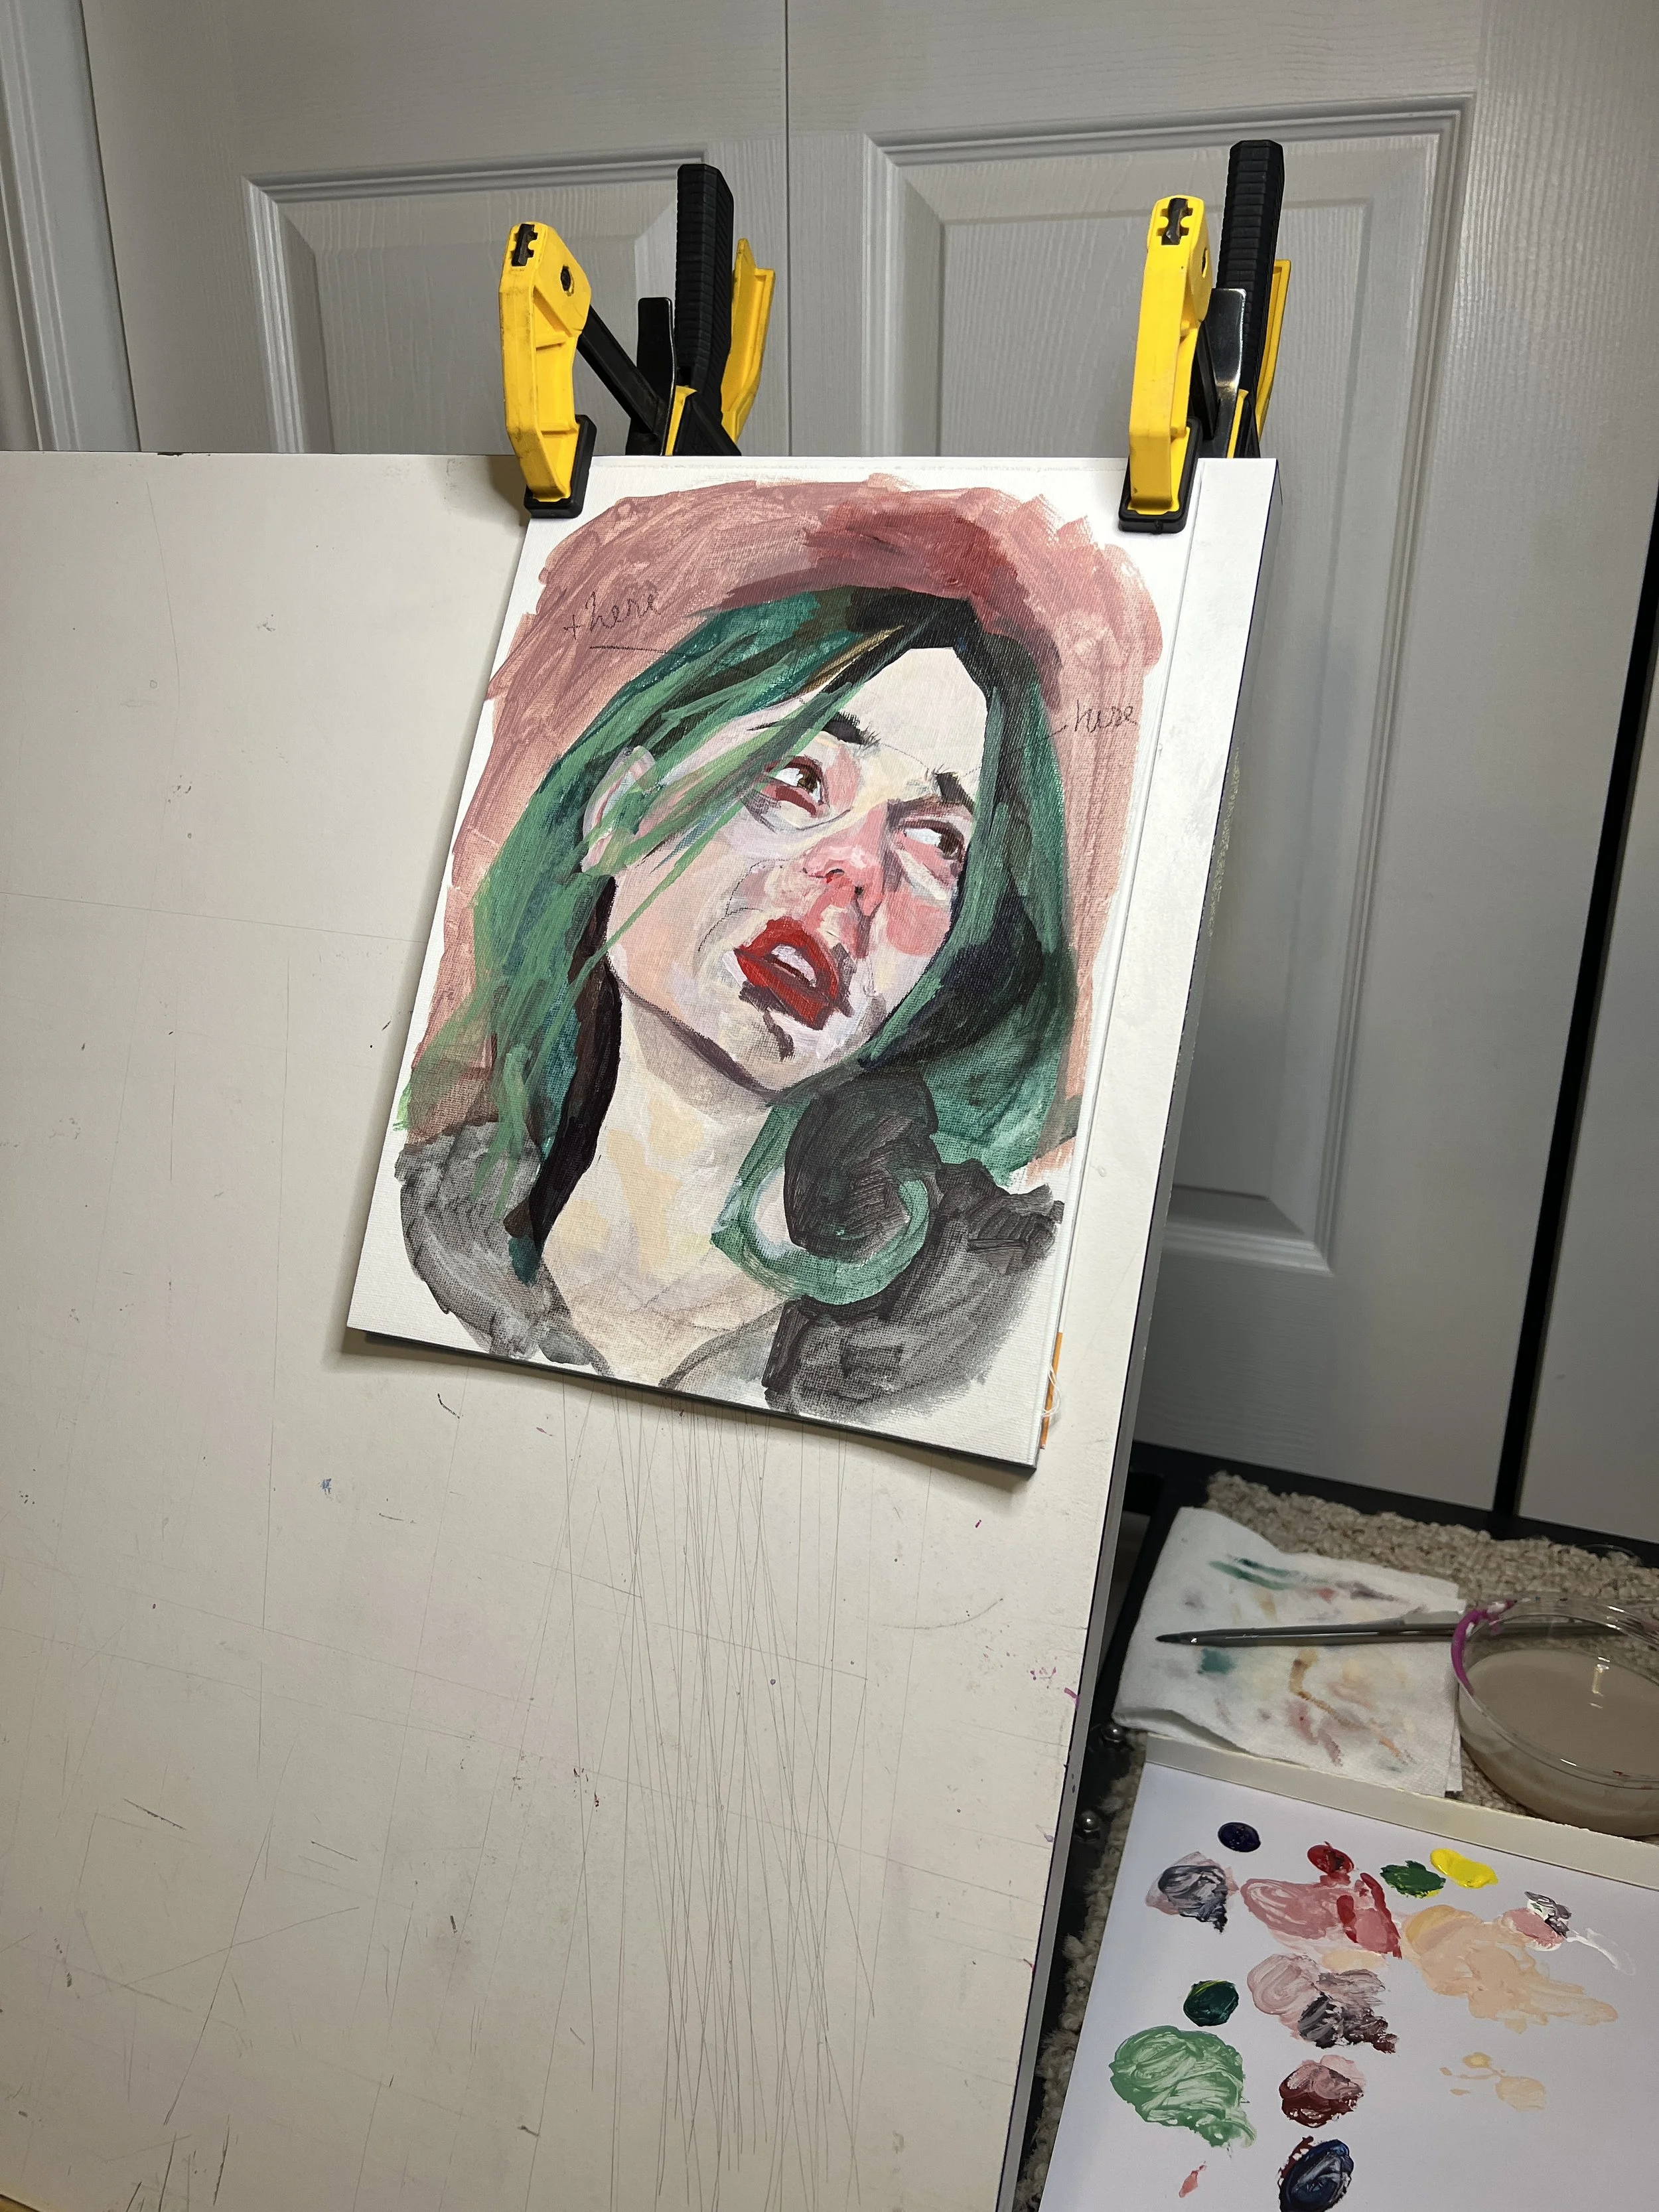
Almost completed painting with green lines now fully across the face to show hair.
Finally, I used the smallest detail brush I had, which you can see in the photo above (it has a blue handle), to put in the finishing touches of white and mint green highlights in the hair. I also added final details such as eyelashes; individual hairs in the eyebrows; fine lines in the mouth and teeth; and twinkles in the eyes. At the end of the day on a Friday, with no one around, the painting was finished!
Finished painting.
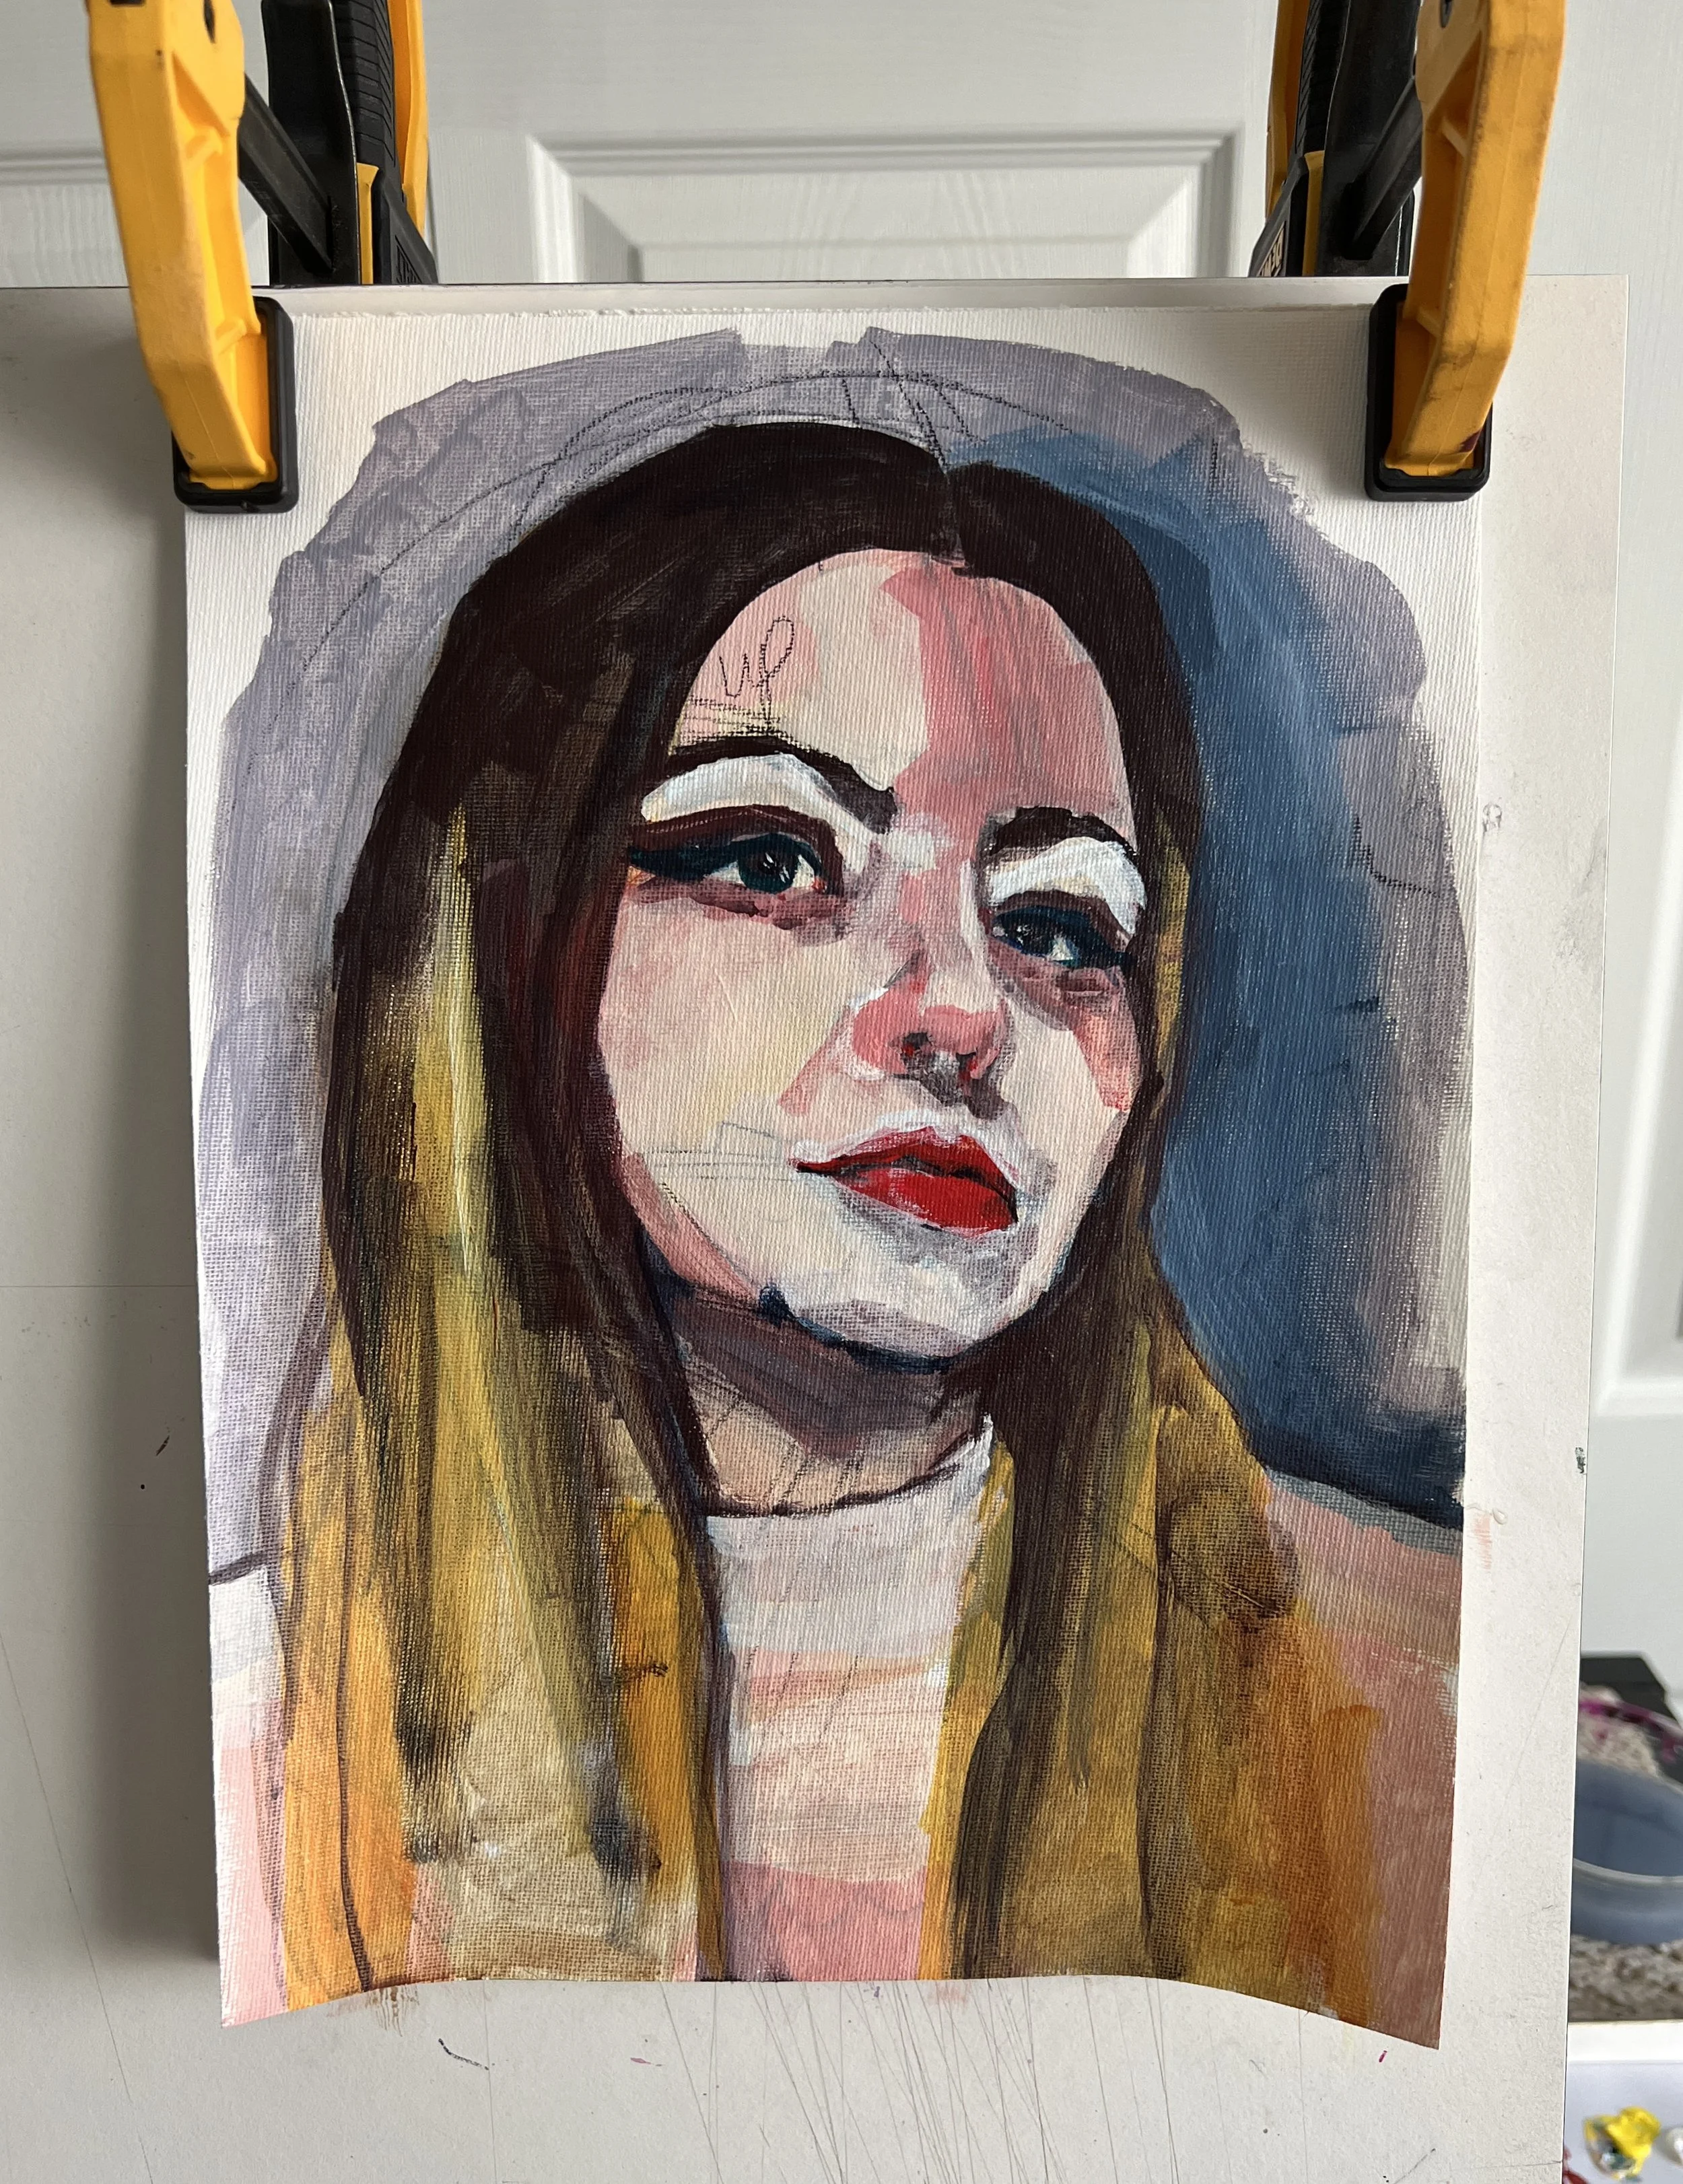
Painting Sketch: Me, Myself, and Eileen
Completed painting sketch of self-portrait.
Having completed the first expressive sketch of Elly, I couldn’t wait to dive into another painting sketch using the same technique.
I am planning to use the portrait below as part of a series of five paintings that I am currently working on, and so I chose to use it as practice.
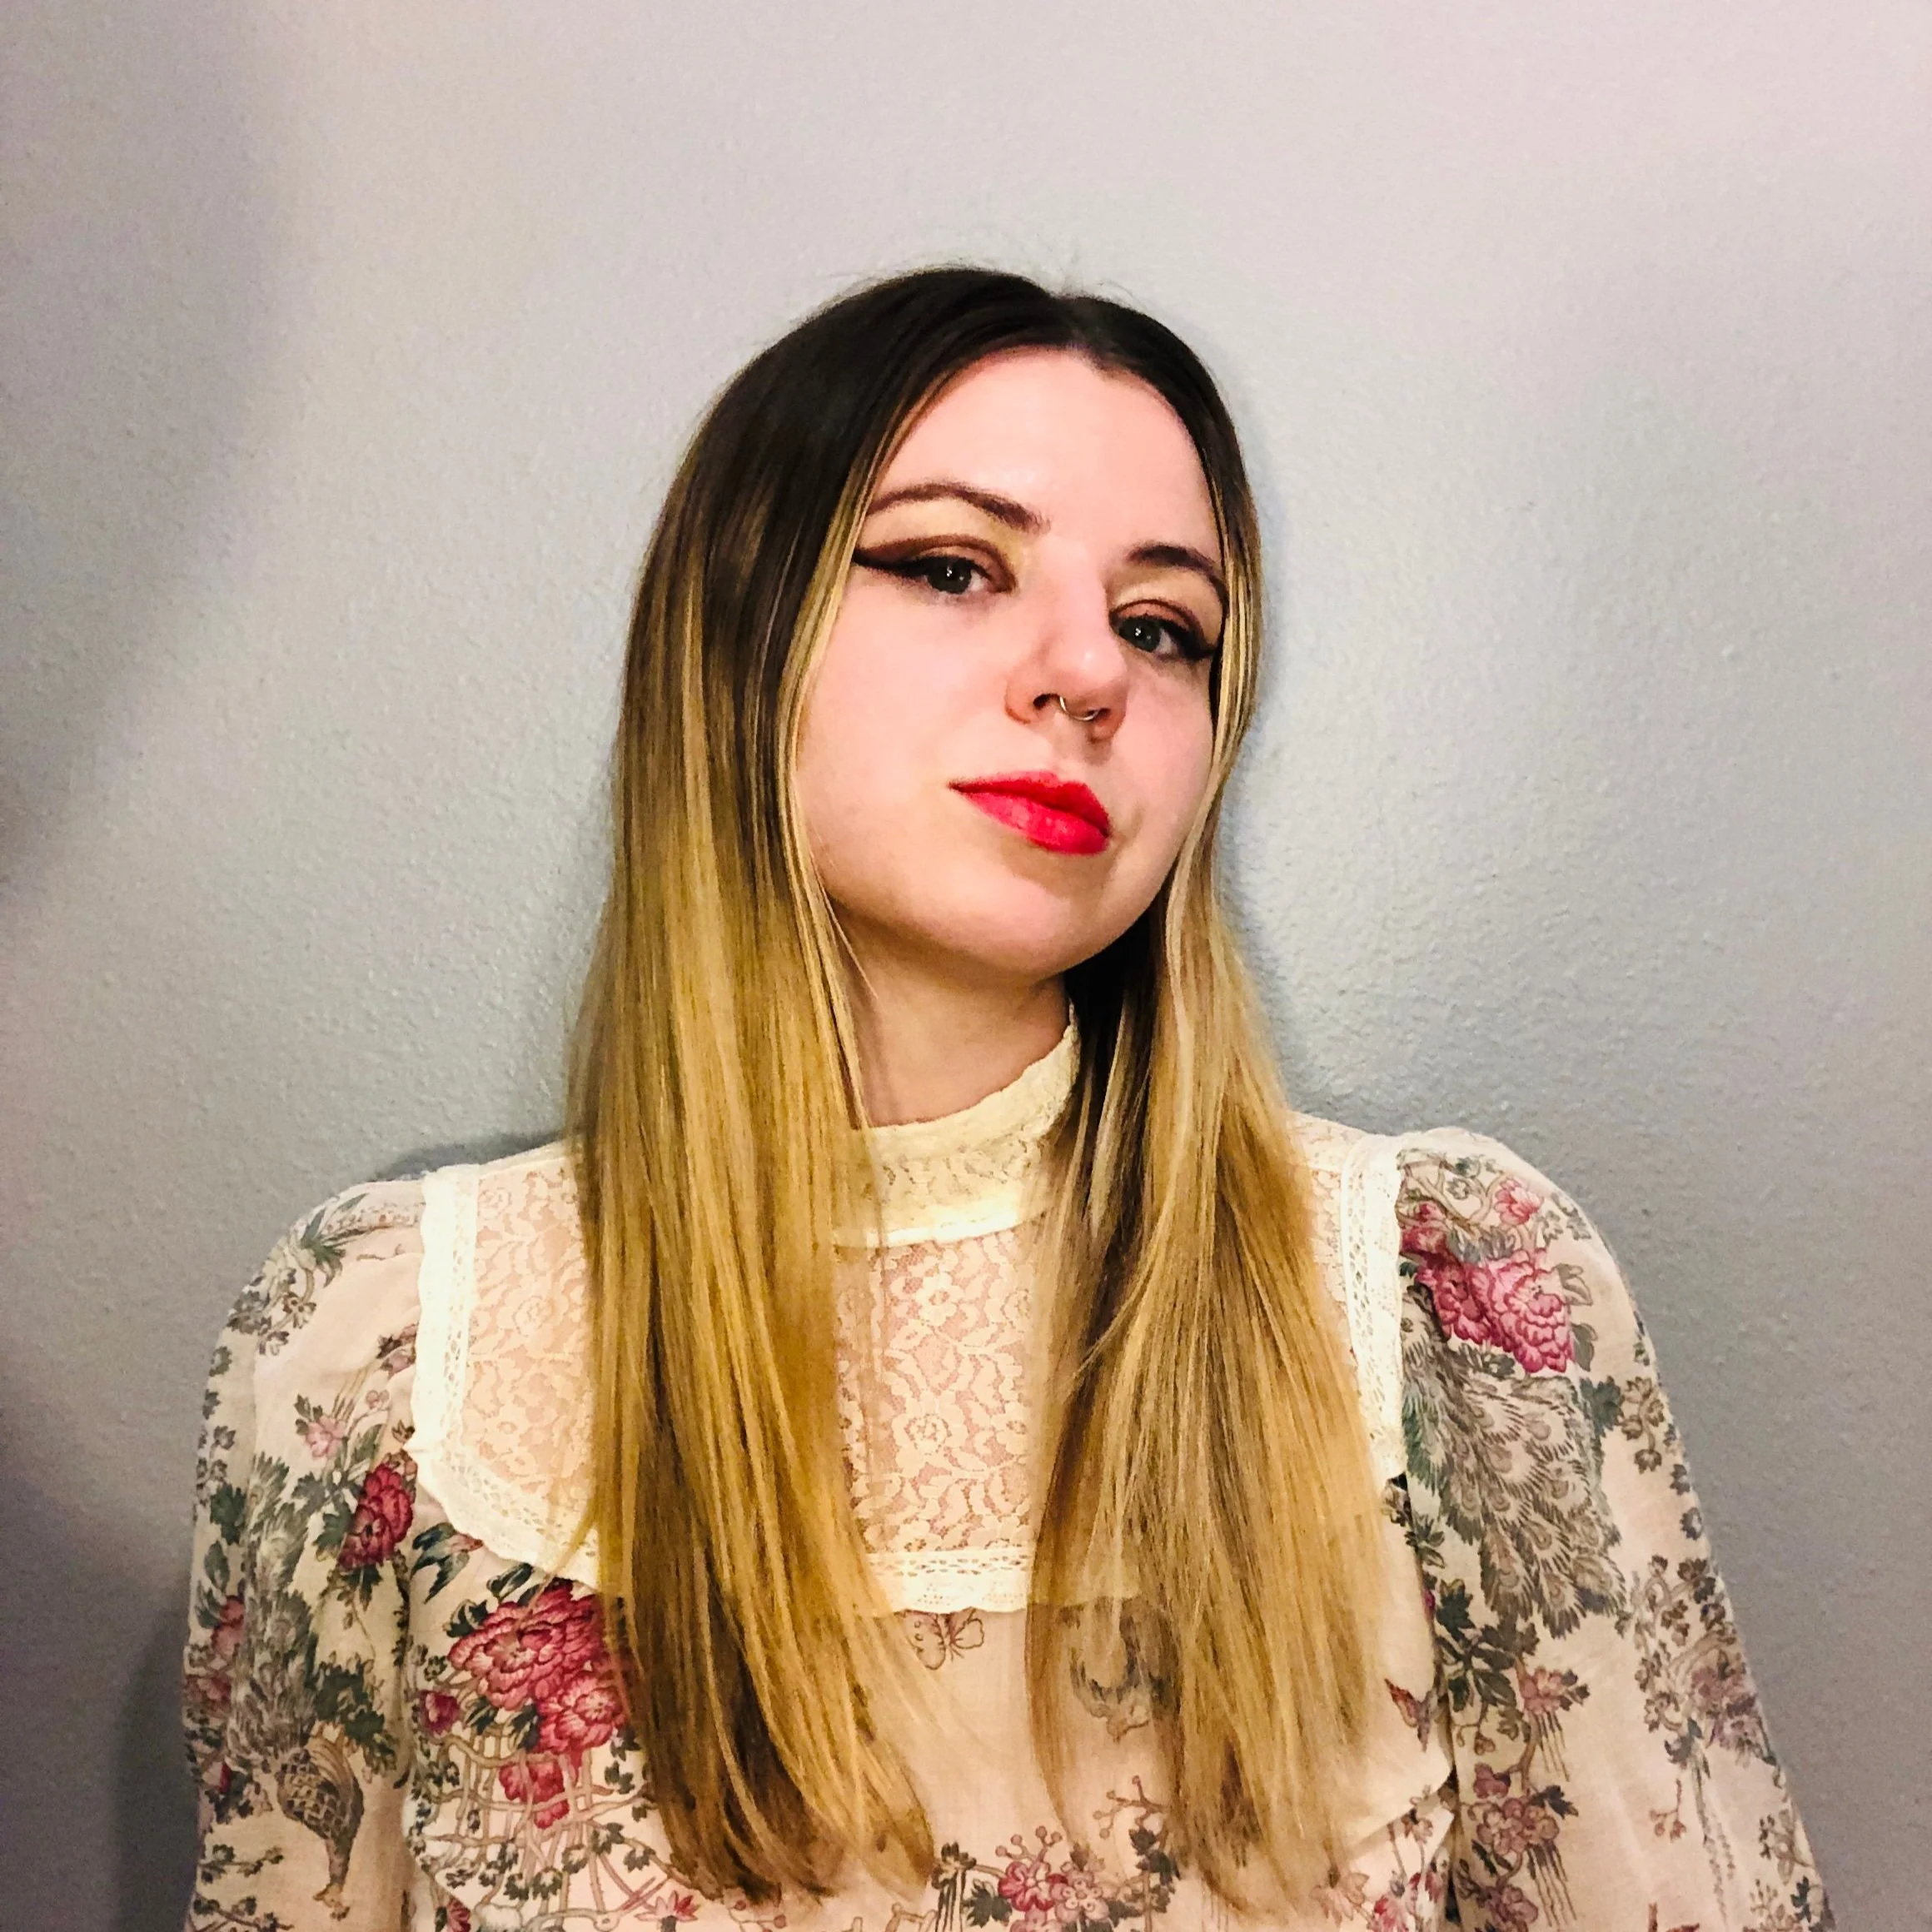
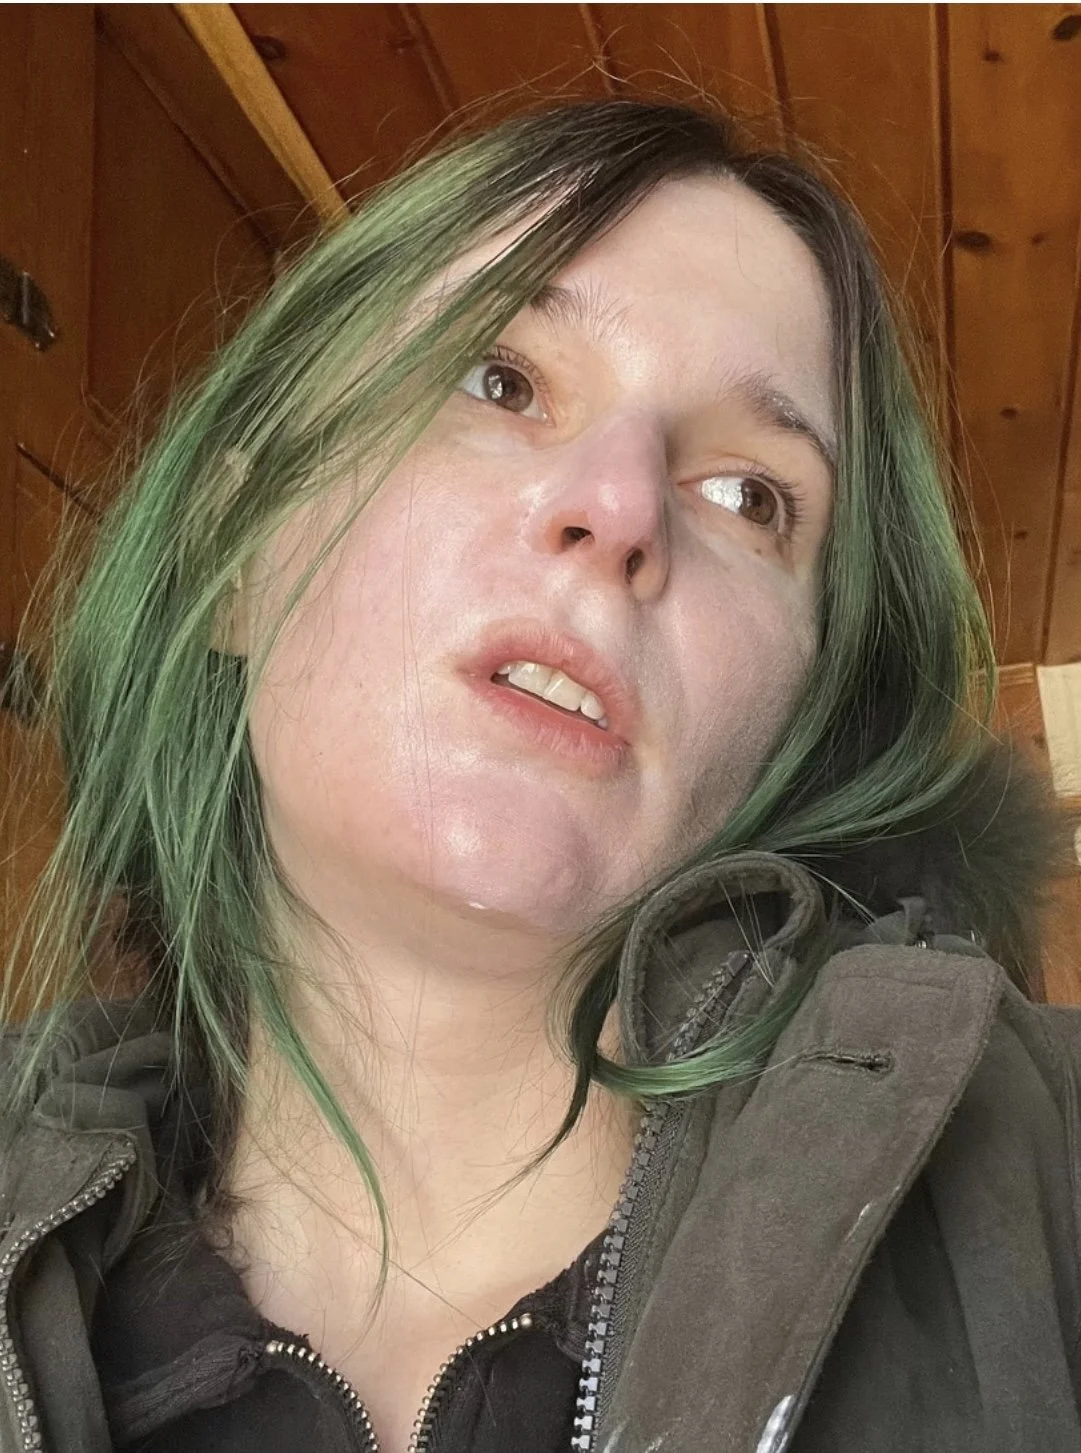
Reference image for painting of self-portrait.
Similarly, for this painting, I began by using a compressed charcoal pencil to make a very simple sketch in order to map out where the portrait would be located on the canvas.
Similar to the first painting of Elly, I started out with a neutral color for the skin tone, as well as the hair and background. As with the painting before, I had plans to add darker colors and lighter colors later as I added more detail.
Overall, I felt that I was more successful with the initial neutral skin tones in the first pass of this painting, than in the previous painting of Elly. Again, I used a large brush for these beginning, loose marks.
Loose marks on first pass of painting consisting of neutral colors for each main area of the portrait.
Painting with all neutral tones completely filled in.
Though the painting felt lovely at this point, I realized that I hadn’t accentuated the tilt in the head as much as I felt it was present in the reference photo. I felt that it was imperative that the three-quarter turn of the head was emphasized in order to convey expression. I used my charcoal pencil to draw a new center line for the head, as well as lines for the eyes, lips, and nose. These lines indicated a stronger three-quarter turn in the portrait and would be guide lines as I worked on the painting moving forward.
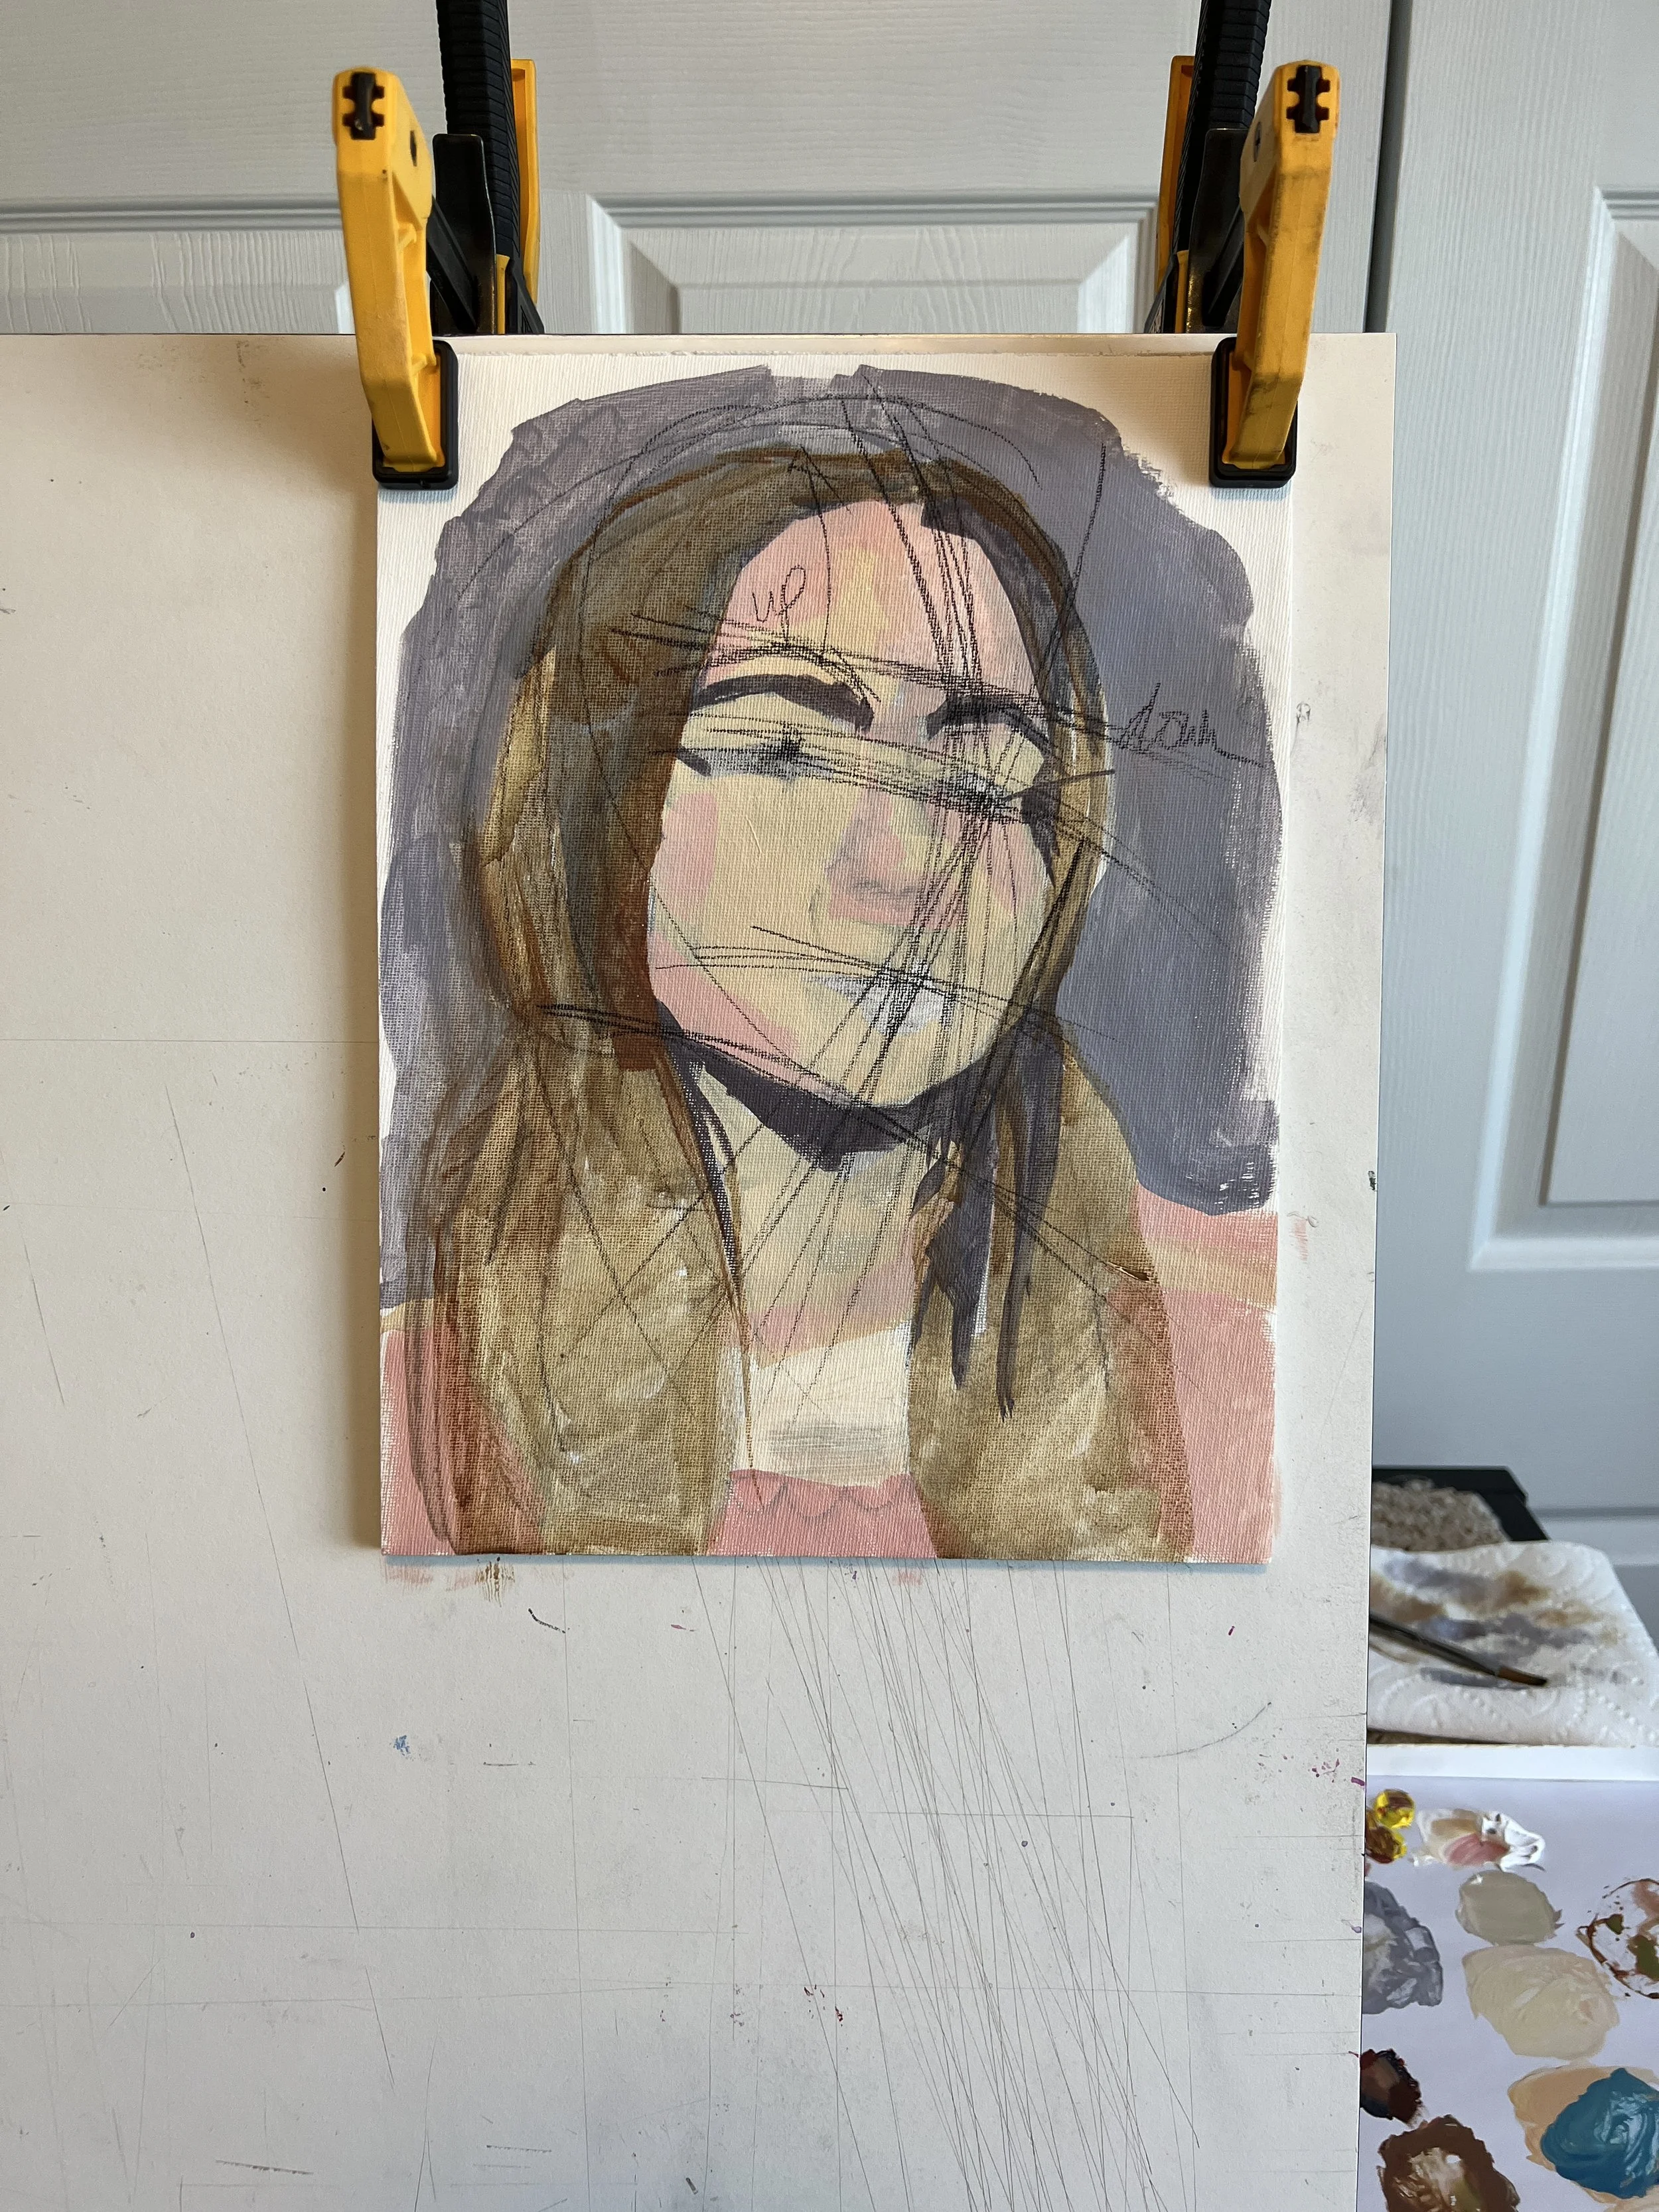
New charcoal lines to indicate where I wanted to make adjustments.
These new charcoal marks were a lot of fun to make. I have found through practice and through working with Elly that the more fearless I am in my mark-making, the more interesting the painting turns out. The process goes faster, too, because I am not too careful or too worried about the end product.
As part of my adjustments, I wrote the word “up” where I wanted the left eyebrow placed higher, and I wrote the word “down” where I wanted the eyebrow on the right, and the right eye, to be placed down further. Like before, I was not too concerned that these words or lines would show through at the end.
Even though the first pass of paint was mostly dry, I found that I was drawing into some wet layers. I left the painting to dry at this stage before coming back the next day to work.
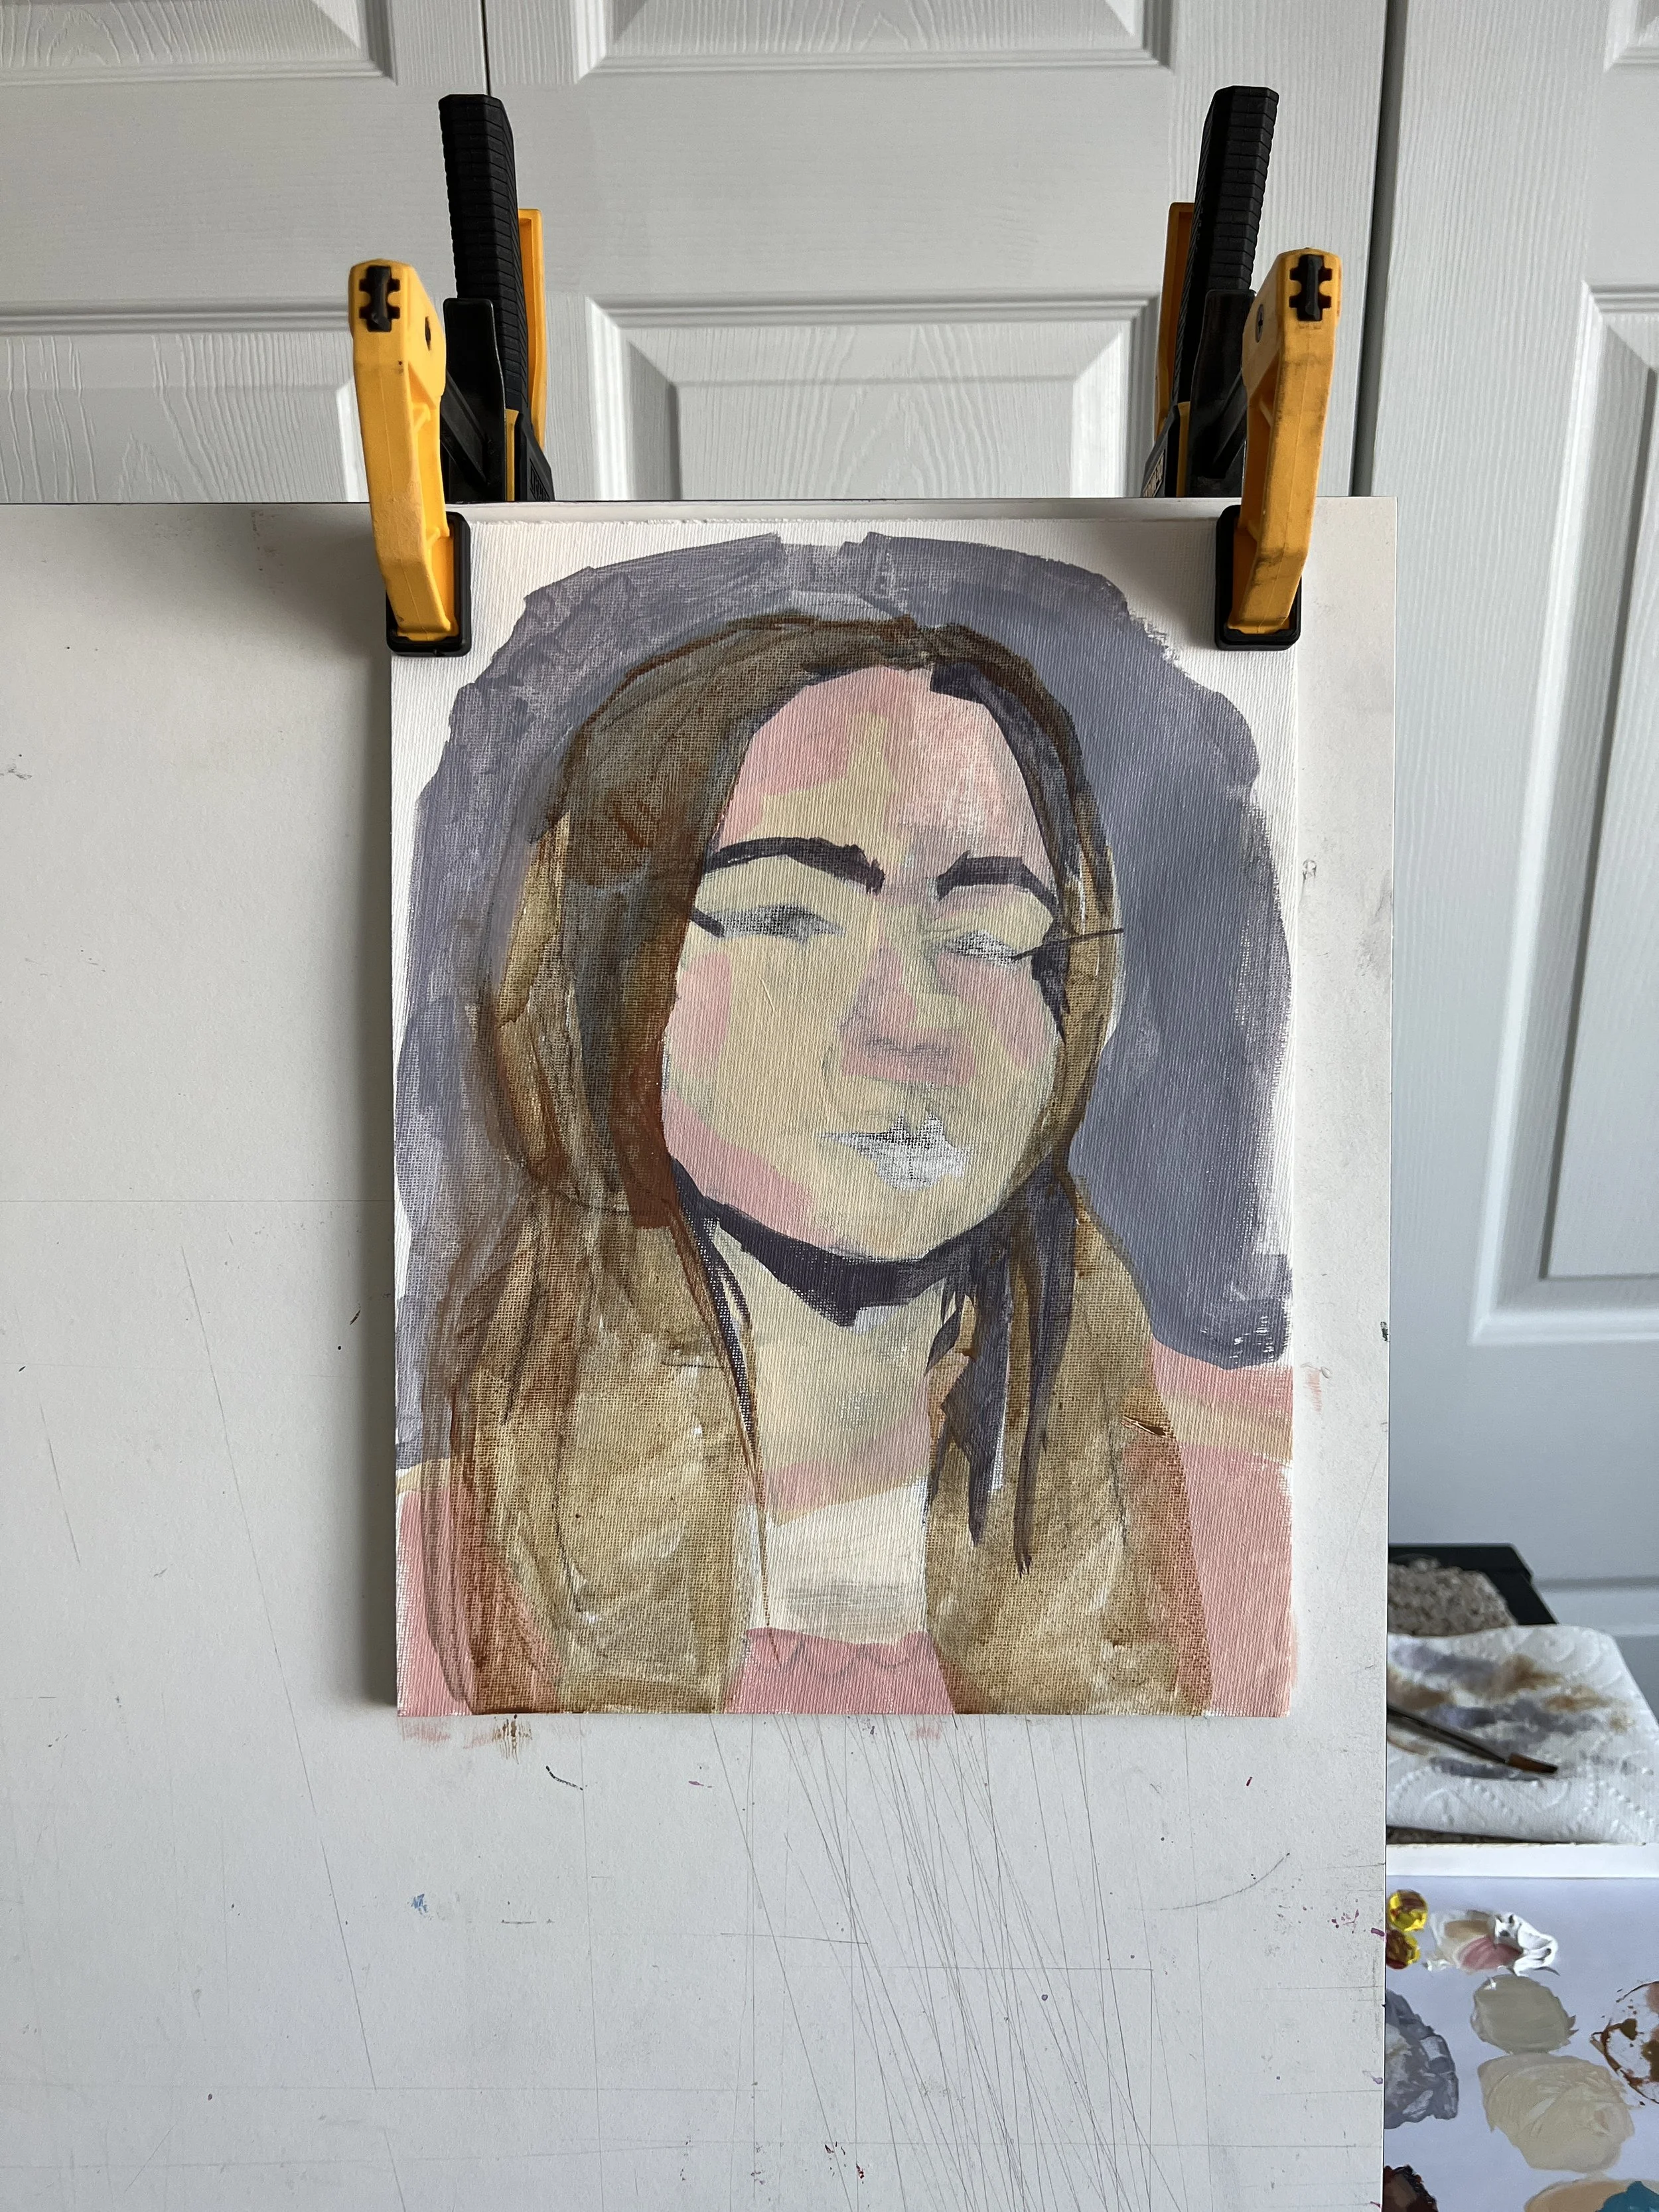
Defining the portrait with wide, loose brush strokes and color - paying attention to form more than detail.
The next day, I was still working with a fairly large brush, and I began to add swaths of definition using bright colors. Paying more attention to color, value, form, and shape, and less attention to detail, I found that the portrait started to emerge. I covered the lines of the old eyebrow on the left with new, flesh-colored paint. While the word “down” was now covered with fresh, blue background paint, along with many of the other lines that I used to map the new face, the word “up” still remained. I was rather pleased with the aesthetic of and didn’t mind. There was no need to cover the word “up” since I felt the flesh tone underneath was the right color, and therefore I did not paint over it.
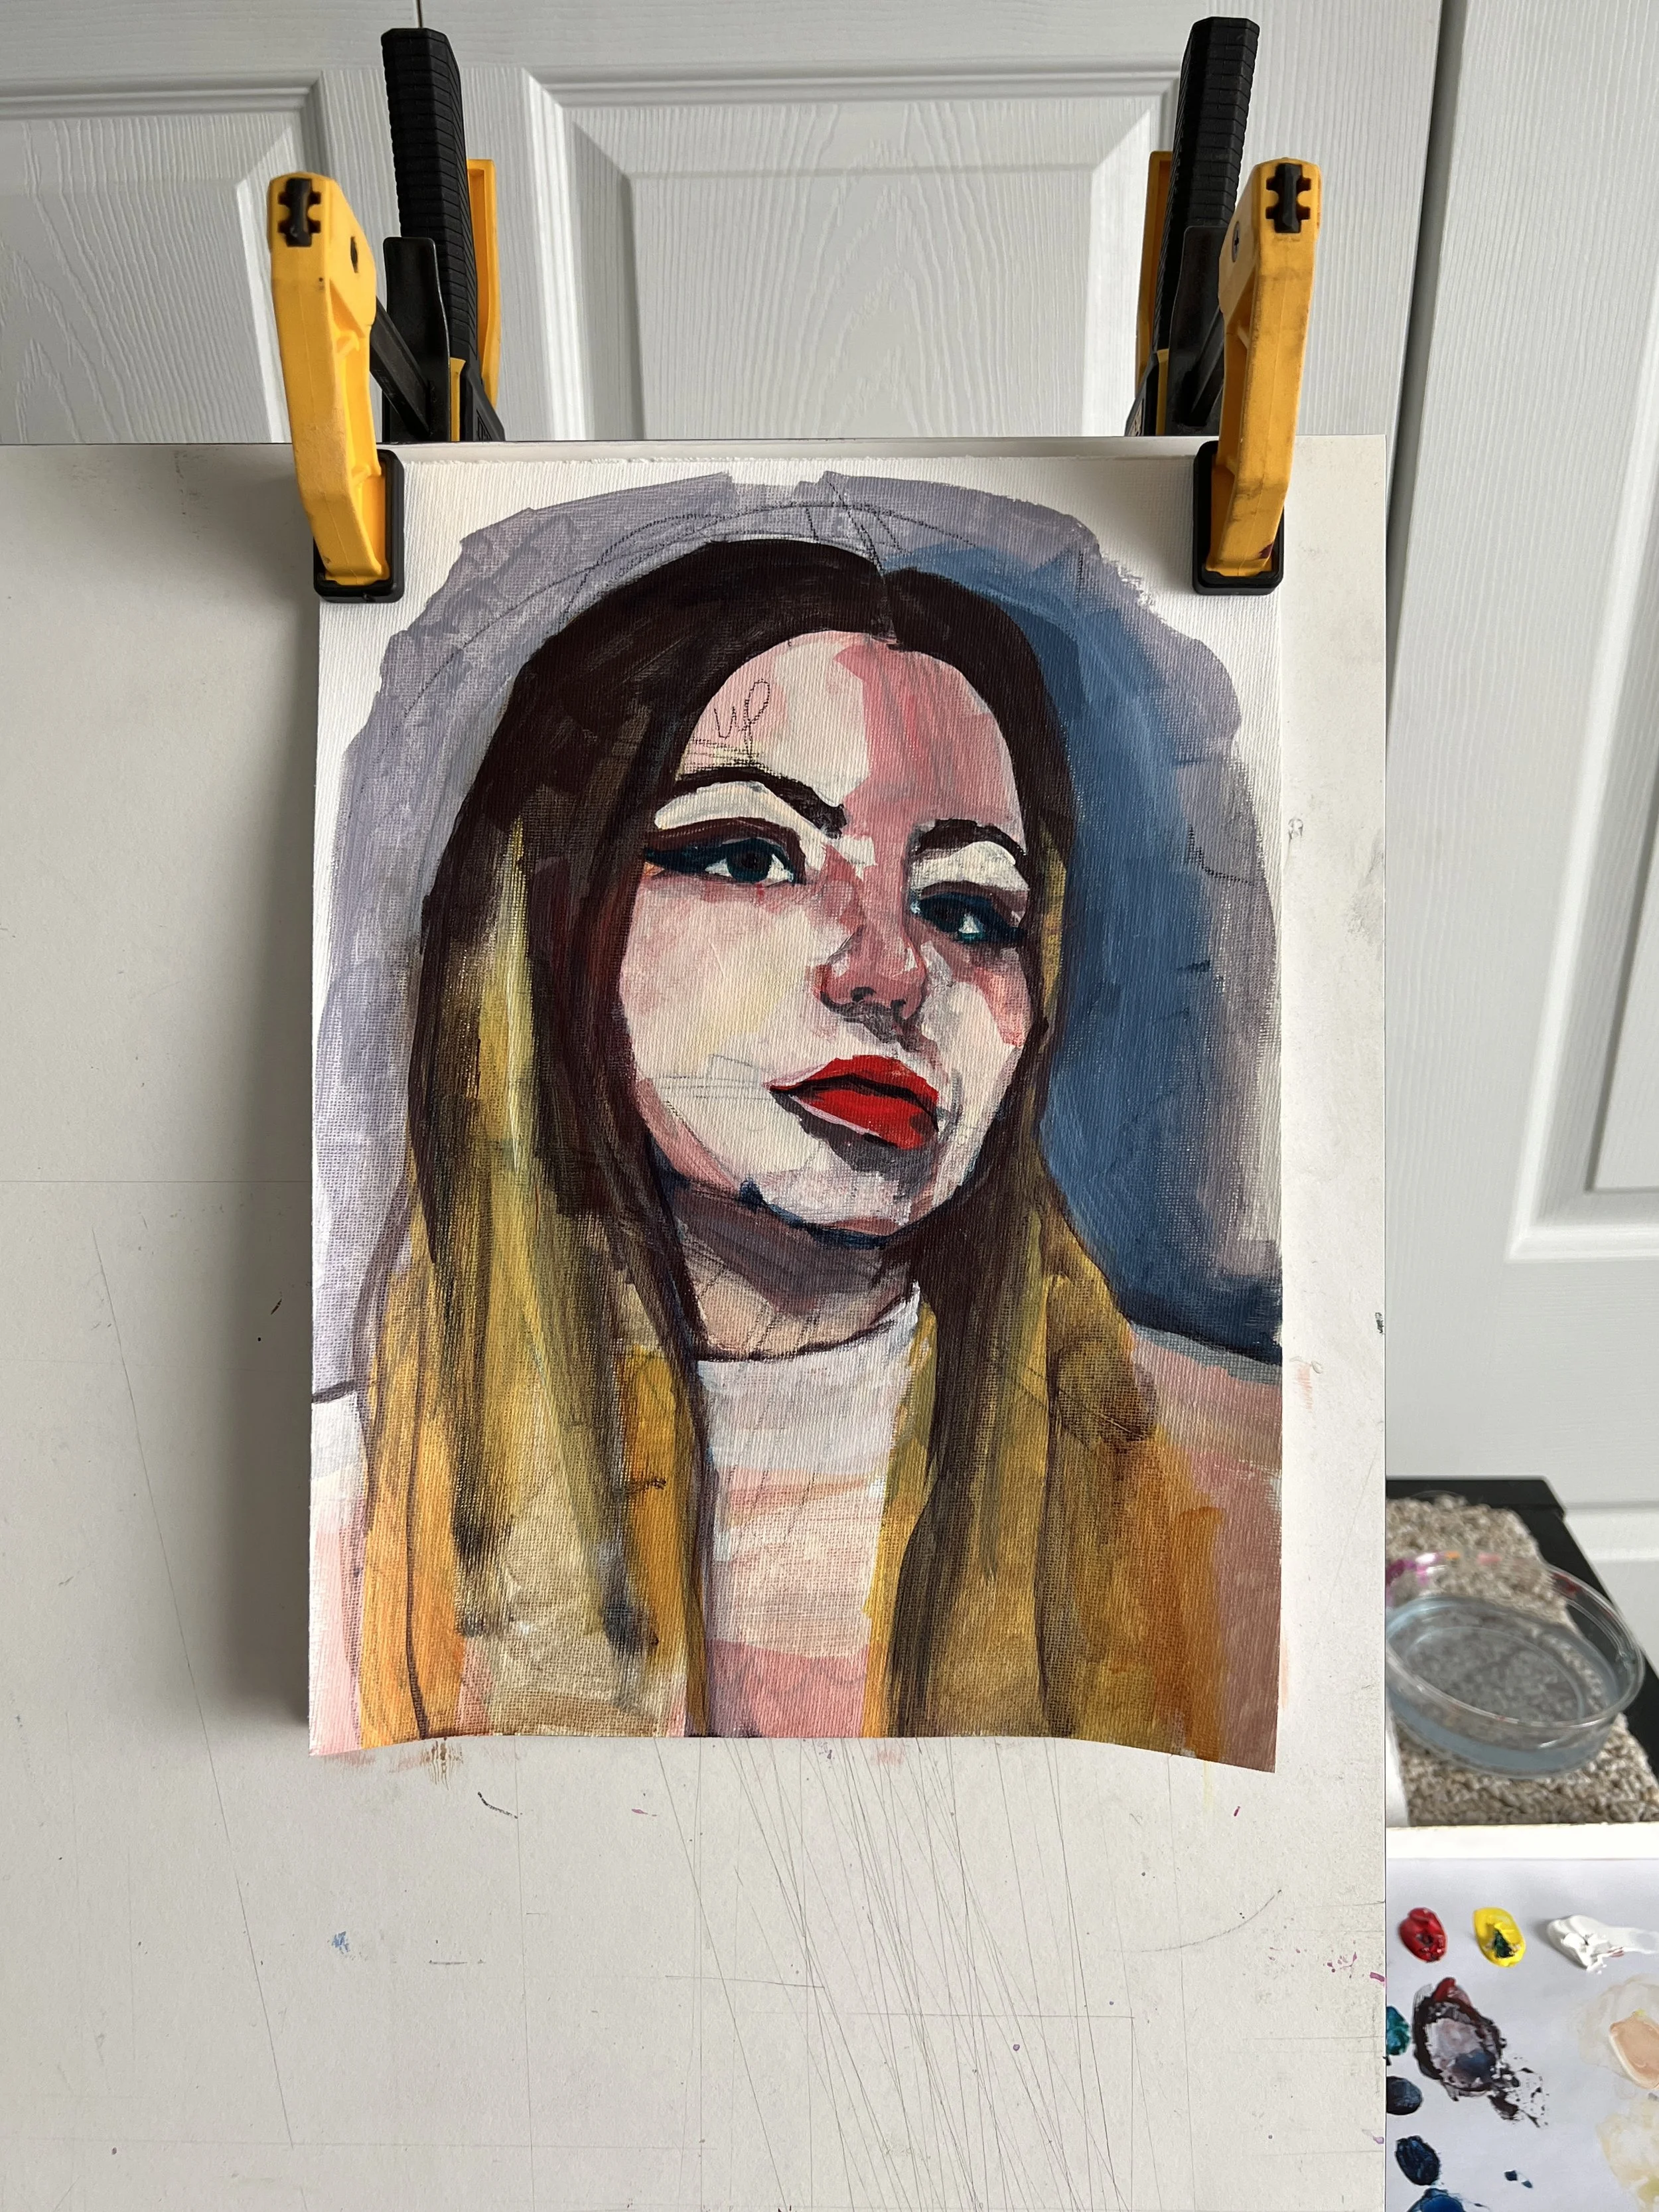
Adding smaller areas of color and refinement while using a medium brush.
Moving down to a medium brush size, I began to add in areas that required more detail and smaller amounts of color, such as the whites and the irises of the eyes. At this point, I also worked on refining the nose and lips. I continued to add definition, color, and detail.
“Cutting in” to the red of the nose and the lips with a medium brush and flesh tones in order to further define the features of the face.
Moving in with flesh tones, and still using my medium brush, I began to “cut in” on the red of the nose and lips to further define the features.
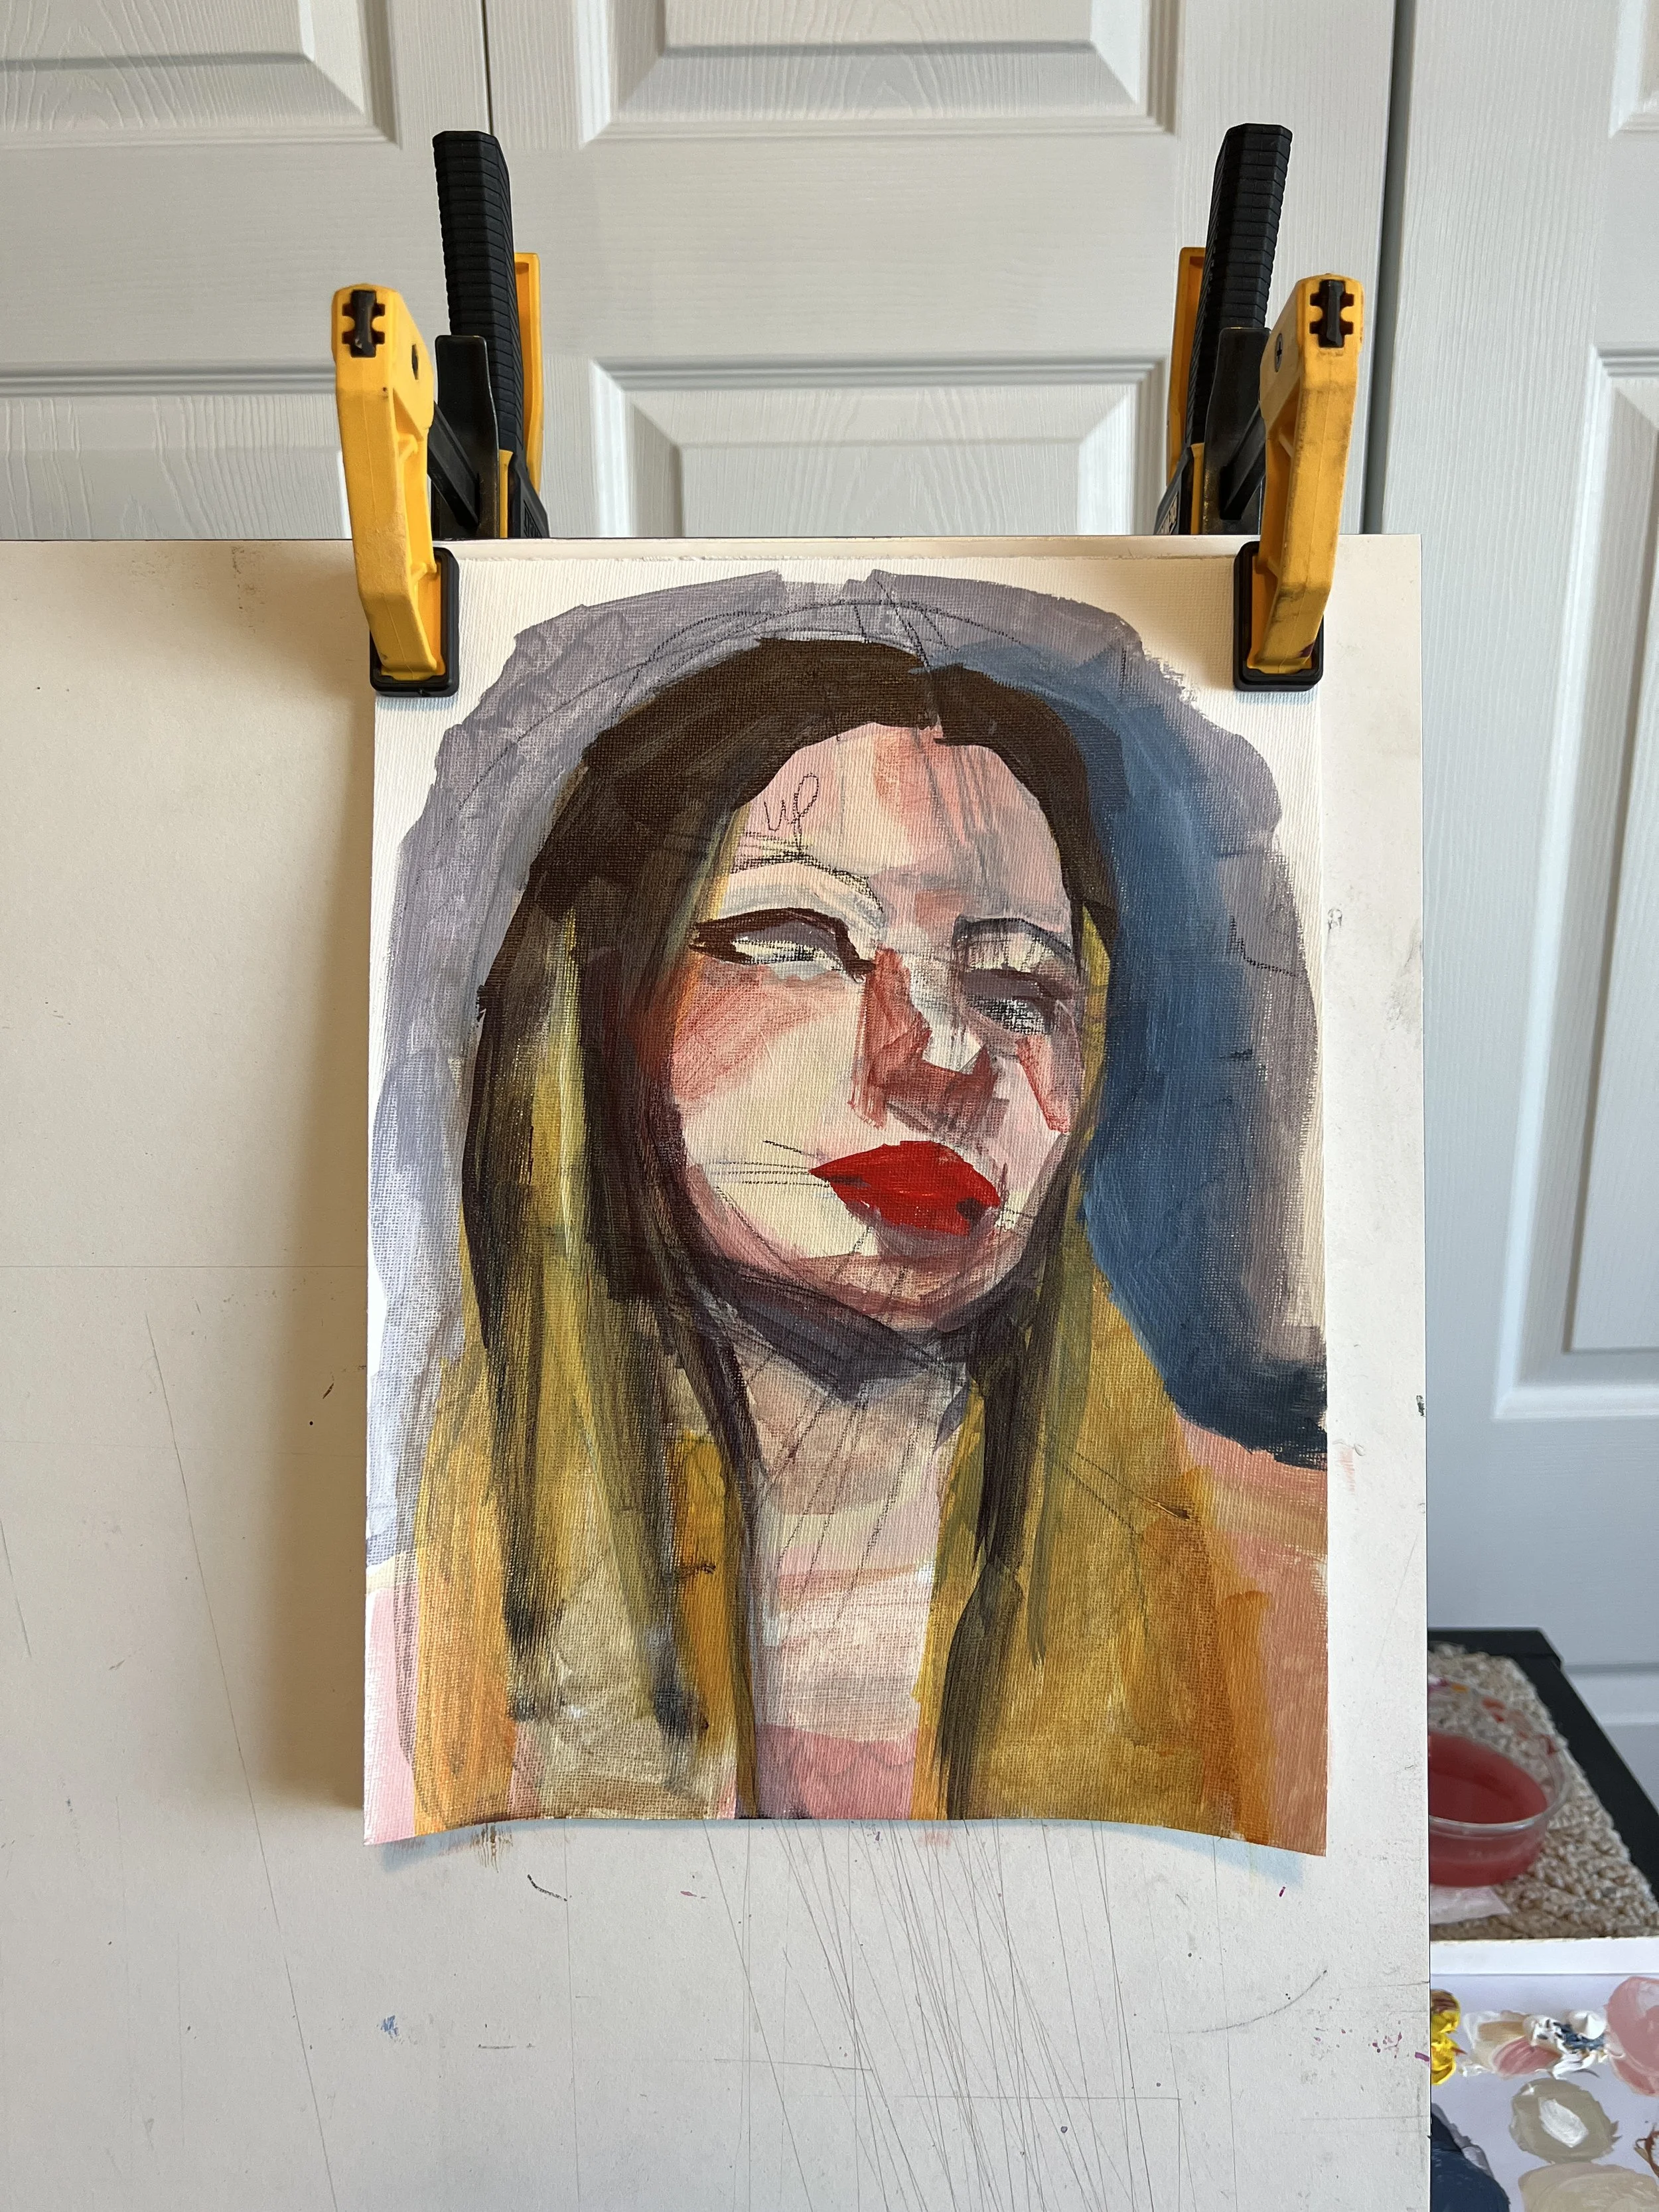
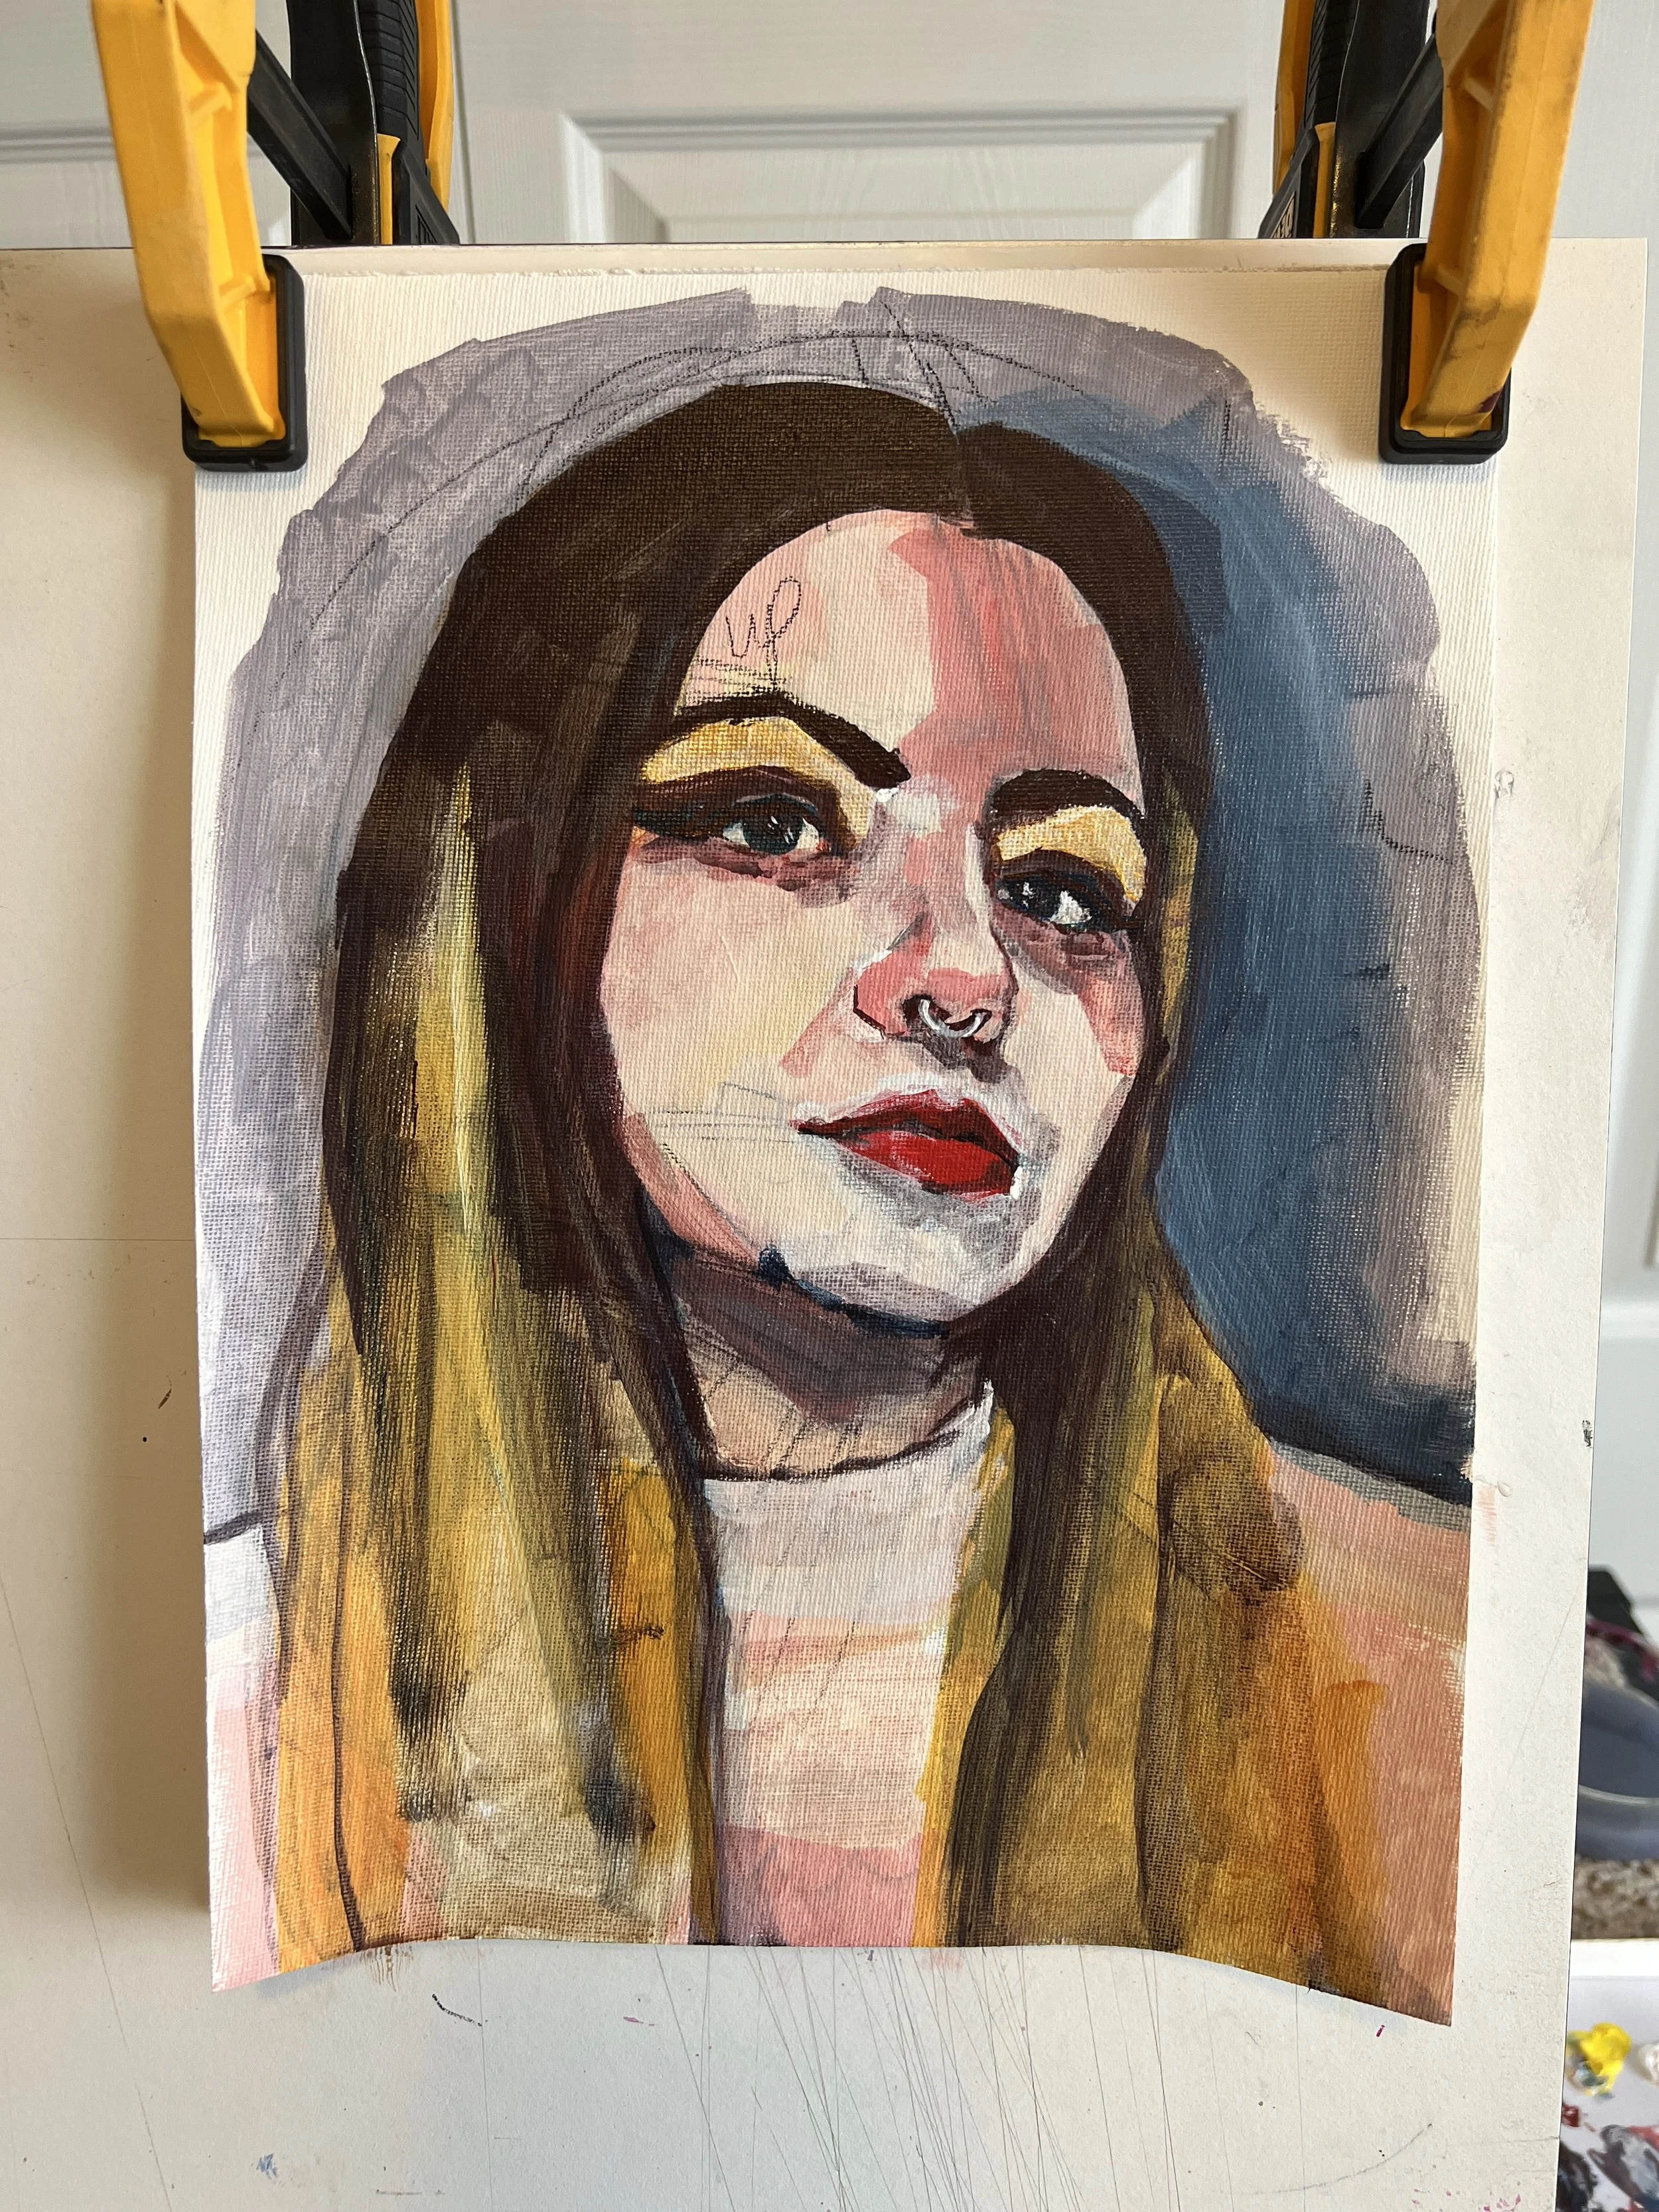
Adding blue/purple shadows underneath nose and lips and around nose to define shapes.
Next, I defined the nose area with blues and darker colors, as well as the nostrils. I mixed a blue/purple color and added it in underneath the nose and bottom lip to represent shadow on the face. I quickly found that I did not like this and felt it looked like a mustache and beard! What’s more, I felt that the nose was too small. I quickly erased the mustache, beard, and incorrect lines of the nose with some off-white paint.
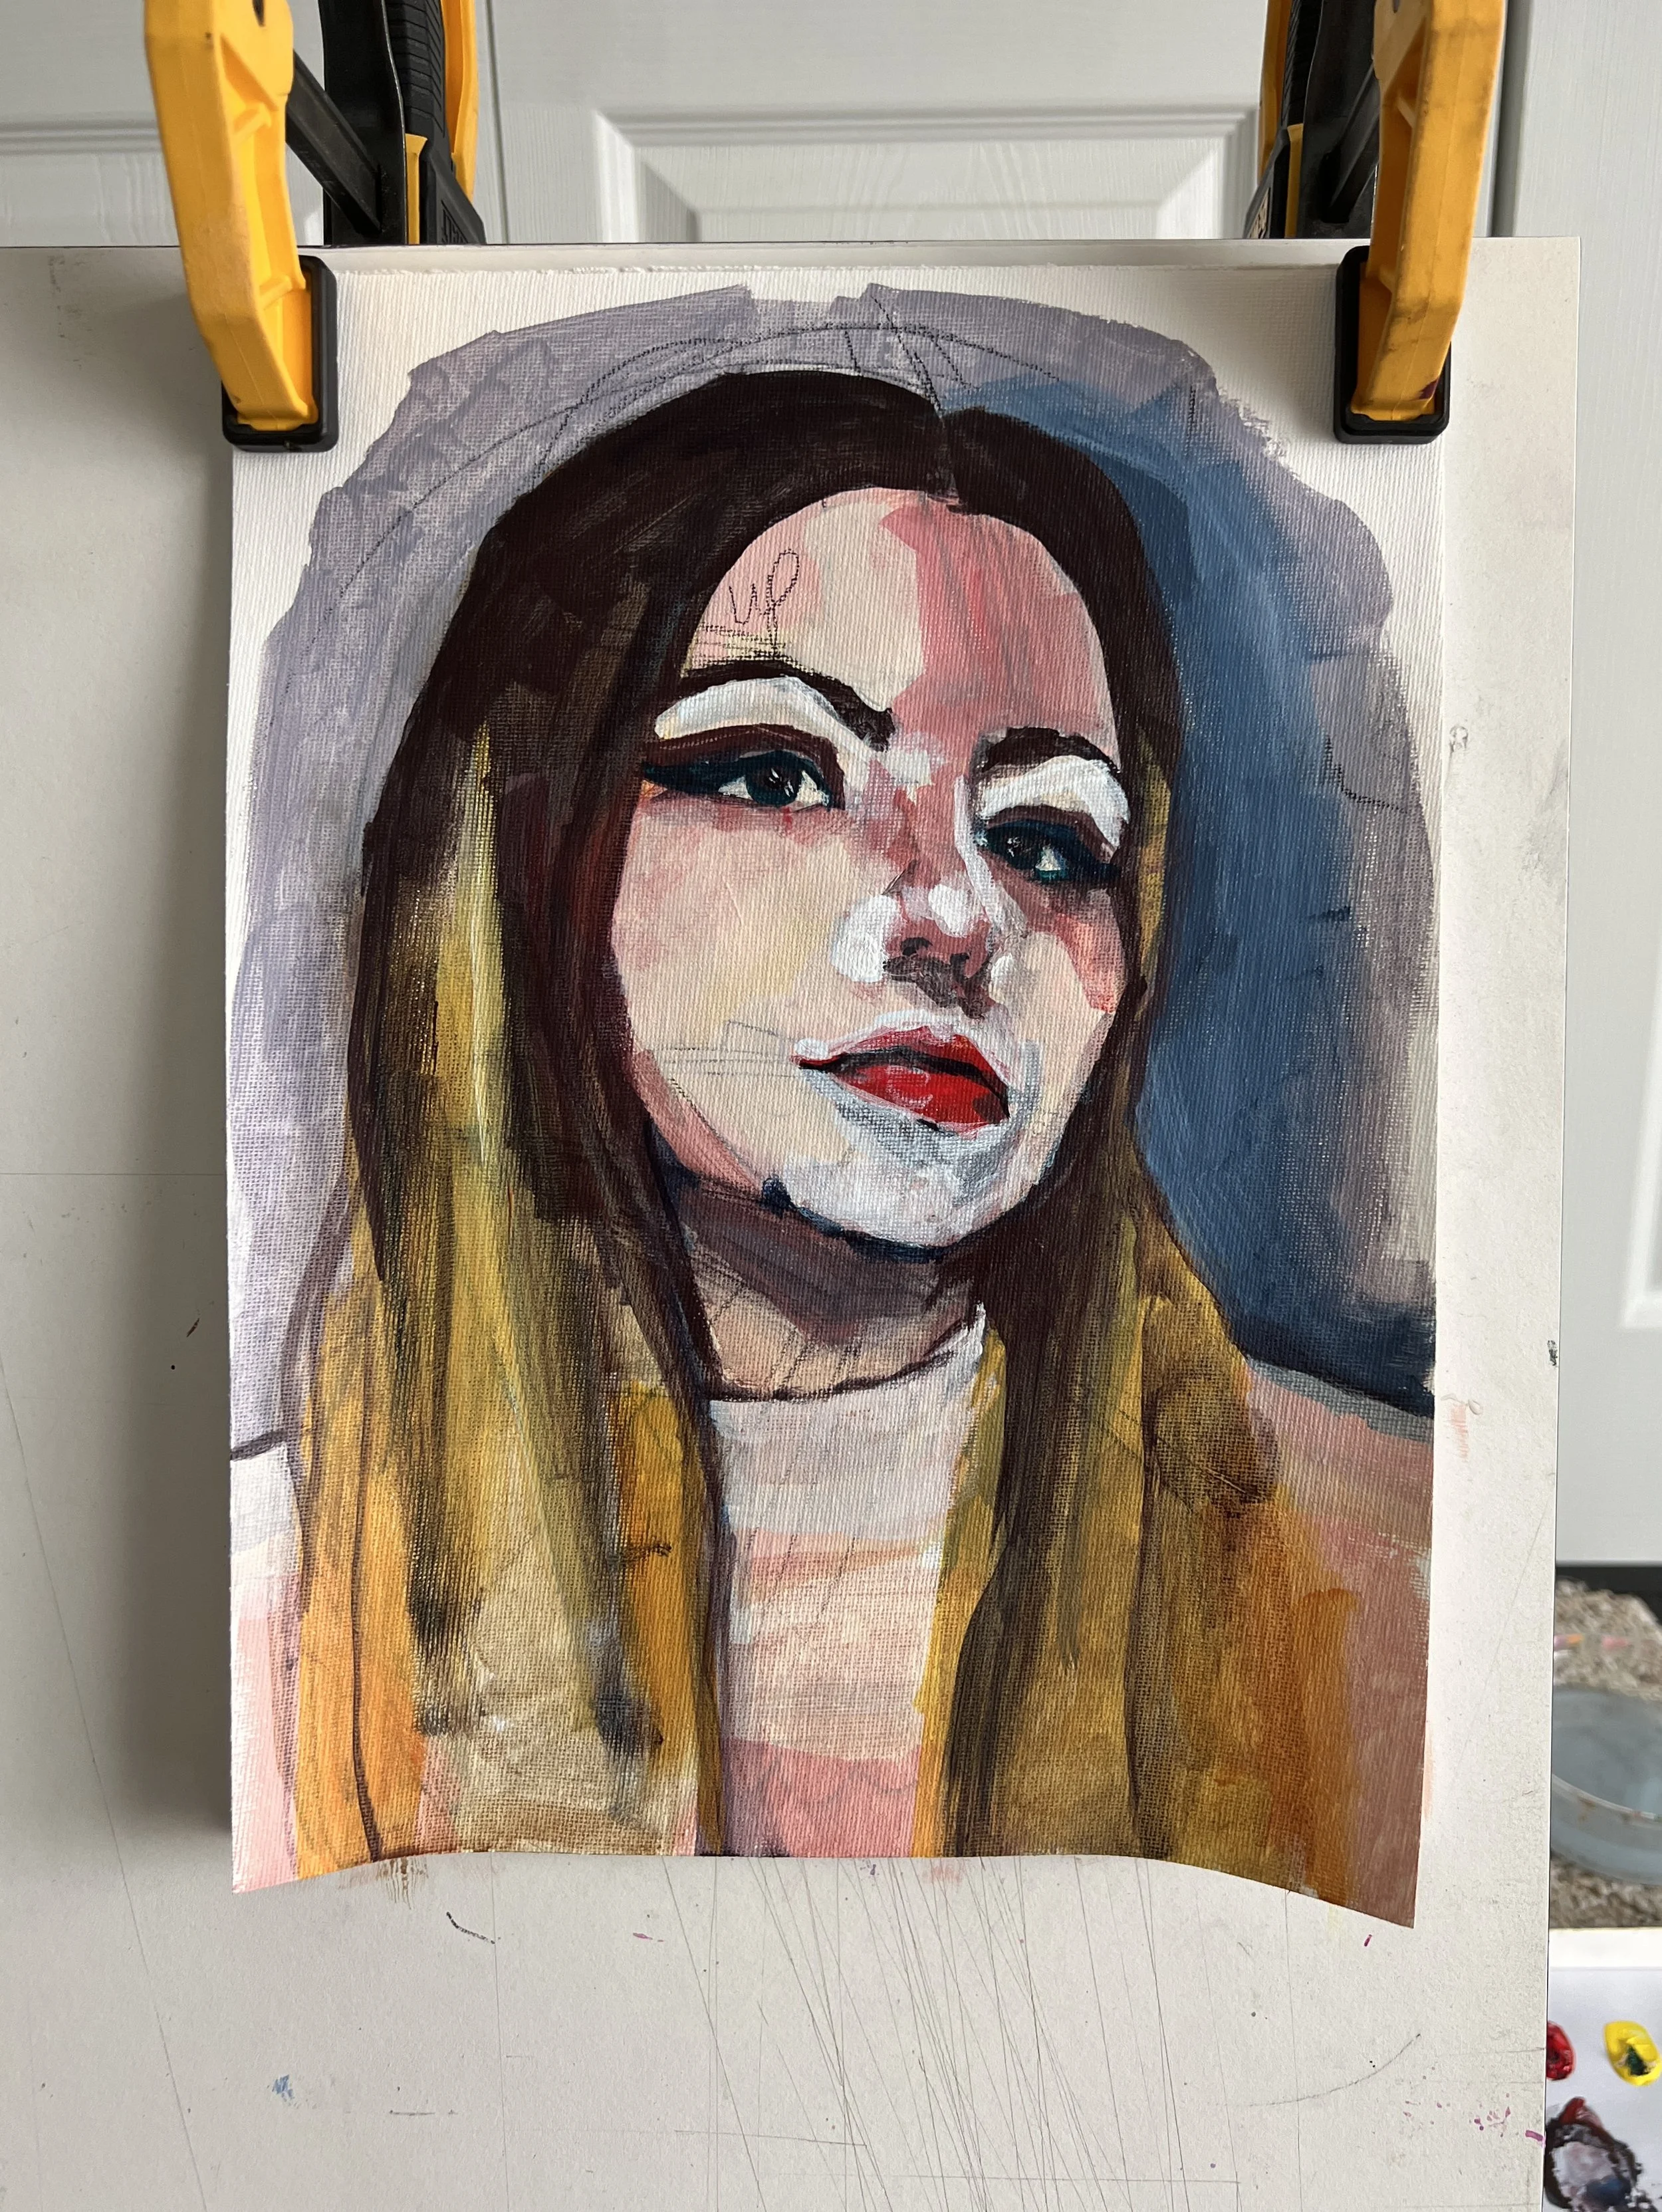
“Erasing” shadows and nose lines with off-white paint.
Once the white paint was added, I’ll admit, I felt that it took away some of the natural transition of the flesh tones in the face that I had worked so hard to obtain. At this point, admittedly, I really wanted to finish the painting in one sitting and I was pushing hard to do so. It took too much time to mix the true flesh tones, and so the white had to do. I painted an extra-heavy blob of white on the tip of nose where there is typically natural shine. I also added white on the bridge of the nose, as well as above the eyelids.
Widening the nose again, I added rosy pink paint over the white to define its new shape. At this point, I was working with my medium-small brush.
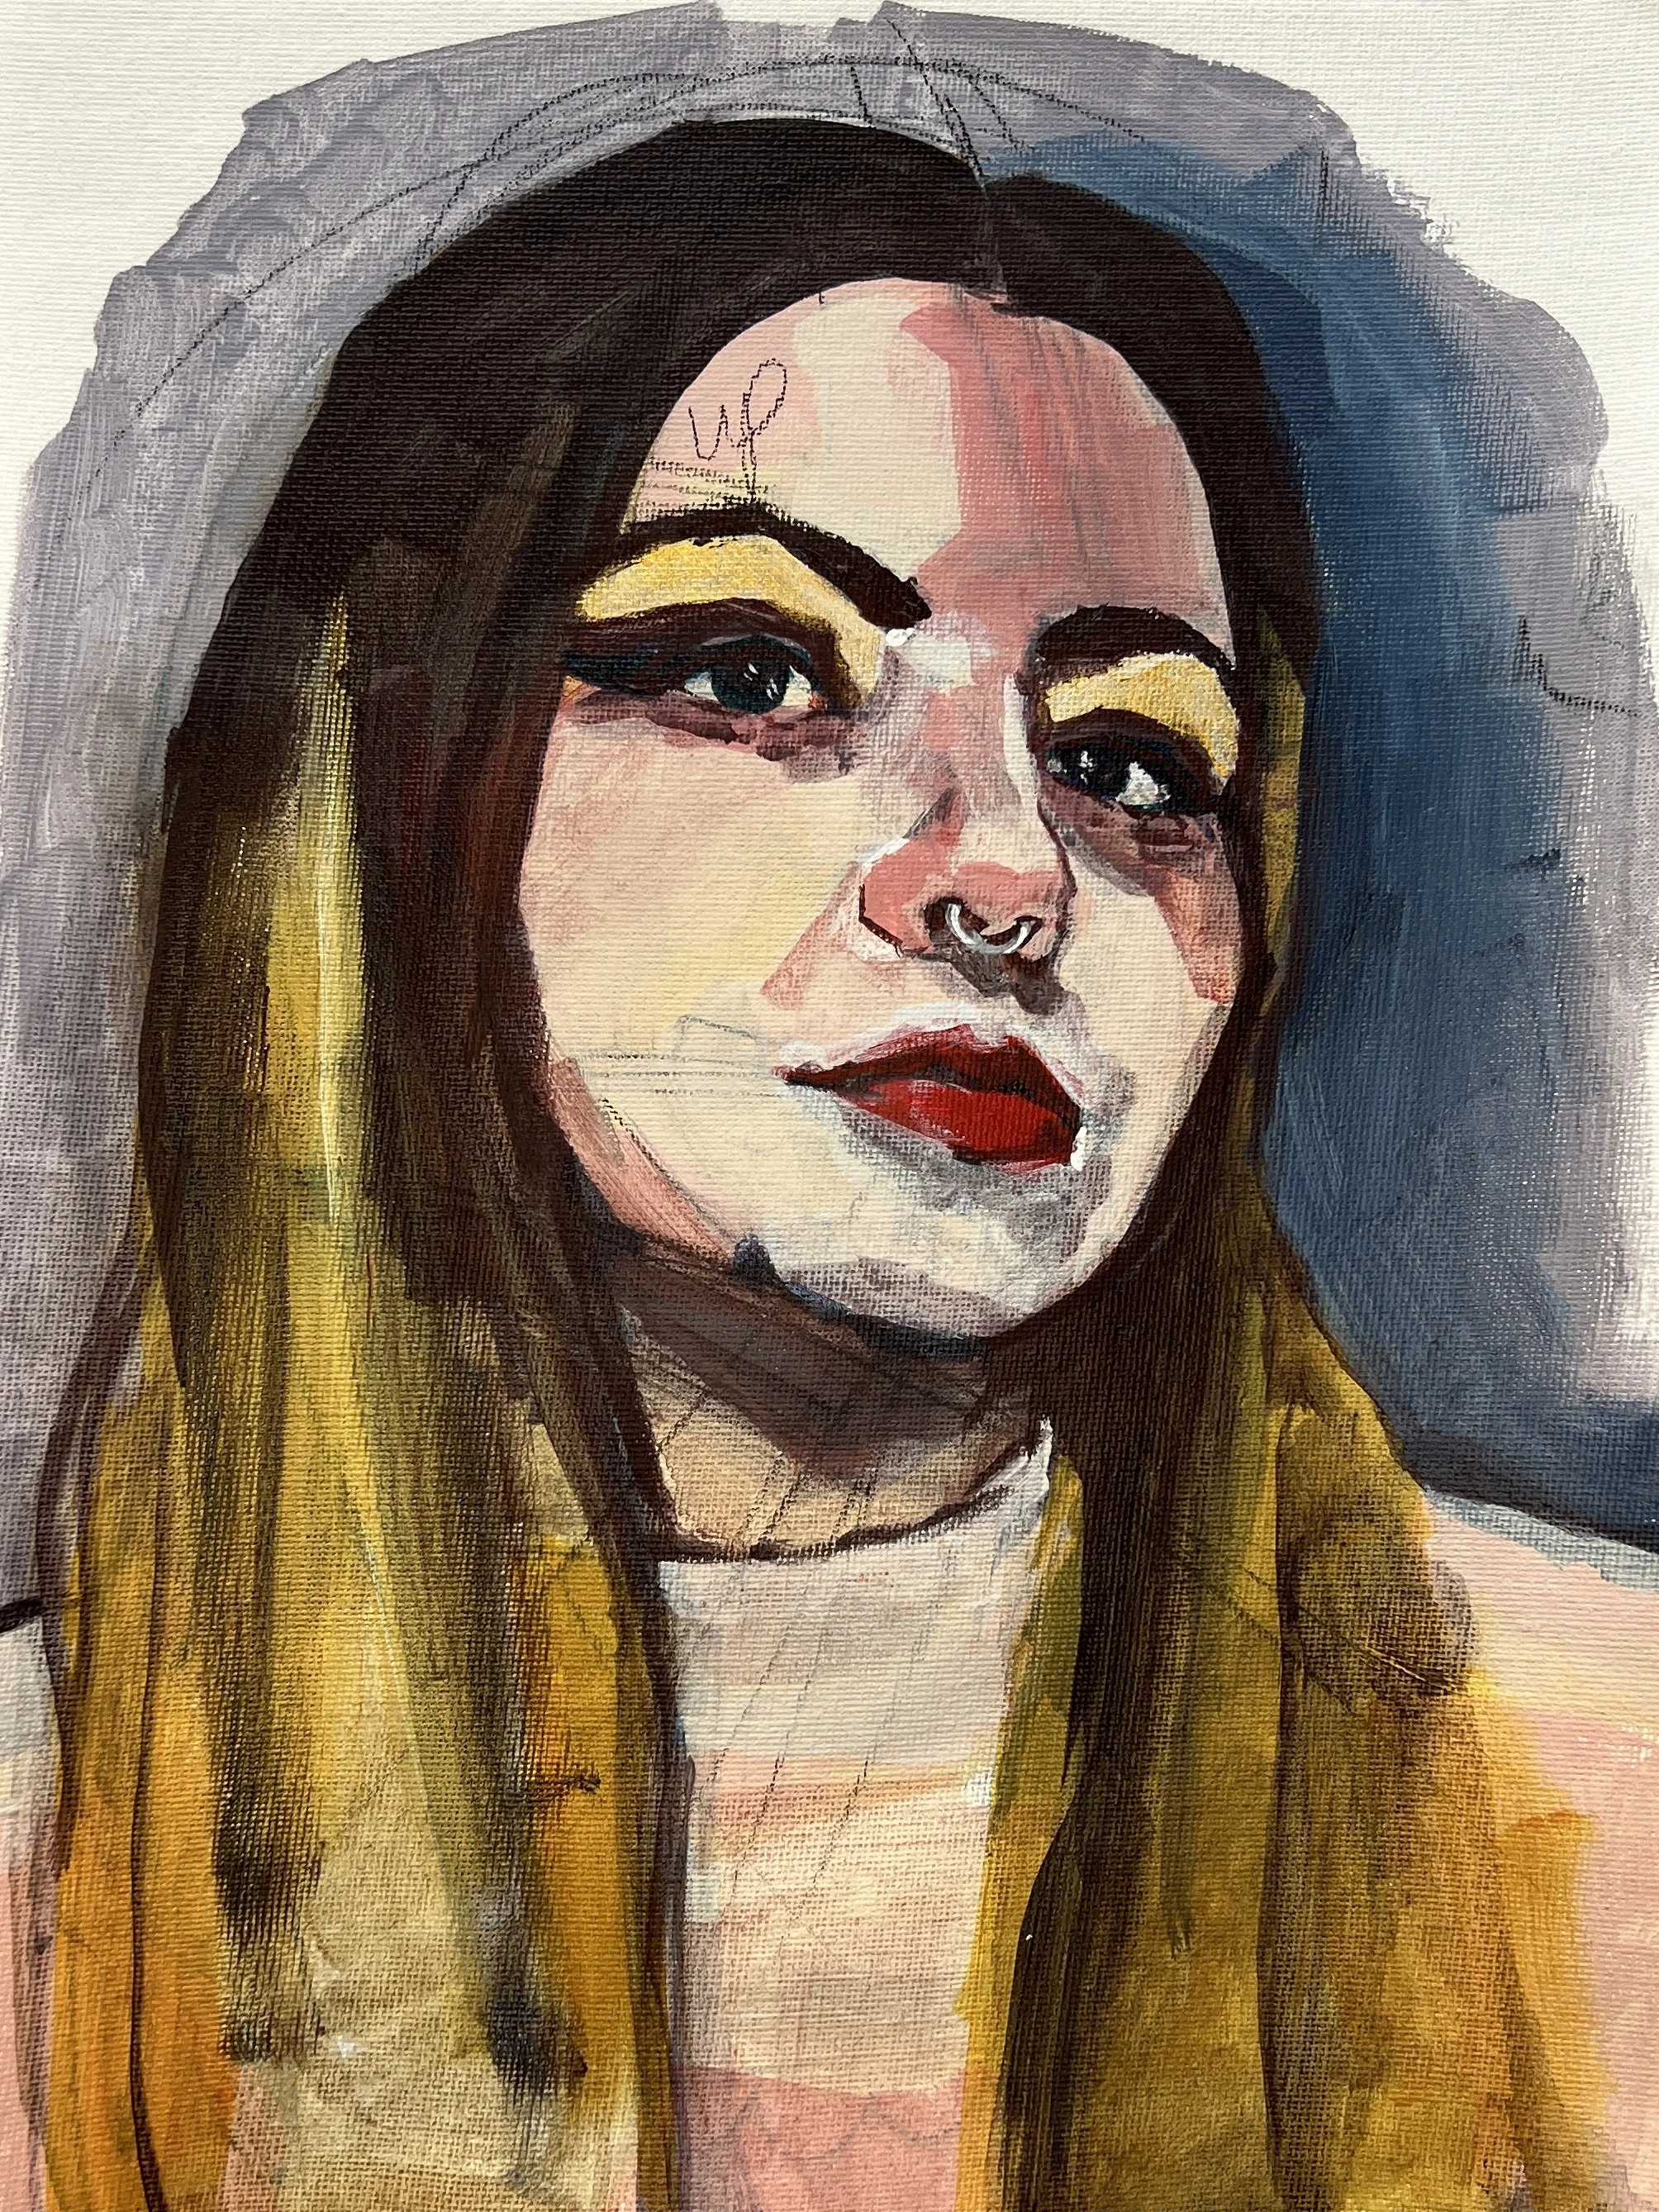
Adding rosy pink over the white to define the new shape of the nose.
The last step was to use my smallest detail brush to add defining lines around the eyes and small, detailed marks like eyelashes, eyeliner, and shading in the fold of the eyelids. I also outlined the nose with a deep red and defined the nostrils to add further definition. This is also the step where I added final adjustments to the lips, because the small detail brush is perfect for the nuanced line of the part between the lips. For many of these shadows and detailed areas, I used a red and blue mixture, which created varying ranges of color from red to deep red to purple to burnt umber brown, depending on the ratio used of each. The final detail was to draw in the nose ring. Et voila, she was finished!
Final painting on easel after finishing touches have been added with a detail brush.